
Introduction
Here is a deep dive into GPS, permissions, and manifests. Learn how to track your location in a Flutter app. Find out how to collect location data while your app is in the background. There are also tips included to prevent the OS from terminating your app after some time.
Working with location data in mobile-aware apps is a common use case in the current app ecosystem. In this deep dive I will show you everything you need to know about how to track your location in a Flutter app. No matter if you want a to put a pin on a map with the current location or track a device continuously for hours, everything is possible.
Set up and preparations
There are different Flutter packages available that do the heavy lifting for us. The two most advanced ones are location and geolocator. They have a similar feature set and if you know how to handle one, you also will have no problem with the other. However, this article will rely on the package geolocator.
To install the package, add it to your pubspec.yaml manually or with the command flutter pub add geolocator. For more information about how to add packages in Flutter apps, read this article.
Android
Your Android app needs to declare certain capabilities to access location data. Those are defined in the AndroidManifest.xml. Navigate to the android\app\src\main\ folder, open the file, and add the following permissions inside the manifest tag:
<manifest xmlns:android="<http://schemas.android.com/apk/res/android>">

  <uses-permission android:name="android.permission.ACCESS_COARSE_LOCATION" />
  <uses-permission android:name="android.permission.ACCESS_FINE_LOCATION" />

  <application
    android:label="your awesome app"
    android:name="${applicationName}">
    <!-- ... -->
  </application>
</manifest>
ACCESS_COARSE_LOCATION is the minimal requirement and returns a rough location estimation that can be up to 100m off your actual position. ACCESS_FINE_LOCATION is more detailed and can be used for routing and navigation. You need to define COARSE as well if you want to use FINE.
If both permissions are declared, Android will ask the user to select a permission (see image).
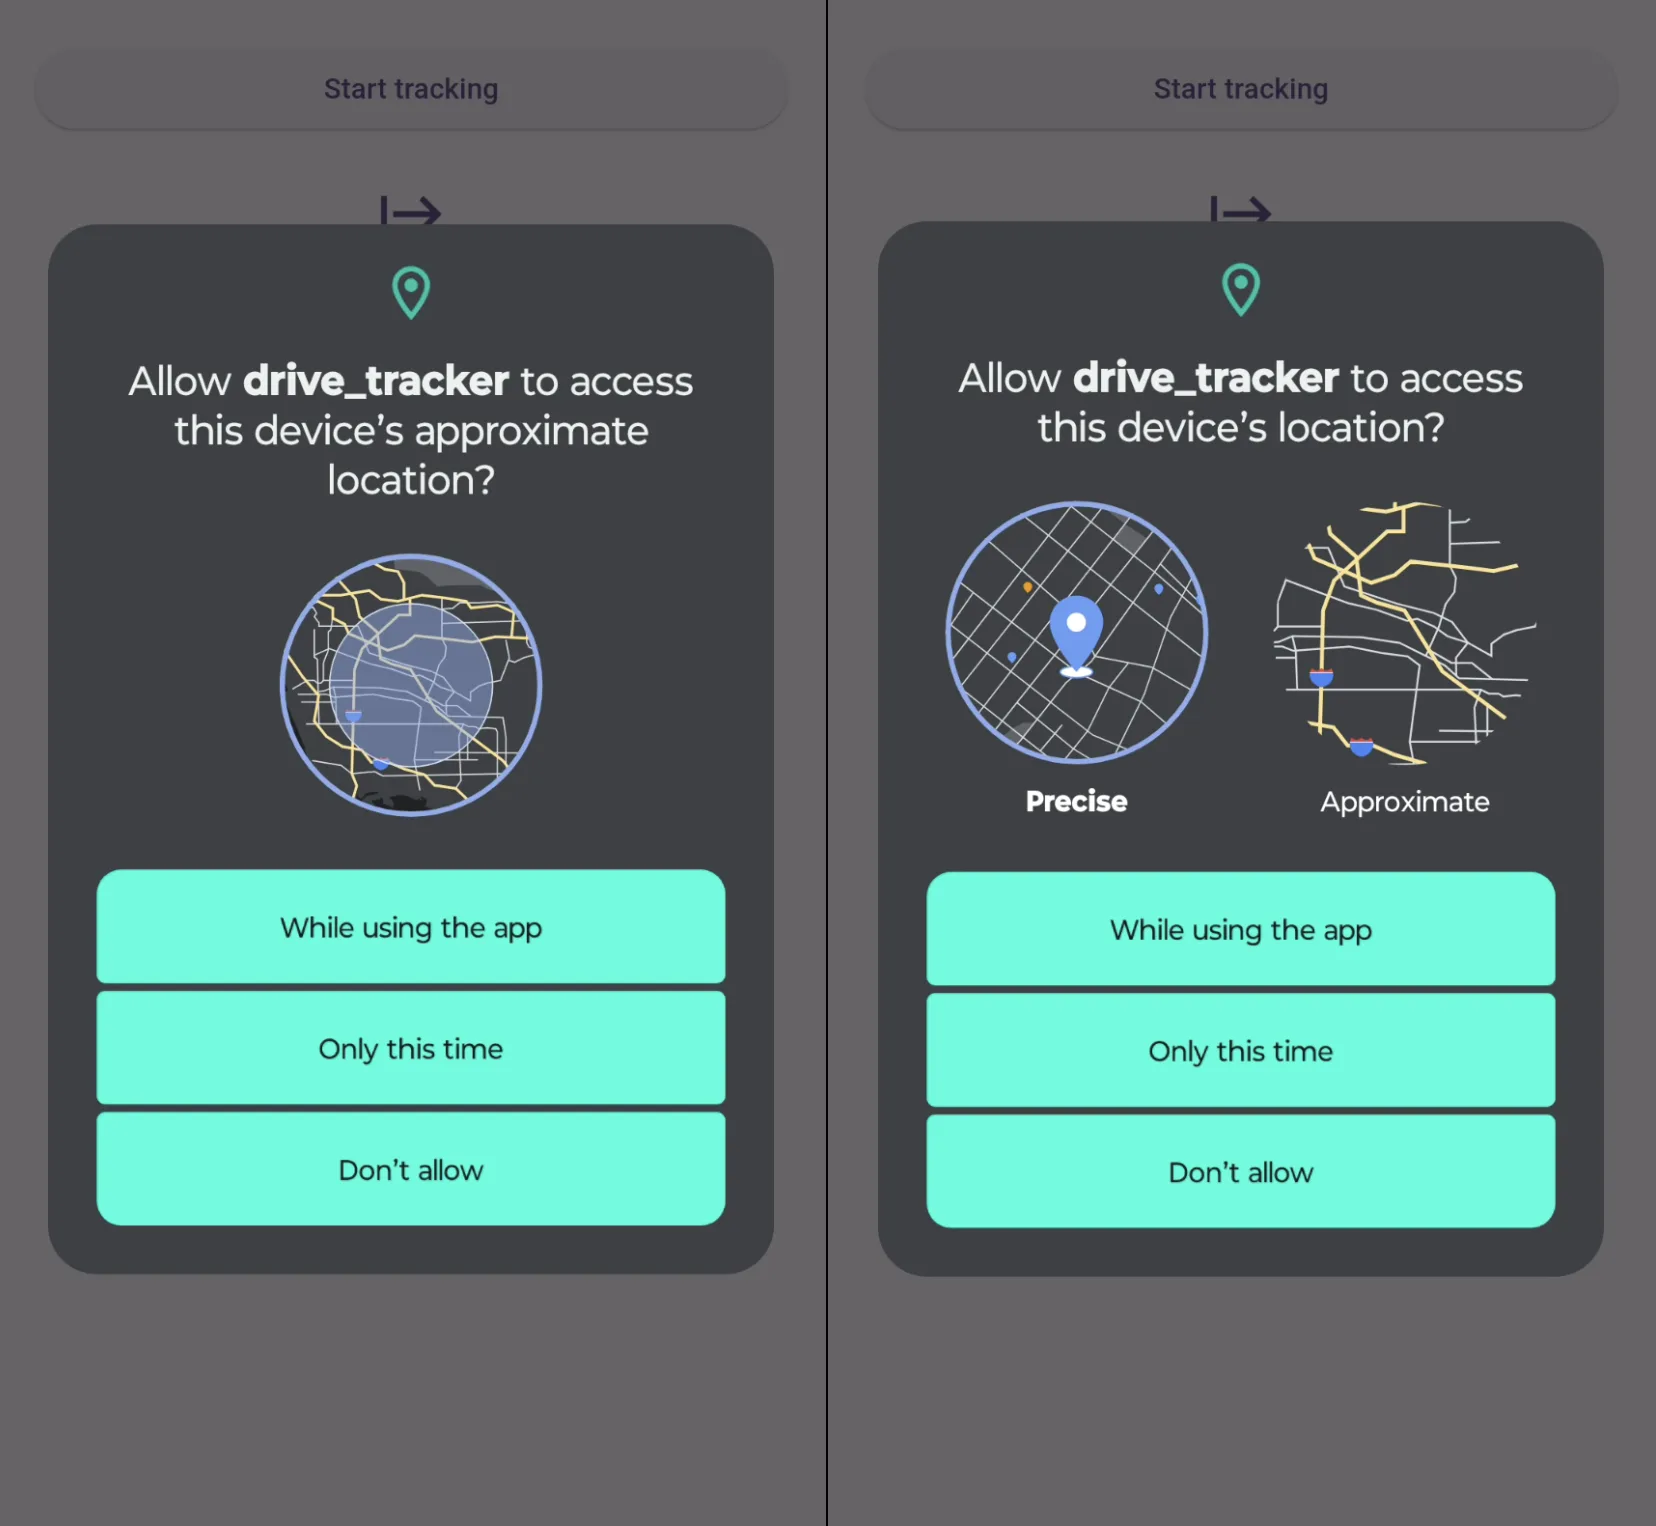
Screenshot of an Android app requesting the device’s approximate location with the ACCESS_COARSE_LOCATION permission defined in the AndroidManifest.xml (left) and screenshot of an Android app requesting the device’s exact location with the ACCESS_FINE_LOCATION permission defined in the AndroidManifest.xml. The user can select which permission should be granted.
iOS
For iOS, add the following keys to your ios/Runner/Info.plist to access GPS data:
<key>NSLocationWhenInUseUsageDescription</key>
<string>This app needs access to location.</string>
Make sure to add a valid reason or your app will be rejected by Apple in their App Store.
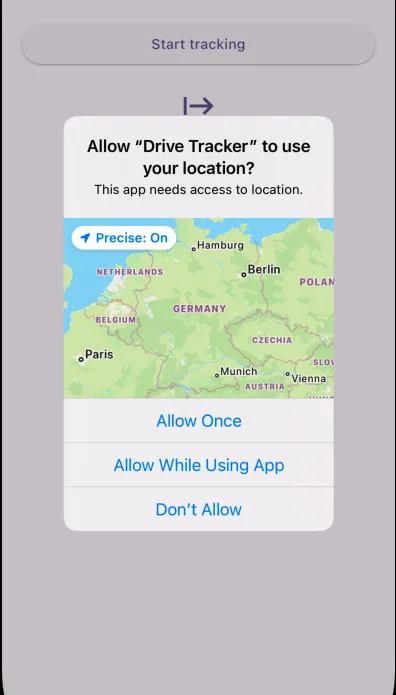
Screenshot of a mobile iOS app requesting access to location services. The reason phrase from the configuration file is displayed in the request.
With that, your Flutter app is ready to work with the position information provided by the mobile devices.
Request permissions
The package contains useful helper methods to check if the location services are enabled and to request permission to use them.
With checkPermission() you can verify that the app has all needed permissions to access the location data of the device. The result is an self-descriptive enumeration.
To request permission, use the method requestPermission(). This triggers a selection dialog for the user or returns the previous selection.
The last useful helper method is the isLocationServiceEnabled() method which should be self-explaining.
Subscribe to location updates
Here is a full code example to subscribe to location updates:
import 'package:geolocator/geolocator.dart';

final hasPermission = await Geolocator.checkPermission();

if (hasPermission == LocationPermission.deniedForever) {
  print("The permission to access the device location was denied forever!");
  return;
}

if (hasPermission == LocationPermission.denied){
	final hasFinalPermission = await Geolocator.requestPermission();
	if (hasFinalPermission == LocationPermission.denied ||
	    hasFinalPermission == LocationPermission.deniedForever) {
	  print("The permission to access the device location was denied!");
	  return false;
	}
}

if (!await Geolocator.isLocationServiceEnabled()) {
  print("The location services of the device are not enabled!");
  return;
}

final subscription = Geolocator.getPositionStream().listen((pos) {
	print("${pos.latitude}, ${pos.longitude}");
});
The first step is to verify the permission. If it was denied, we ask again. This opens a dialog for the user to select the permission for our app.
In addition, we check if location services are enabled. If everything is fine, we subscribe to the position stream to get location updates.
Configure location settings
You can configure the location settings of the location stream. Therefor, you can either use the base class LocationSettings or specialized classes for the mobile platforms, AndroidSettings and AppleSettings.
The most basic configuration values are a distance filter and an accuracy setting. The distance filter filters location updates that are too close to the last position. It is specified in meters. The accuracy setting describes how precise the location should be retrieved. This can range from a few 100 meters to as close as 1 or 2 meters.
The classes AndroidSettings and AppleSettings contain platform-specific settings.
final settings = LocationSettings(...);

final subscription = Geolocator
		.getPositionStream(locationSettings: settings)
		.listen((pos) {
	print("${pos.latitude}, ${pos.longitude}");
});
Background updates
Sometimes, you might want to get location updates even if your app is not running in the foreground. Geolocator can be configured to also work under these circumstances.
🔔 Terminology
We assume an app has three states: Foreground, background, and terminated.
Foreground means that the app is open and visible on the device screen. Background means the app was started previously but is not visible. A terminated is not running anymore because it was terminated by the user or by the operating system.
To support background updates, we need to add more permissions in the AndroidManifest.xml and the Info.plist.
Here is the updated AndroidManifest.xml:
<manifest xmlns:android="<http://schemas.android.com/apk/res/android>">

  <uses-permission android:name="android.permission.ACCESS_COARSE_LOCATION" />
  <uses-permission android:name="android.permission.ACCESS_FINE_LOCATION" />
  <uses-permission android:name="android.permission.ACCESS_BACKGROUND_LOCATION" />
  <uses-permission android:name="android.permission.FOREGROUND_SERVICE" />
  <uses-permission android:name="android.permission.FOREGROUND_SERVICE_LOCATION" />

  <application
    android:label="your awesome app"
    android:name="${applicationName}">
    <!-- ... -->
  </application>
</manifest>
And this is what your Info.plist should contain:
<key>NSLocationWhenInUseUsageDescription</key>
<string>This app needs access to location.</string>
<key>UIBackgroundModes</key>
<array>
		<string>location</string>
</array>
Have a look at the geolocator documentation for more details!
And here is how you activate background location updates in the code. This is only needed for iOS, Android works without any code changes!
final settings = AppleSettings(
		showBackgroundLocationIndicator: true,
    allowBackgroundLocationUpdates: true);

final subscription = Geolocator
		.getPositionStream(locationSettings: settings)
		.listen(...);
Now, you can use another app while your location tracker runs in the background. It still receives location updates and can handle them.
The operating systems notify the user in different ways that there is an app running in the background, accessing location data, and probably causing increased battery drain.
On Android, the location services icon is permanently shown in the notification bar. In addition, the notification center shows a list of background apps at the bottom.
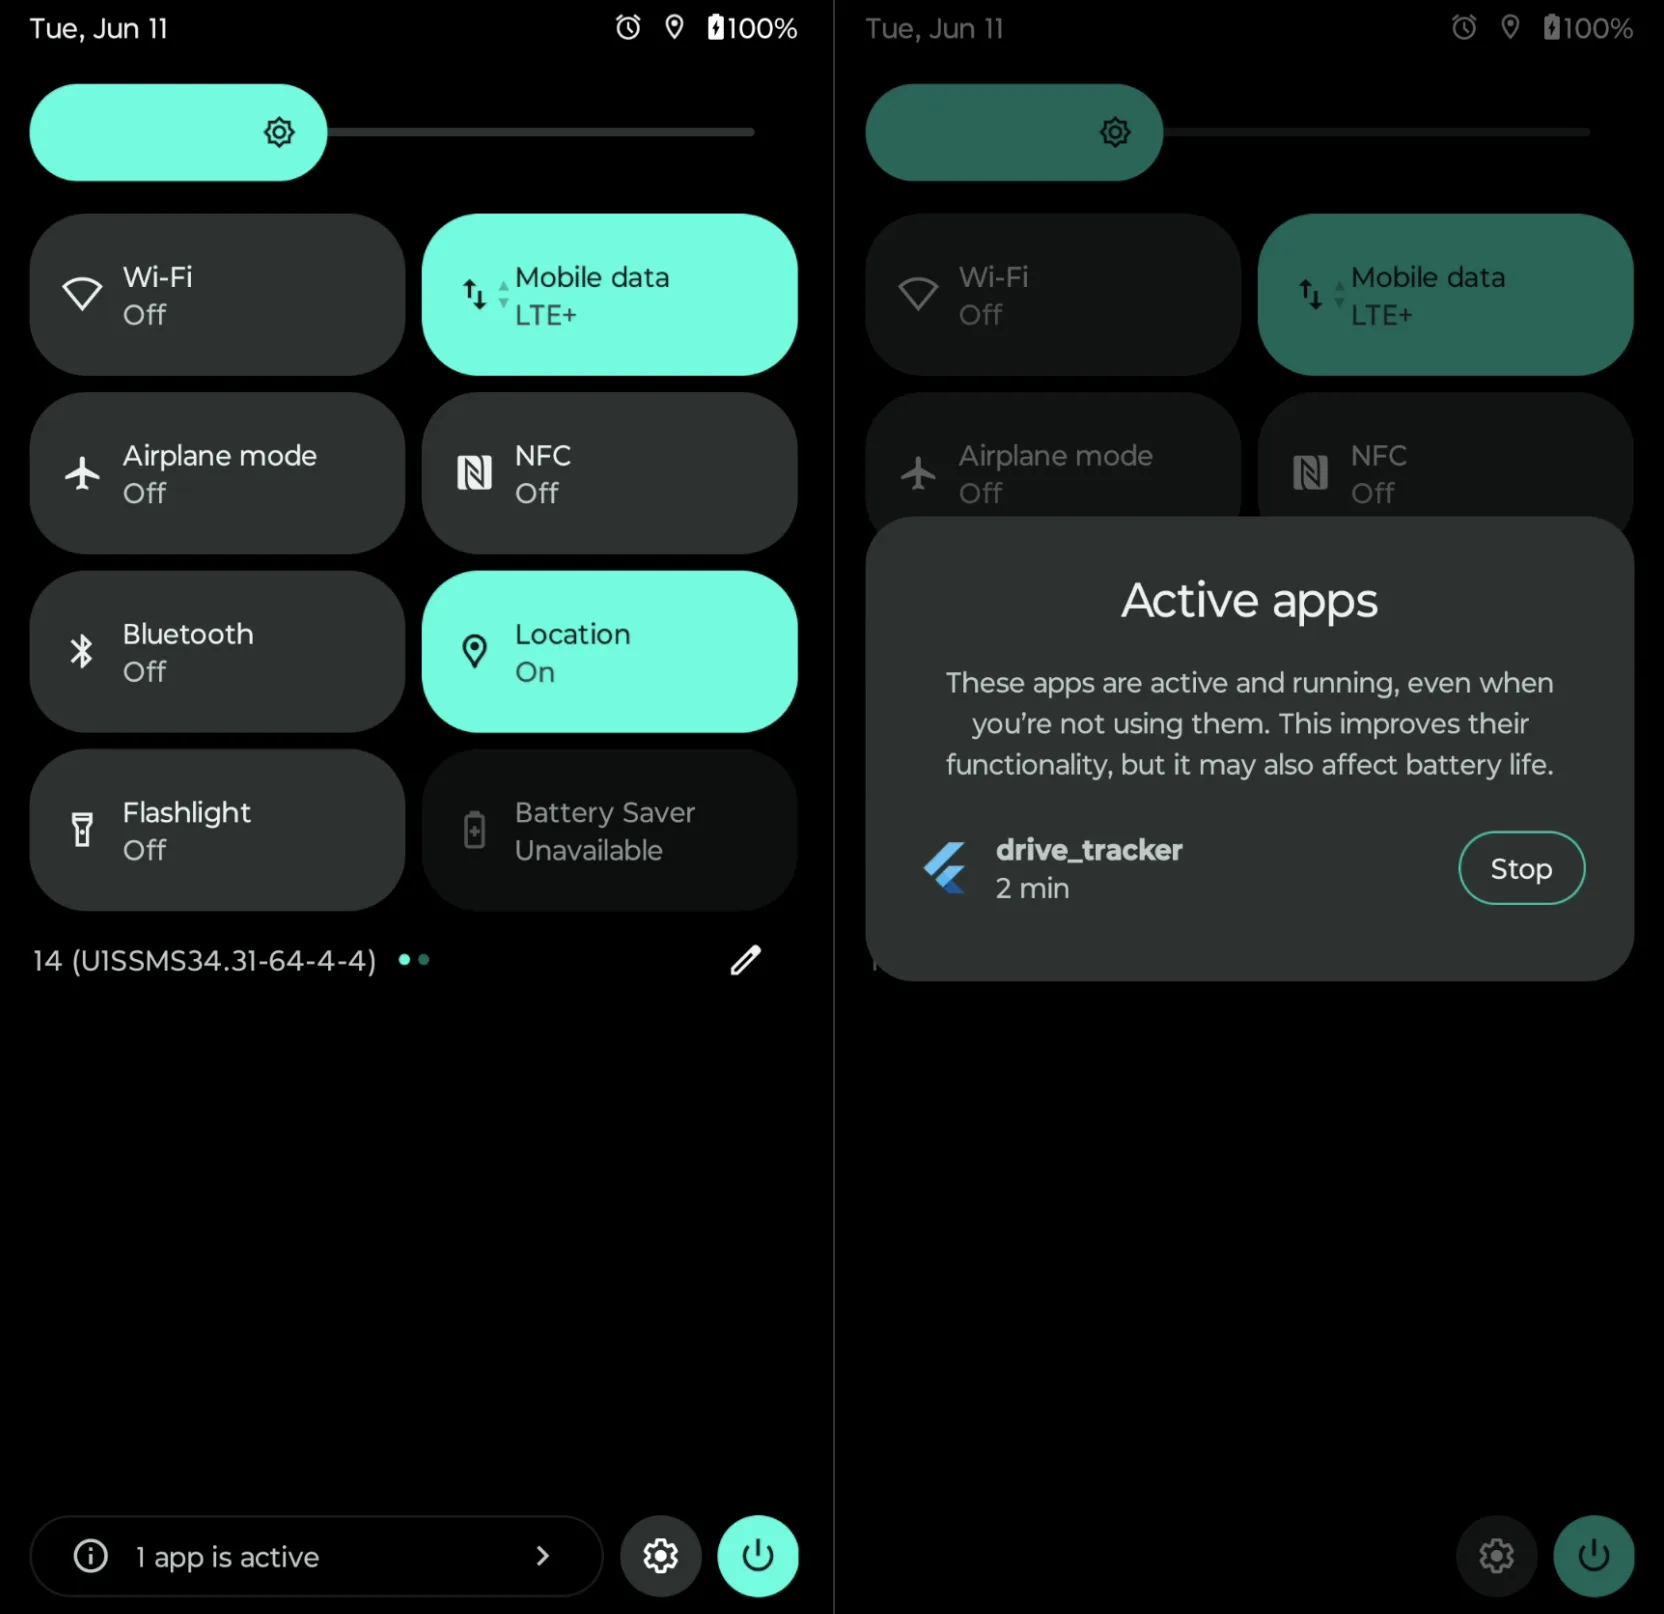
Screenshot of the Android notification center with an active app indicator at the bottom (left) and screenshot of the Android notification center with a detail view of the active app indicator (right)
On iOS, the notification bar also shows a permanent icon for active location services. You can see details about the app and the used services when you swipe down.
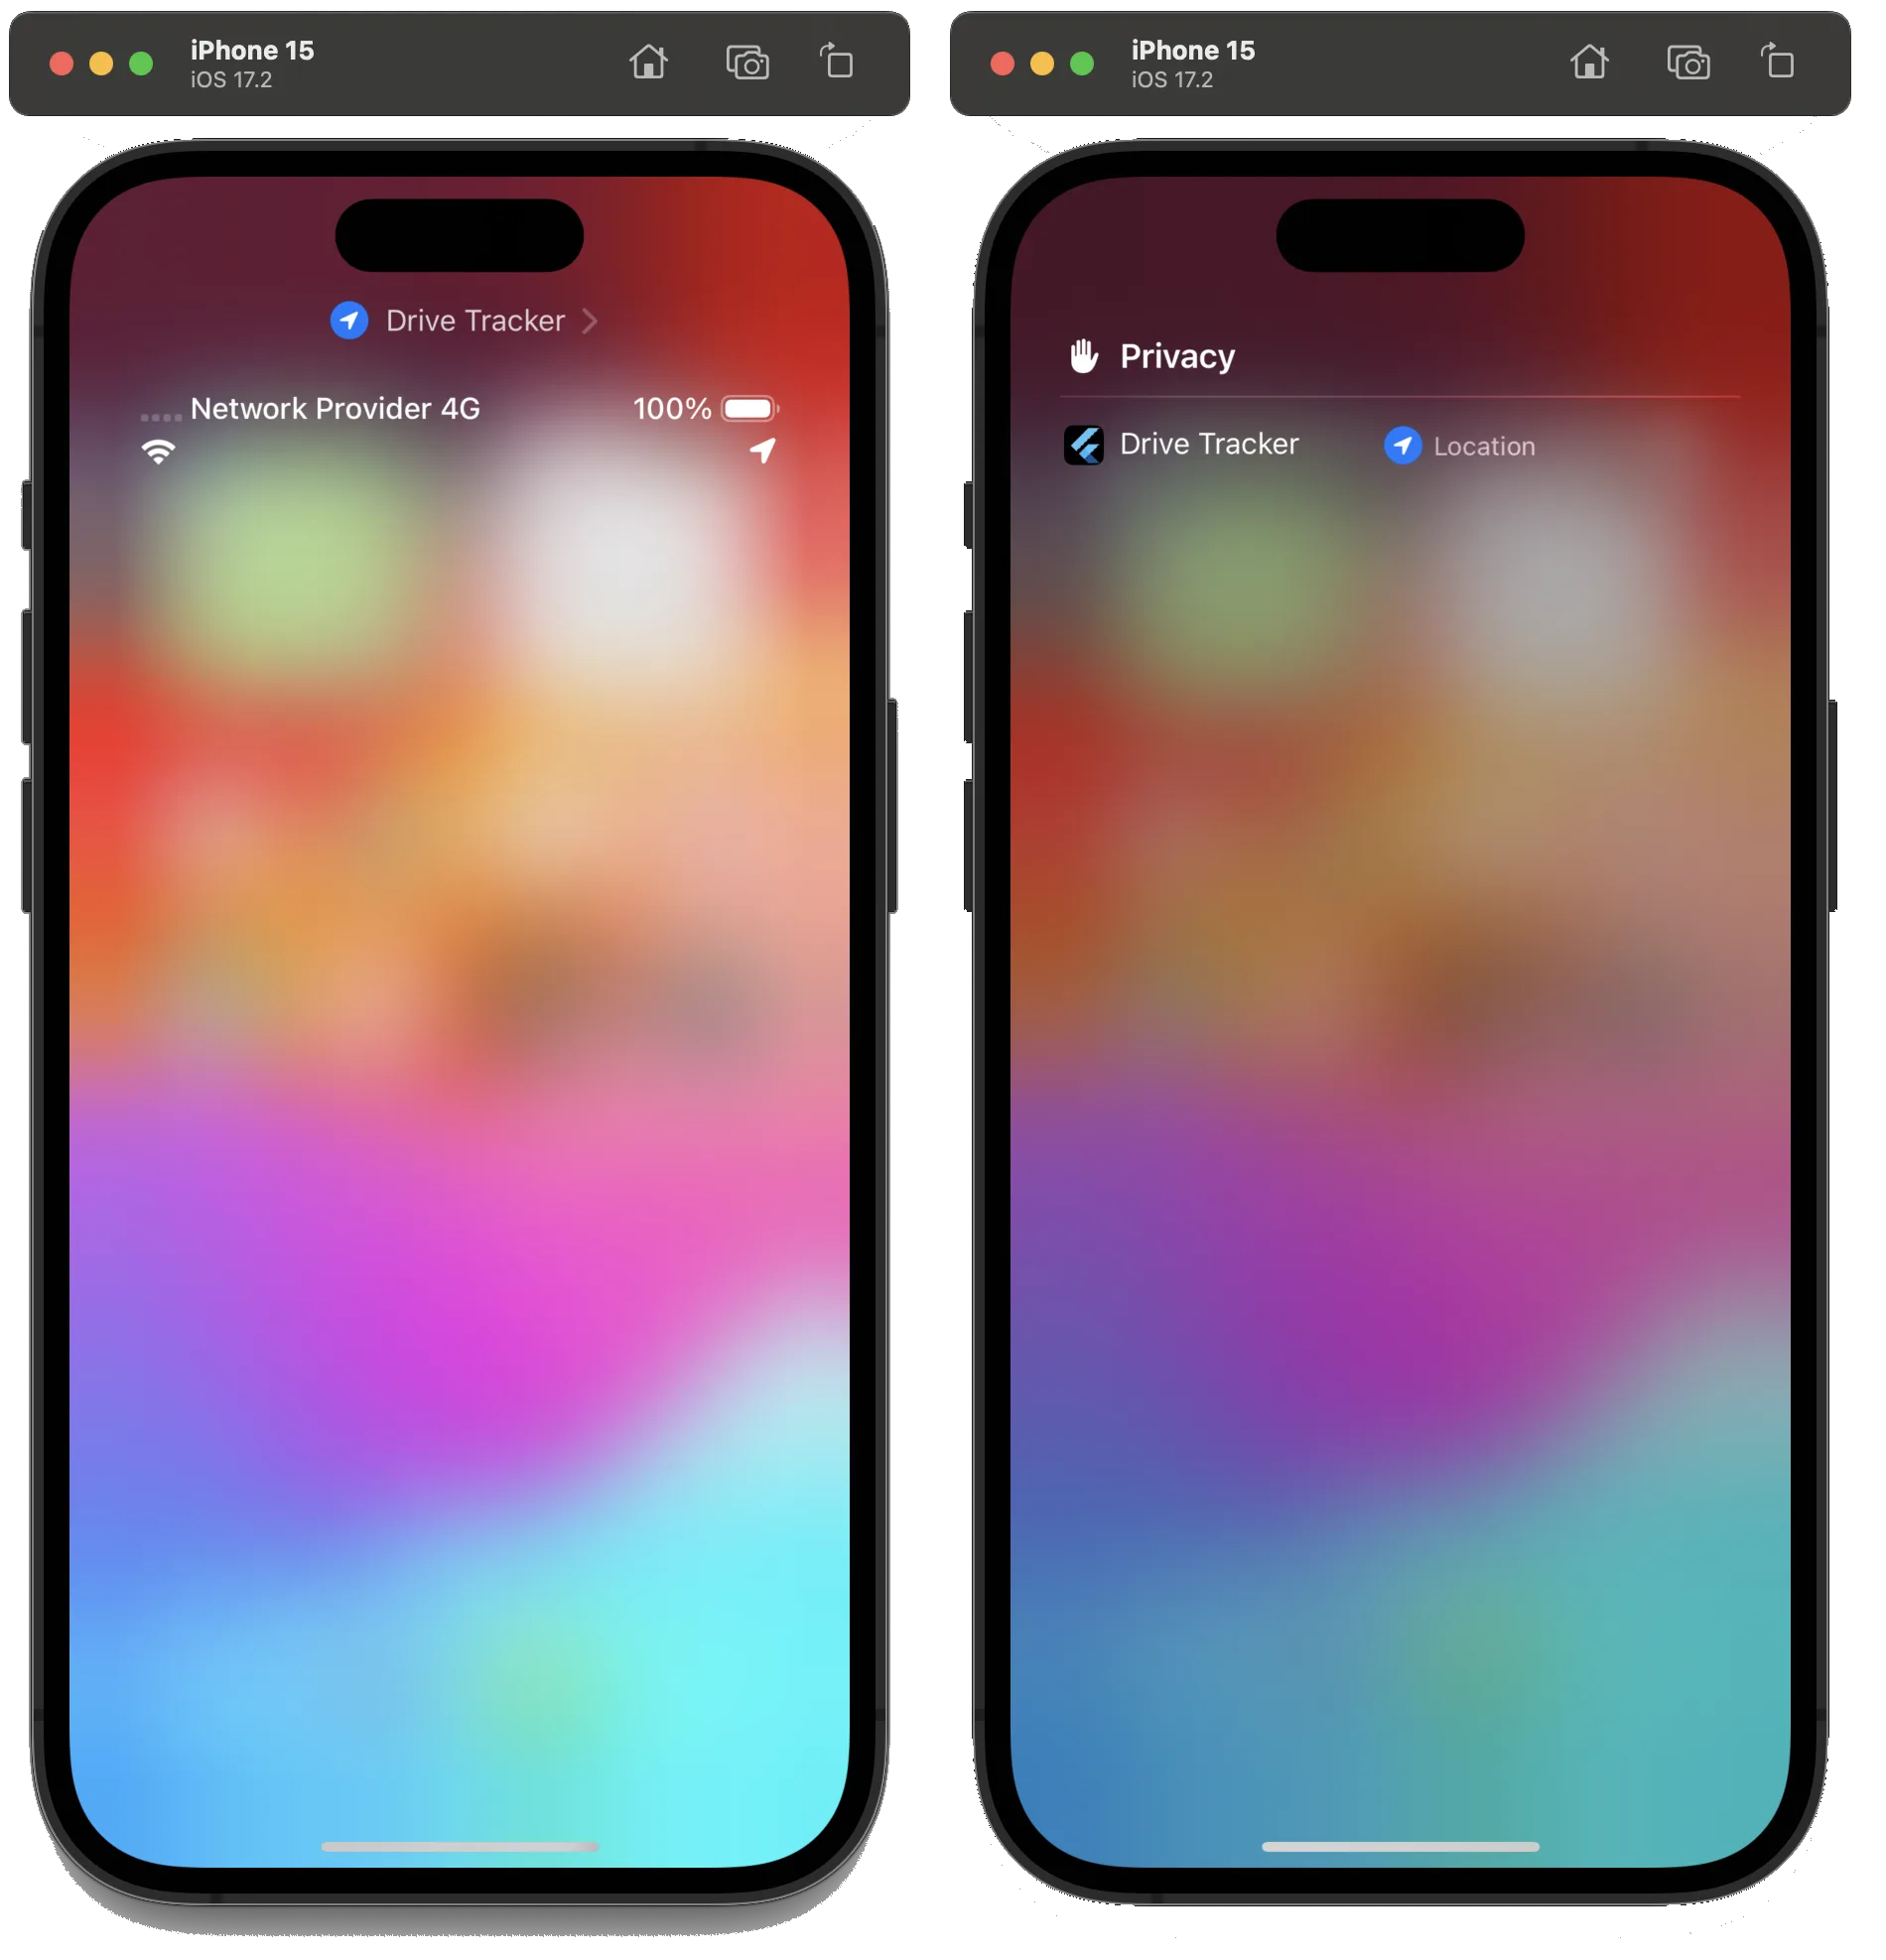
Screenshot of an iOS simulator running an app in the background (left) and screenshot of an iOS simulator running an app in the background with details (right)
Be aware that the operating system decides when an app is terminated depending on the settings and the available resources. If you want to maximize chances that your apps runs smoothly in the background, read the tips in the next section.
Keep your app alive
A key marketing factor of smartphones is battery life. Of course, the vendors and Google try everything to make the battery last as long as possible. That’s why apps in the background are usually shut down when they consume too much energy or when resources like storage and computing power are limited.
Some vendors even add custom logic apart from the rules of Google to determine when an app needs to stop. This means that it also depends on the vendor what actions you and your users need to take to make your app run successfully. Check out this website for vendor-specific instructions. Here are some general tips:
Pause app activitiy if unused (Android)
Disable this setting of your app to prevent Android from stopping it. You cannot do this yourself, only the user can.
Go to Settings → Apps → Your app to find the switch at the bottom of the page.
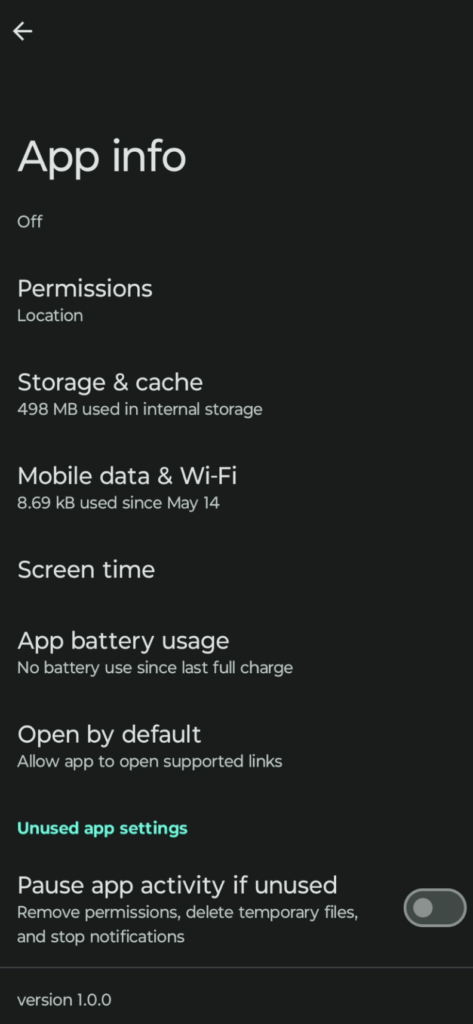
Screenshot of the Android app settings dialog
Set app battery usage to unrestricted (Android)
Guide your users to activate the option Unrestricted to allow your app consume more battery while in the background.
Go to Settings → Apps → Your app → App battery usage to find the setting.
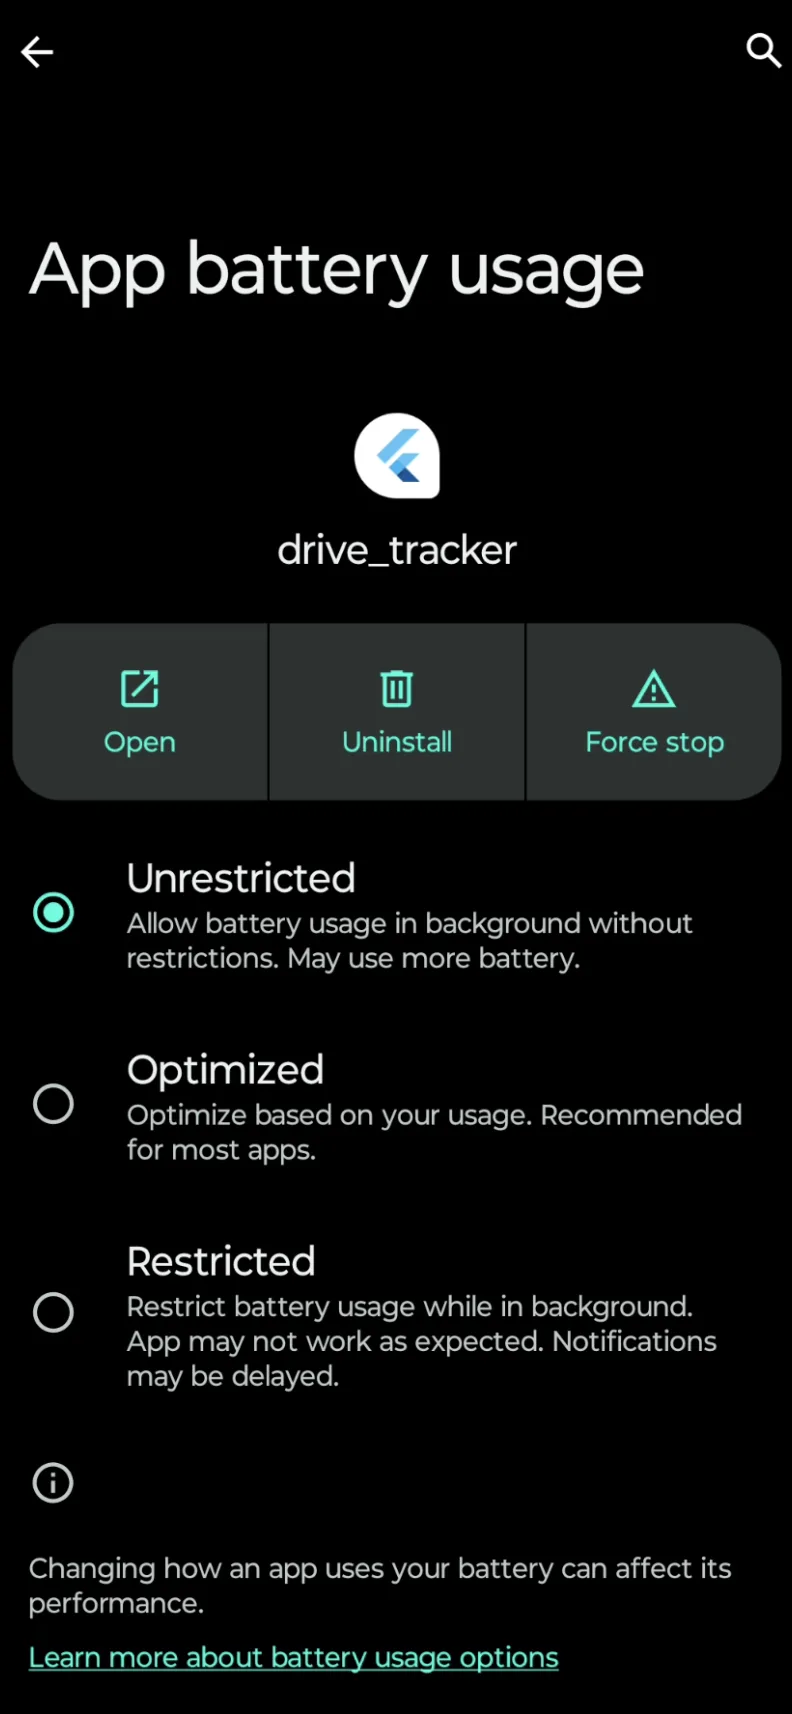
Screenshot of the Android app battery usage dialog
Add a permanent foreground notification (Android)
A permanent notification is Android’s official way of telling the users that there is something happening in the background. Here is how to configure it with the geolocator package:
final settings = AndroidSettings(
          foregroundNotificationConfig: ForegroundNotificationConfig(
                  notificationText: "Doing some heavy work ... please stand by!",
                  notificationTitle: "Background Service"));

final subscription = Geolocator
		.getPositionStream(locationSettings: settings)
		.listen(...);
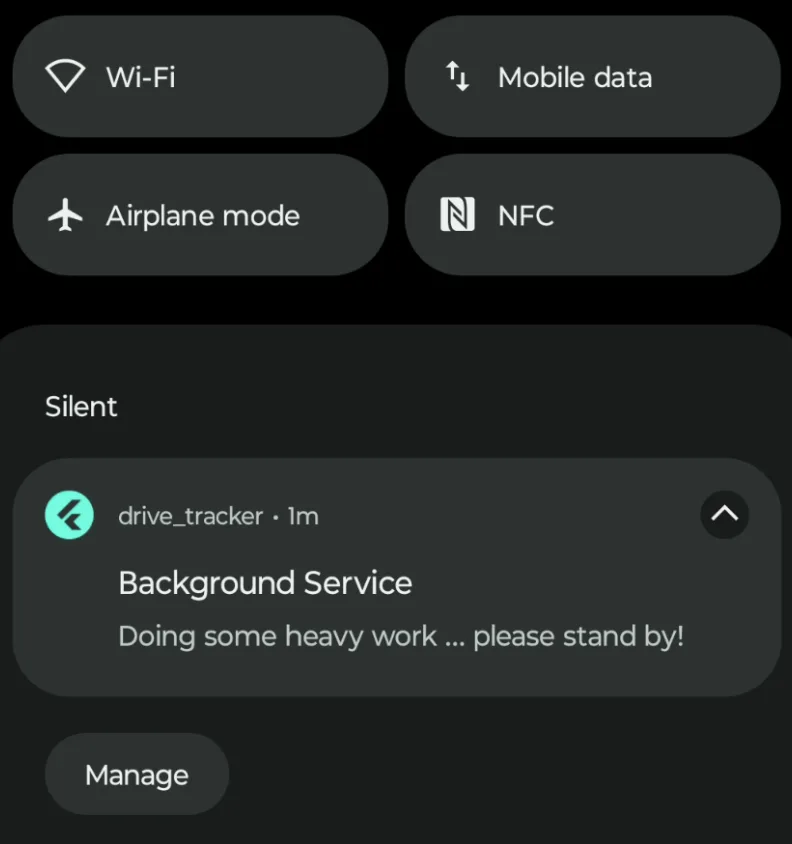
Screenshot of the Android notification for an app running in the background
In case, your notification is not visible, try the following approaches from this thread:
Add a new permission for notifications to the AndroidManifest.xml file:
<uses-permission android:name="android.permission.POST_NOTIFICATIONS"/>
Then, add permission_handler and request the permission for notifications in your app.
await Permission.notification.request();
If it still doesn’t work, try the package flutter_local_notifications. The code below recreates the notification channel so that the permanent notification should now be visible.
import 'package:flutter_local_notifications/flutter_local_notifications.dart';

const AndroidNotificationChannel backgroundLocationChannel = AndroidNotificationChannel(
  'geolocator_channel_01', // id
  'Background Location', // name
  description: 'Background Location Notification Channel', // description
  importance: Importance.min,
);
final FlutterLocalNotificationsPlugin plugin = FlutterLocalNotificationsPlugin();
await plugin
    .resolvePlatformSpecificImplementation<AndroidFlutterLocalNotificationsPlugin>()
    ?.createNotificationChannel(backgroundLocationChannel);
Set appropriate activitiy type (iOS)
The AppleSettings class in the geolocator package has a property activityType. With that you can tell the operating system what type of app you build so that the system can decide how to handle background updates.
Conclusion
In this article you learned everything you about how to track your location in a Flutter app. By using established packages and following the setup instructions, you shouldn’t run into problems. For more advanced use cases, we also talked about background operations and how you can ensure that your app is not terminated by the operating system.