Introduction
Flutter offers several types of tests that you can use to ensure correct app behavior. There are unit tests, integration tests, and finally widget tests. In this article, we’ll have a look at how to do widget testing in Flutter apps. Improve your testing knowledge with this guide. This means that a part of the app is rendered during the tests and you can describe test steps to copy the behavior of a real user. The Flutter SDK offers methods to simulate a complete workflow.
The app to test
I created a simple app that needs some widget tests. You can see a demo below.
The app contains a Scaffold with a static AppBar, a description Text, a ListView, and a FloatingActionButton. When you click on the button, a new row is inserted into the ListView with a random number between 0 and 10, the header text is updated, and a SnackBar is shown. You can also delete entries with a long press. A simple tap shows a confirmation of what row you clicked. This is what we are going to test now.
Test scenario
As the app workflow is pretty simple, we’ll write just one test that fulfills all requirements. You can, of course, split your tests into multiple ones if it makes sense. Good test organization is essential in larger apps, so take your time and think about what’s reasonable.
Our test will do the following: (action step, verification step)
- Verify that there are already 3 data items present
- Tap the FloatingActionButton
- Verify that a new data item has been added
- Tap the 3rd item
- Verify that the SnackBar shows the same data as in the list
- Long press the 2nd item
- Verify that the correct item has been deleted
The test skeleton for widget tests is similar to unit tests but has an additional WidgetTester argument. It always looks like this
import 'package:flutter_test/flutter_test.dart';

void main() {
  testWidgets('Test description', (WidgetTester tester) async {

  });
}
widgetTester class
The WidgetTester is the central unit that performs actions during the test. For example, there are methods to
▶ write into TextField widgets → enterText
▶ tap widgets → tap
▶ trigger animations and rendering → pump, pumpAndSettle
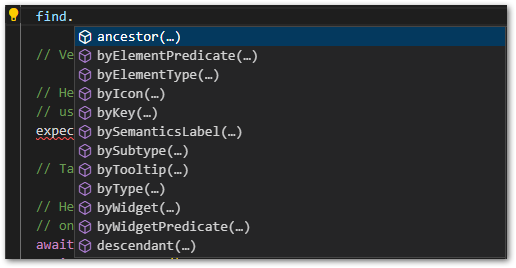
To find widgets, you use the Finder class. It has many methods to find exactly what you are looking for. Some examples are
▶ find.byType
▶ find.byKey
▶ find.text
For verification, you use the expect library like in regular unit tests. A typical expect statement can look like this:
expect(find.byText(”test”), findsOneWidget);
Look for one or more specific widgets and assert it.
Full test code
The general workflow in widget tests is always the same. First, you use a Finder to identify a widget you want to interact with. Then, you pass it to the WidgetTester that performs an action and triggers animation and rendering. The final step is to verify the outcome with the Expect class.
Have a look at the test example below. You can find the entire app source code at the end of the article.
import 'package:flutter/material.dart';
import 'package:flutter_test/flutter_test.dart';
import 'package:flutter_widget_test/list_widget.dart';

import 'package:flutter_widget_test/main.dart';

void main() {
  testWidgets('Test app workflow', (WidgetTester tester) async {
    // Build our app and trigger a frame.
    await tester.pumpWidget(const MyApp());

    // Verify that 3 data items exist

    // Here we look for 3 ListWidget elements which are the widgets that are
    // used in the ListView.
    expect(find.byType(ListWidget), findsNWidgets(3));

    // Tap the FloatingActionButton

    // Here we use a Type Finder to find our item. Works great if there is only
    // one element of a type present.
    await tester.tap(find.byType(FloatingActionButton));
    await tester.pump();

    // Verify that new row has been added

    // We again look for 4 ListWidget elements. Furthermore, we look for a
    // SnackBar and the matching text that is displayed when a new data item is
    // added.
    expect(find.byType(ListWidget), findsNWidgets(4));
    expect(find.byType(SnackBar), findsOneWidget);
    expect(find.text("item 4 added"), findsOneWidget);

    // Tap 3rd item in the list

    // We use a Key Finder to identify the ListWidget we want to tap. Keys are
    // always unique and a good way to find the exact widget. The pumpAndSettle
    // is required because the previous SnackBar auto-dismisses after 1 second
    // and we need to wait for that to happen.
    await tester.tap(find.byKey(const Key("ListWidget2")));
    await tester.pumpAndSettle(const Duration(milliseconds: 1250));

    // Verify shown data is correct

    // We look for the SnackBar and a certain text.
    expect(find.byType(SnackBar), findsOneWidget);
    expect(find.text("item 3 pressed"), findsOneWidget);

    // Long press 2nd item

    // Again a Key Finder and a pumpAndSettle to wait for the previous SnackBar.
    await tester.longPress(find.byKey(const Key("ListWidget1")));
    await tester.pumpAndSettle(const Duration(milliseconds: 1250));

    // Verify pressed item was deleted

    // Finding widgets by type, by key, or by text. There are many possibilities.
    expect(find.byType(ListWidget), findsNWidgets(3));
    expect(find.byKey(const Key("ListWidget0")), findsOneWidget);
    expect(find.byKey(const Key("ListWidget1")), findsOneWidget);
    expect(find.byKey(const Key("ListWidget2")), findsOneWidget);
    expect(find.byKey(const Key("ListWidget3")), findsNothing);
    expect(find.byType(SnackBar), findsOneWidget);
    expect(find.text("item 2 deleted"), findsOneWidget);
  });
}
Conclusion
In this article, we explored how to do widget testing in Flutter apps. They are the core testing principle together with unit and integration tests for any Flutter app.
Source code
You can find the source code on GitHub.
Become A Testing Expert!

Become a proficient Flutter app tester with my detailed guide. This ebook covers everything from unit tests over widget tests up to dependency mocking.
Related articles