Introduction
Here is how to set up a free repository for your Flutter packages with Cloudsmith in no time!
A package repository has many benefits over packages in local folders or GitHub repositories. If you want to publish your package publicly, you usually are fine with pub.dev. In case you need a private solution, continue reading here. I’ll show you how to set up a free repository for your Flutter packages with Cloudsmith.
Cloudsmith is free as long as you have only one developer. For bigger teams you need to upgrade your plan and pay depending on your team size. On the other hand you also get package repositories for other programming languages like Java (Maven) or C# (Nuget) and tools like Chocolatey or Docker.
Why not just use GitHub?
Fair question!
You can reference GitHub branches, tags, or commit-ids in your pubspec.yaml. So wouldn’t it be enough to just use GitHub?
The downside is that you can’t specify versions when using GitHub references. So let’s say you reference a branch with your app and everything works today, but tomorrow your build breaks because the branch was updated.
Another problem is that you cannot have transitive dependencies with other packages hosted on GitHub. I talked about this in detail here as I struggled with it just recently.
If those reasons are not a issue for you, GitHub can already be enough for your needs. And if you use it already for code hosting, then it’s a no-brainer.
In all other cases keep on reading to learn how to set up a free repository for your Flutter packages with Cloudsmith. I’ll talk you through all details in the next chapters!
Create account
The first step is to create a free account. Cloudsmith also offers paid plans for larger teams with more features but we will focus on the basics here.
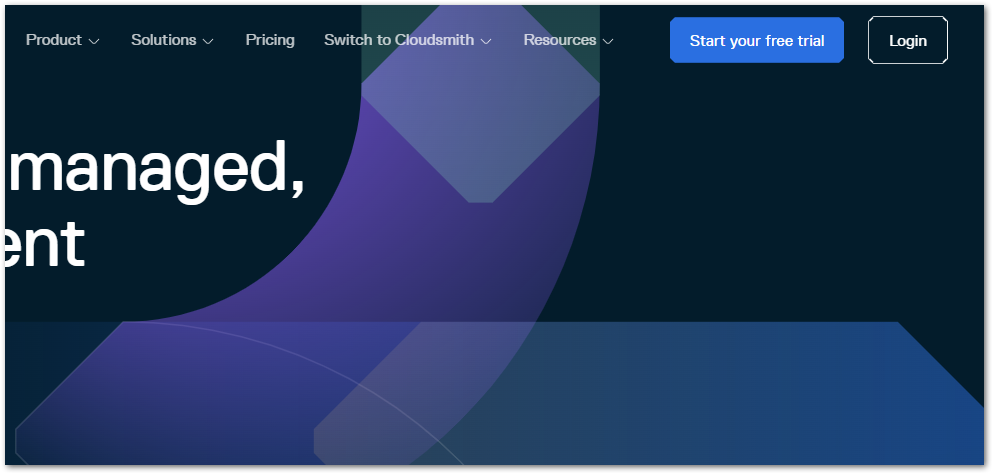
Go to https://cloudsmith.com and click on the button Start your free trial in the top right corner.
Enter your details, create a new account, and confirm it with the email that Cloudsmith sends you.
After that, you will be prompted to join an existing organization or to create a new one. It’s just another hierarchical layer on top of repositories. Be aware that the organization name will be part of the URL when uploading or consuming packages.

As a bonus you can try out all paid features for 14 days. After that you need to switch another plan to benefit from those. If you don’t do anything, your available feature set will be reduce to the free Core plan.
Now, let’s move on to creating a new repository in our organization!
Create repository
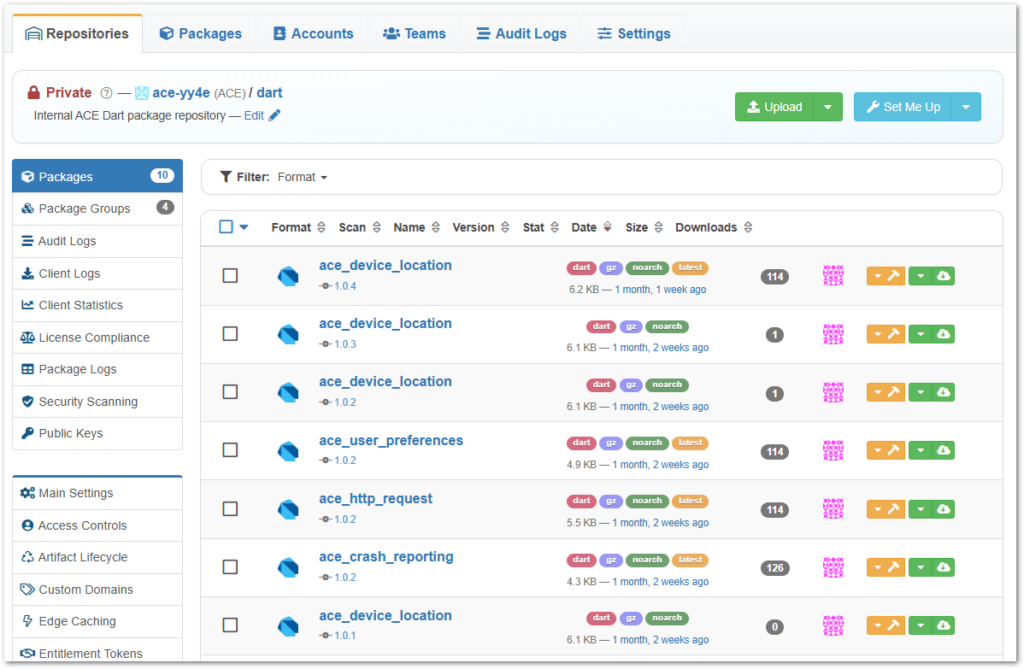
A repository is just a container for all your packages. You are not limited to one certain type of package per repository. It’s totally fine and possible to use Dart packages, npm packages, and Nuget packages in the same repository from a technical point of view. If this makes sense, is up to you however.
After creating your organization, you will be asked to create a repository.
Choose a descriptive repository name as an identifier. It will be part of the URL but can be changed later. The URL will stay the same after the initial creation.
The storage region might be relevant for data protection. If you want to use the service for free, you have to stick with the default region.
With the repository type you define the access level and the feature set. A private repository has the least features available for free while open-source repositories have more benefits.

After you created your repository, the main repository page appears.
The next step is to upload packages so that your apps can consume them.
Upload packages
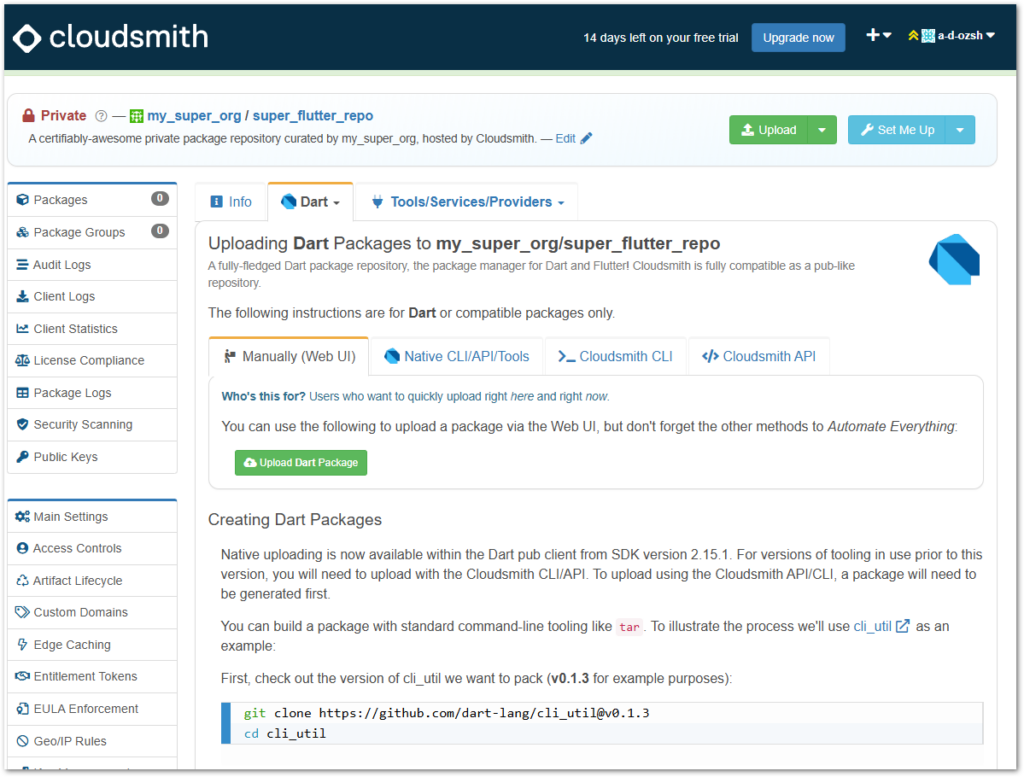
Cloudsmith offers detailed instructions for every supported package and repository format. Since we are focusing on a Dart/Flutter repository, I’ll show you the required steps for that.
Choose the Dart package format in the lower tab bar to see the instruction panel.
You have 4 options to upload packages:
- manually with the web UI
- with the native Dart/Flutter tools
- with the Cloudsmith CLI tools
- or with the Cloudsmith API
The web UI is useful for upload testing for the first time or configuring the repository. You can do any automations with it. For that, you should either use the native Dart/Flutter tooling or the Cloudsmith CLI. The main difference is that the Cloudsmith CLI allows upload of 5GB or more while the native tooling is limited to 200MB per file. The Cloudsmith API is useful when you want to create custom apps that interact with your repository.
No matter what approach you choose, the instruction panel shows everything you need to know to get access.
The final step is to learn how we can consume packages.
Consume packages
The setup is completed and you have pushed your first packages to the repository. Now, how do you consume those?
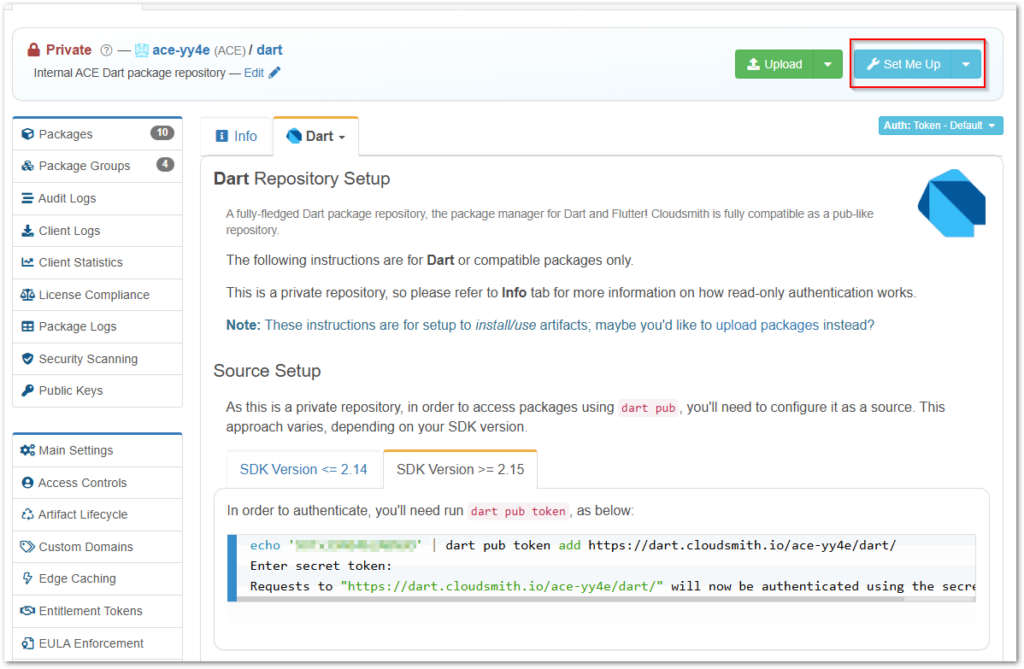
In your repository, click on the blue button Set Me Up in the top-right corner and choose the Dart package format.
The instructions will guide you through the steps necessary for your apps to connect with the repository.
First, add a package reference to your pubspec.yaml
dart pub add your-package:1.2.3 --hosted-url <https://dart.cloudsmith.io/><your-orga>/<your-repo>/Next, add an authentication token
echo '<your-token>' | dart pub token add <https://dart.cloudsmith.io/><your-orga>/<your-repo>/
Enter secret token:
Requests to "<https://dart.cloudsmith.io/><your-orga>/<your-repo>/" will now be authenticated using the secret token.
Run flutter pub get and test if errors occur. If not, your setup was successful!
To learn more about how to install packages in Flutter apps, read the following article:

This concludes the basic steps of how to set up a free repository for your Flutter packages.
Bonus: GitHub Actions pipeline
As software developer, we tend to automate things as much as possible.
I manage the code of my packages in GitHub and I also have GitHub Action pipelines to build, test, and deploy them. Here is an example of such a pipeline:
name: Release

on:
  workflow_dispatch:
    branches:
      - master

env:
  PACKAGE_REPOSITORY_TOKEN: ${{ secrets.PACKAGE_REPOSITORY_TOKEN }}

jobs:
  build:
    runs-on: ubuntu-latest

    steps:
    - uses: actions/checkout@v3

    - name: Setup Flutter
      uses: subosito/flutter-action@v2
      with:
        flutter-version: '3.22.0'
        channel: 'stable'

    - name: Add package repository token
      run: dart pub token add <https://dart.cloudsmith.io/><your-repository>/dart/ --env-var PACKAGE_REPOSITORY_TOKEN

    - name: Install dependencies
      run: flutter pub get

    - name: Run unit tests
      run: flutter test

    - name: Publish package
      run: flutter pub publish --force

    - name: Create release branch
      run: |
        VERSION=$(awk '/version:/{print $2; exit}' pubspec.yaml)
        git checkout -b release/$VERSION
        git push --set-upstream origin release/$VERSION
Ok, what does it do?
You’ll notice the trigger workflow_dispatch which means you can only trigger this pipeline manually on the master branch. I am hesitant to remove this step because then a faulty commit could lead to all consuming apps breaking immediately.
Next, Flutter is set up with a specific version. You could extract the version into a variable but I don’t see any benefits.
The following step sets up the connection to our repository at CloudSmith. The token is stored as a secret (secrets.PACKAGE_REPOSITORY_TOKEN) in GitHub so that it doesn’t appear in log files or the code base.
Then, the usual stuff happens. Install dependencies, run tests, and publish the package eventually. Make sure to connect to your package repository before running flutter pub get. And in case you want to test publishing, use the argument --dry-run or -n on the flutter pub publish command.
The last step creates a release branch with the version number stored in pubspec.yaml and pushes the code there. Every release branch corresponds to a specific package version.

I wanted to give you some inspiration of what is possible. Use this pipeline as a baseline and enhance it to suit your needs.
Conclusion
In this article you learned how to set up a free repository for your Flutter packages with Cloudsmith. When you are a single developer and just need a private repository for your packages, Cloudsmith can be a solution. It’s fairly easy to manage and apart from the initial setup, you probably rarely need to visit their homepage.
Related articles