
Introduction
Here is a short guide to get you started with the basics in .NET MAUI. Navigate between pages, bind data in XAML, and add dependency injection quickly.
.NET MAUI is Microsoft’s approach to challenging established cross-platform frameworks like Flutter. It is the successor to Xamarin and enables you to develop apps for Android, iPhone, Mac, Windows, and the web platform. Here is a short guide to help you get started with the basics of .NET MAUI.
Add additional pages to the app
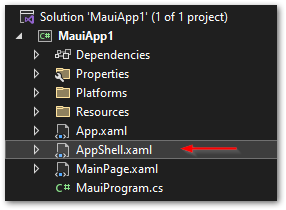
The default .NET MAUI template in Visual Studio 2022 contains an AppShell.xaml that reduces the complexity of app development by providing the fundamental features that most apps require, including:
- A single place to describe the visual hierarchy of an app.
- A common navigation user experience.
- A URI-based navigation scheme that permits navigation to any page in the app.
- An integrated search handler.
We’ll use it and add another page to it. Here is what you need to do.
1️⃣ Create a new .NET MAUI Content Page
Open the Add dialog and select .NET MAUI ContentPage (XAML). Don’t select the C# version or you’ll end up without a XAML file. For the difference between ContentPage and ContentView see this short explanation.

2️⃣ Create a new view model for the content page
Create a view model (an empty C# class for now) for the new page in the next step. We will use it for data-binding in a future step.
3️⃣ Add a new ShellContent block in AppShell.xaml
Next, open AppShell.xaml. Add a new ShellContent block, and reference the new page as the ContentTemplate property. The Route property indicates how to identify the page during navigation.
And that’s all it needs to add new pages to a .NET MAUI app!
Navigate between the pages
After the new page is set up, we want to navigate to it. Let’s use the existing button on MainPage to trigger a navigation action. Open MainPage.xaml.cs and change the OnCounterClicked event handler to the following code:
Pay attention to the method being async but not returning Task!
This covers everything you need for navigation. It’s pretty simple. For more information on navigation in .NET MAUI, see the documentation.
Data-binding in XAML
Data-binding works pretty similar to what you might know from WPF or other XAML-related languages. Here is how to do it.
1️⃣ Create a property in your view model class (for example a simple string called Heading to begin with) and assign an initial value.
2️⃣ Open the XAML of your second page and change the Text property of the Label to {Binding Path=Heading}.
3️⃣ Set the data type in the XAML file so that code navigation works in Visual Studio.
4️⃣ Set the BindingContext of your second page to the view model. Open the xaml.cs file and change it accordingly.
This is a short example of how static data-binding works. It won’t reflect changes made to bound properties since we didn’t implement the INotifyPropertyChanged interface in our view model class.
Add dependency injection
Most modern applications rely on dependency injection. If you are familiar with the setup in other .NET 6 and newer project types, you won’t be surprised here. Let’s dive right in!
1️⃣ Open App.xaml.cs.
2️⃣ Create a getter-only property Services of type IServiceProvider.
3️⃣ Create a private method that returns IServiceProvider and adds all your dependencies to a ServiceCollection.
4️⃣ Assign the result of the created method to the Services property in the class constructor.
5️⃣ Hide the static App property with the new keyword. Why? Otherwise you can’t access the Services property from outside.
6️⃣ Change the BindingContext in the XAML file of your second page to use the IServiceProvider instance.
This is an easy way to set up dependency injection in .NET MAUI apps.
Conclusion
This was a short guide to get you started with the basics in .NET MAUI. We covered navigation between pages, data-binding in XAML, and dependency injection. Once you have these skills under your belt, your app development journey can begin.
Related articles