Introduction
Brevo offers a powerful free bulk-email service. Here is how you can send emails for free with the Brevo REST API. Grab your free package with 300 emails per day with Brevo!
In this guide, I’ll show you how to send free emails with the Brevo REST API. While Brevo is more than just an bulk-email service, we will focus on that part here.
🔔 Hint
Brevo links are affiliate links. If you order a paid package, I will receive a commission.
Brevo is a reliable provider. I use them for my automated Medium newsletter and have had no problems with their service. Their customer support is fast and helpful, even for non-paying customers.
What you need
To use the REST API you need a free Brevo account and an API key. In the free version you can send up to 300 emails per day. When you exceed the limit, the API will deny your requests until the quota is reset.
First, go to https://brevo.com and create a free account. This is enough to get you started. When you need more, you can always upgrade within minutes.
Next, log into your account and head to the SMTP & API settings menu in the top right corner.
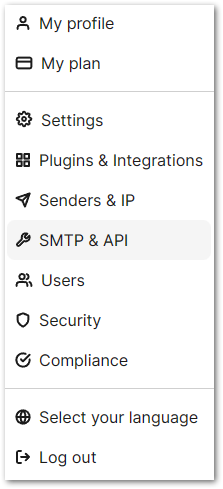
Go to the next page and click on the API Keys tab. This will show you all of your existing API keys.

On the right side, you can generate a new API key by clicking the Generate a new API key button. Give the key a name and store it in a safe location. Once you close the dialog window, the key cannot be restored!
You need to include the API key you created in your requests to the REST API. In the next step, we will assemble a request and test the sending process.
Build a request
It doesn’t really matter what programming language you use. The essential part is building and sending an HTTP request with the correct JSON content so that the API knows what to do.
To get started, we will just send the text Hello world! as email content. You can customize it later once it works as expected.
Here is the JSON that the REST API understands:
We need to provide the following properties:
- A
senderobject containing an optionalnameand anemailaddress. - An array of recipients as the
toobject. Each recipient should also include an optionalnameand anemailaddress. - A
subjectstring. - A valid HTML document string for the
htmlContentproperty.
This is a minimal example. The API offers many more options, such as attachments, scheduled sending, and BCC recipients. For all the details and examples available, please refer to the documentation.
Here is the Dart code to build the request body:
Here is the C# code to build the request body:
For C#, there is an official SDK available that allows you to send emails and perform other tasks. You can download it from GitHub or add it directly in Visual Studio using Nuget. This SDK will make your code easier to read and more robust.
💡 Tip
Don’t get confused because the package is labeled as Sendinblue. Brevo recently underwent a rebranding and was formerly known as Sendinblue. It appears that not everything has been updated yet.
For more information, please refer to the API documentation.
Send a request
We have built the content of the request. Now we need to send it. To make it work, the request needs the following header properties:
Acceptheader with the valueapplication/jsonContent-Typeheader with the valueapplication/jsonApi-Keyheader with your individual API key
The expected HTTP status code is 201 because we send a POST request and create a resource on the server.
Here is the Dart code to send a request:
To make the code work you also need the http package which handles the request sending in this example.
And here is the same example with C# code:
You will need the package RestSharp to make the code work.
After sending the request you can track the sending progress in the Brevo dashboard.
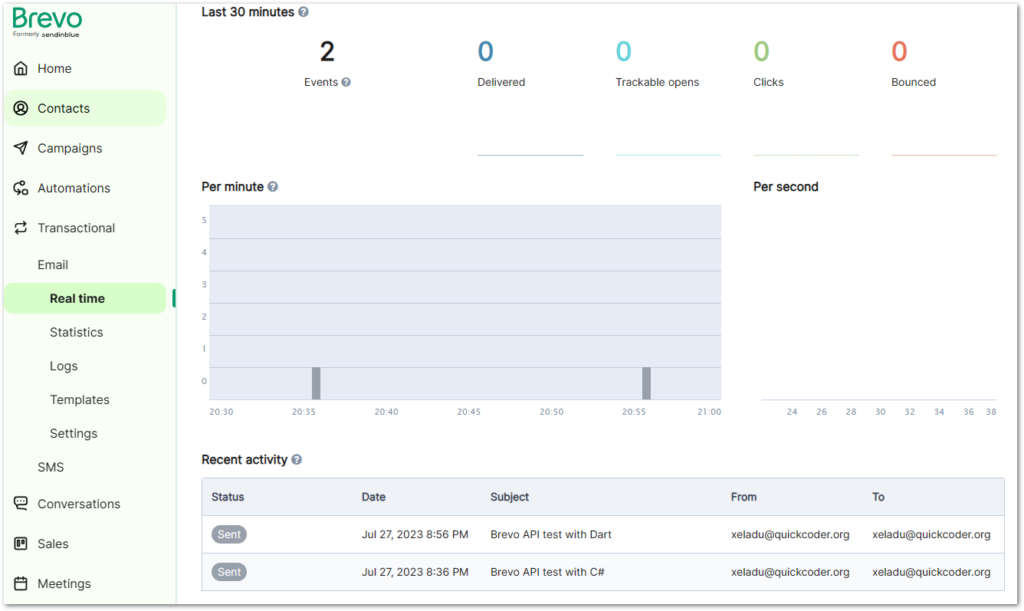
And that is all it takes to send emails for free.
Conclusion
This article demonstrated how to send emails for free using the Brevo REST API. The code examples provided make it easy to integrate this functionality into your applications.
Related articles
