How to create a pipeline from an existing YAML file in Azure DevOps
Instead of creating a pipeline with the editor of Azure DevOps, you can create a pipeline from an existing YAML file. Here is how you do it! Link to heading
Let’s say, you want to use the build pipeline from another project. You’ll either need to recreate the pipeline with the editor (?) or create a pipeline from your existing YAML file (?).
?
Hint
Your YAML file must be checked into version control!
Go to Pipelines and click on New pipeline in the upper right corner. Select the code hoster in the Connect step and the repository in the Select step where your YAML file resides. In the Configure step choose the option Existing Azure Pipelines YAML file and select the correct file in the dropdown menu**.** The last step is to save the pipeline (the option is hidden in the dropdown of the Run button). A click on Run will also save it.
You can also rename the pipeline by clicking on the 3 dots on the right and selecting Rename/move. Enter the desired name in the textbox and confirm. Your pipeline will be renamed afterward.
Here is a short demonstration video:
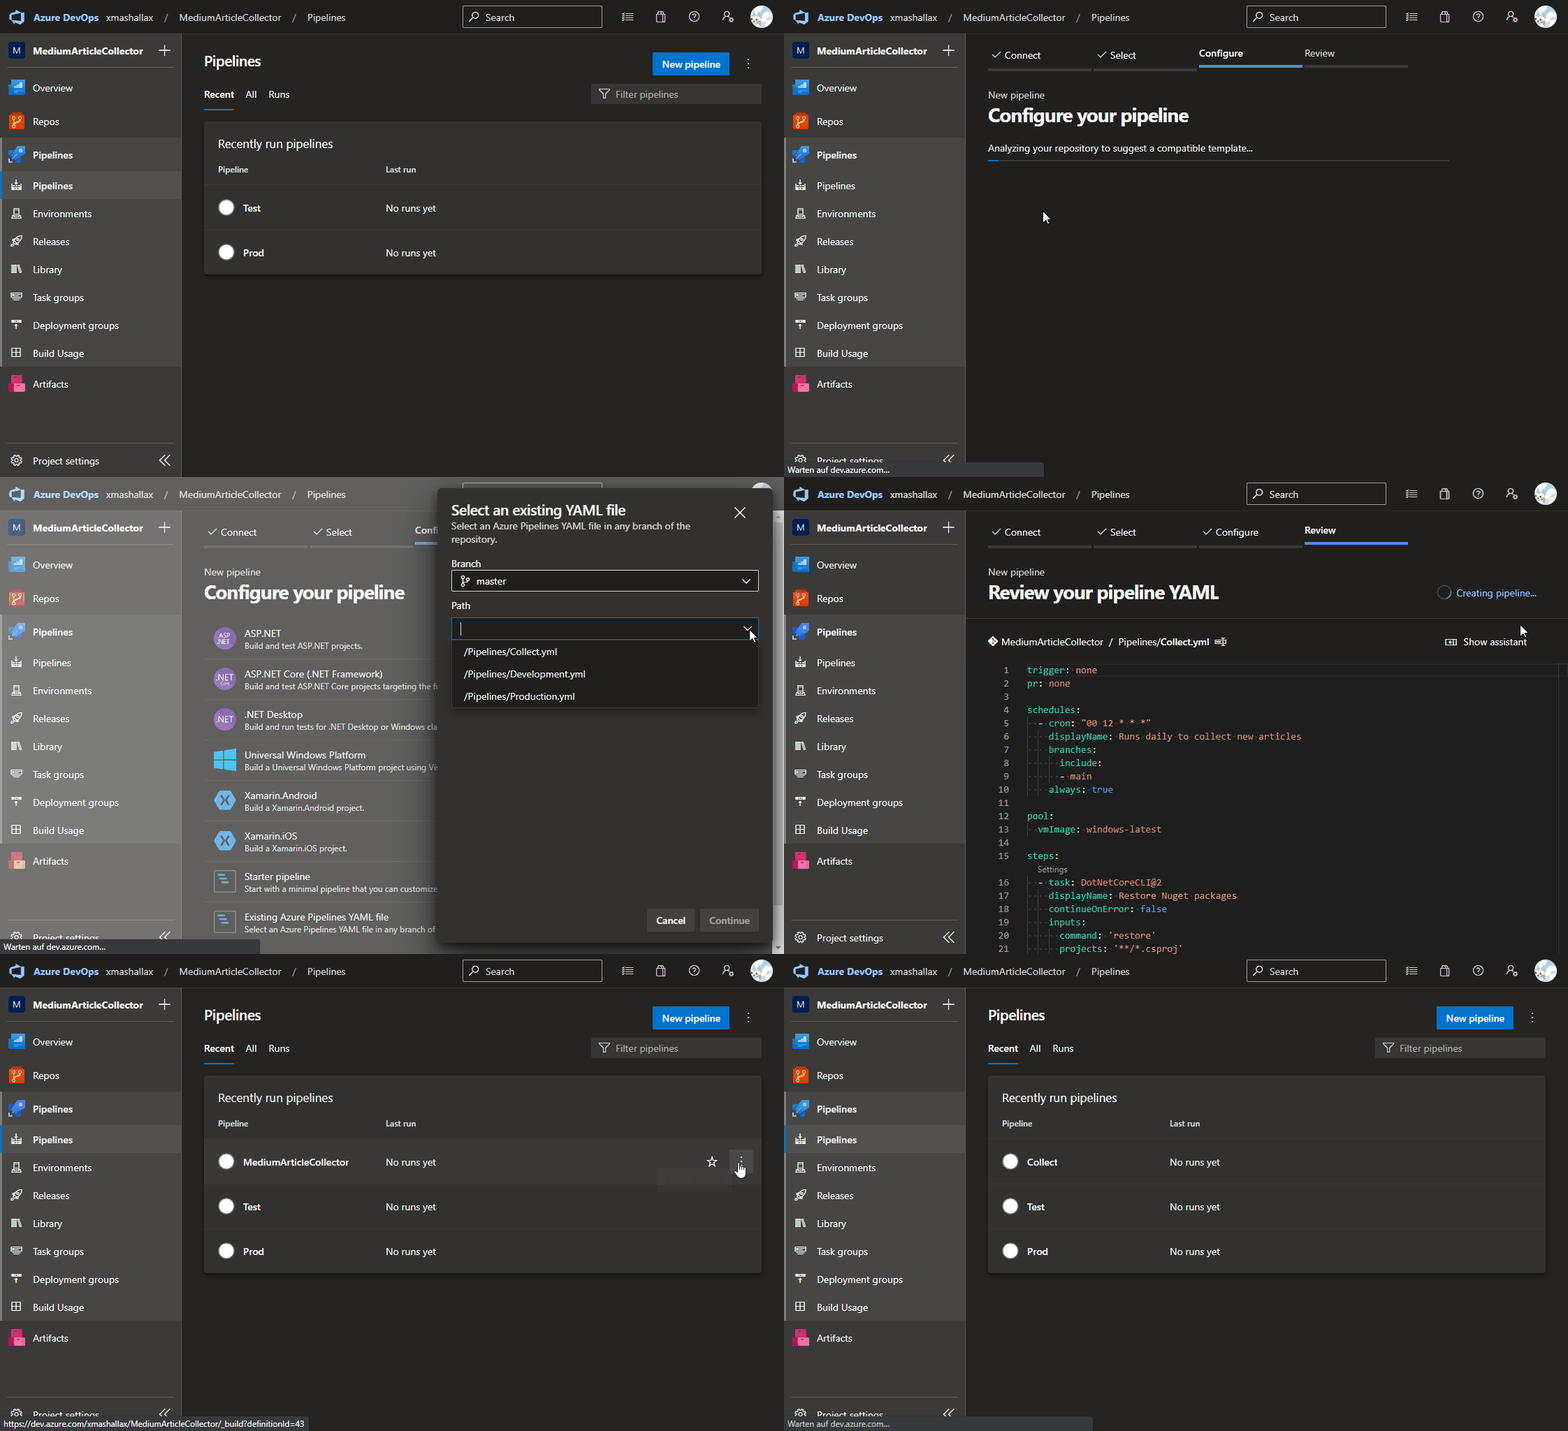
Demo video of how to create a pipeline from an existing YAML file in Azure DevOps by author
Related articles Link to heading

Azure articles on QuickCoder Link to heading
Azure is a cloud platform developed by Microsoft. All articles that are tagged with Azure on QuickCoder can be found here.
DevOps articles on QuickCoder Link to heading
Devops is the combination of the disciplines development and operations. All articles that are tagged with DevOps on QuickCoder can be found here.