
Introduction
In this article, we explore how to build a modern Flutter app with user authentication powered by Firebase Authentication. You’ll learn how to implement account management methods with Firebase Authentication in the most simple way. Check out the demo application and see how everything comes together.
This article covers the following use cases with Flutter code examples for Firebase Authentication:
- Registration with email and password
Users can create an account by providing an email address and a password. - Sign in with email and password
Users can sign in with email and password after account creation. - Email address confirmation process
To verify the email address, users need to click a confirmation link in an email sent by the system. - Change email address
In case the email address is no longer valid anymore, users can update it on their own. - Change password
Updating their passwords can also be achieved for all users with minimal effort. - Forgot password process
Sometimes, people forget their passwords. Here is how you can give them the option to reset it. - Delete account
With this option, users can delete their accounts. In the background, linked data like Firestore collection or Storage buckets can be deleted by a Cloud Function.
Let’s get ahead with a Flutter app and how to implement account management methods with Firebase Authentication for free!
💡 Tip
The entire system will work on Android, iOS, Web, MacOS, and Windows!
Flutter ❤️ Firebase

Get started with Firebase and learn how to use it in your Flutter apps. My detailed ebook delivers you everything you need to know! Flutter and Firebase are a perfect match!
Firebase preparations
We need a working Firebase project that is linked with a Flutter app. Here are the quick steps:
- Create a Flutter app (instructions)
- Create a Firebase project (instructions)
- Link it with your Flutter app (instructions)
- Enable email provider in Firebase Authentication (instructions)
- Packages firebase_core and firebase_auth
Everything ready? Then, let’s move on!
Registration
Obviously, the first step for a user is to create an account. Here is what you need to do.
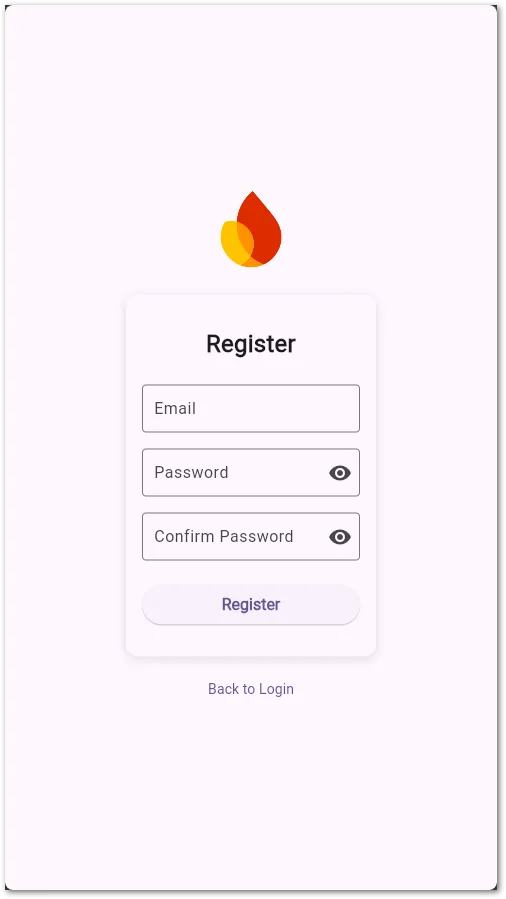
First, we need a simple form with input fields for email and password. It could look like this:
When clicking the button, the following code is executed to create a new account in Firebase Authentication:
await FirebaseAuth.instance.createUserWithEmailAndPassword(
  email: _emailController.text.trim(),
  password: _passwordController.text.trim(),
);
As a result, you get a UserCredential object and you can always access the current User object with
await FirebaseAuth.instance.currentUser;After the registration, the user is also in a logged in state.
Login
Signing in is the bread-and-butter task for every user. Let’s see how we can accomplish this.
Again, we need a form where the user can input the data.

Then, we run this code after a button click:
await FirebaseAuth.instance.signInWithEmailAndPassword(
  email: _emailController.text.trim(),
  password: _passwordController.text.trim(),
);
Once again, you get a UserCredential object as a result and you can access the current User object with
await FirebaseAuth.instance.currentUser;Email verification
Sometimes, you want to make sure, users use valid email accounts. Here is how you can send a confirmation email and how you can check if the user clicked the link in it.
First, we need to send a verification email to the current user:
await FirebaseAuth.instance.currentUser?.sendEmailVerification();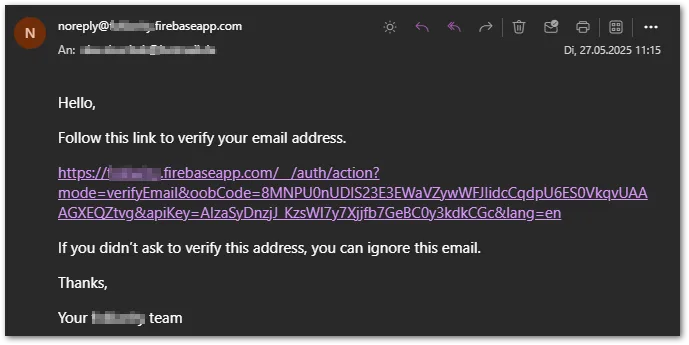
When the user clicks the link, the verification is performed. The status is a property of the User object called emailVerified. It will be set to true when the verification was successful.
Change email
Switching to a new email doesn’t need to be complicated. Here is the form:

And here is the code:
// assumption: User entered the password for reauthentication
final credential = EmailAuthProvider.credential(
  email: user.email!,
  password: _passwordController.text.trim(),
);

await user.reauthenticateWithCredential(credential);

final newEmail = _emailController.text.trim();
await user.verifyBeforeUpdateEmail(newEmail);
You’ll receive this email to your new account to complete the change:
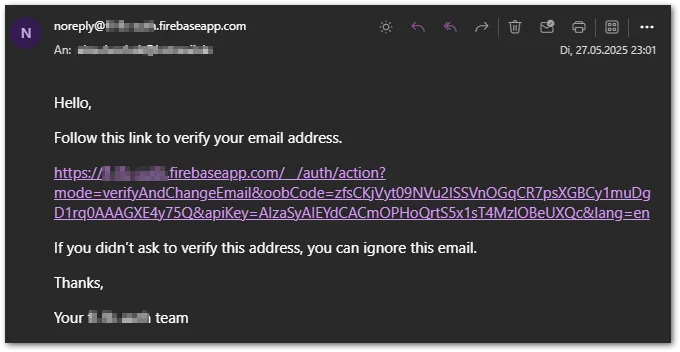
When you click the link, you should see the following eventually:

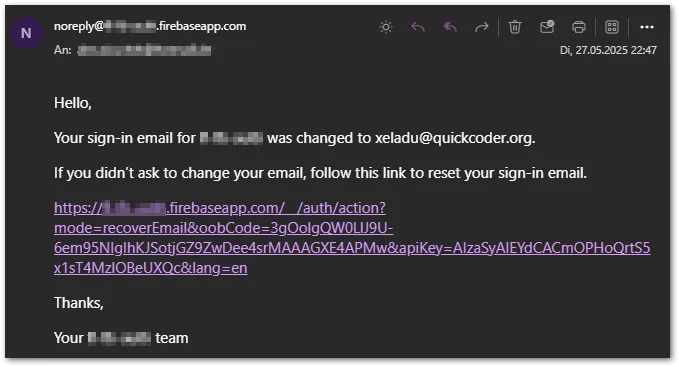
This is a security-sensitive feature. Check the section about Reauthentication for more details. You also get a confirmation email to your old email account with a recovery link in case you didn’t initiate the change and want to revert it.
Change password
Password changes are rare but the possibility should always be available.
Here is an example form:
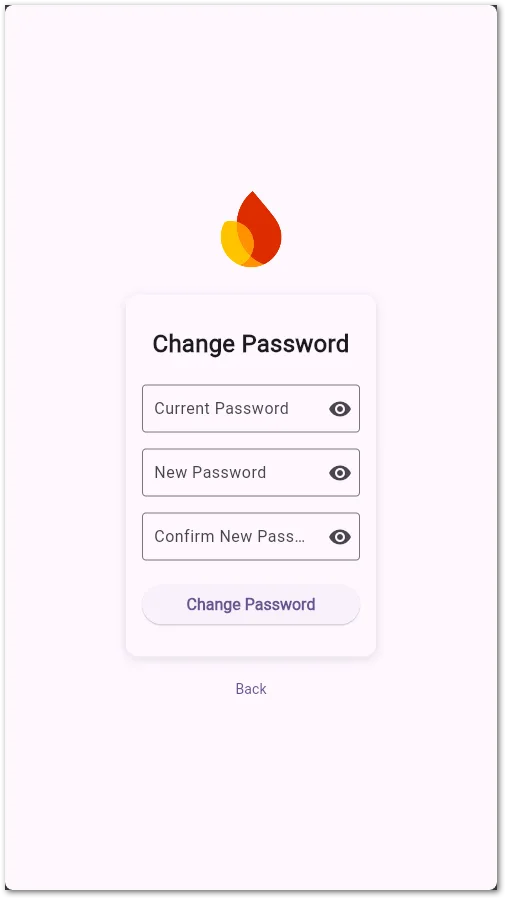
And this is the corresponding code:
final credential = EmailAuthProvider.credential(
  email: user.email!,
  password: _currentPasswordController.text.trim(),
);

await user.reauthenticateWithCredential(credential);
await user.updatePassword(_newPasswordController.text.trim());
The change will be effective immediately. When you sign in the next time, you can use your new password.
This is a security-sensitive feature. Check the section about Reauthentication for more details.
Forgot password
Give your users an option to reset their passwords in case they need it.
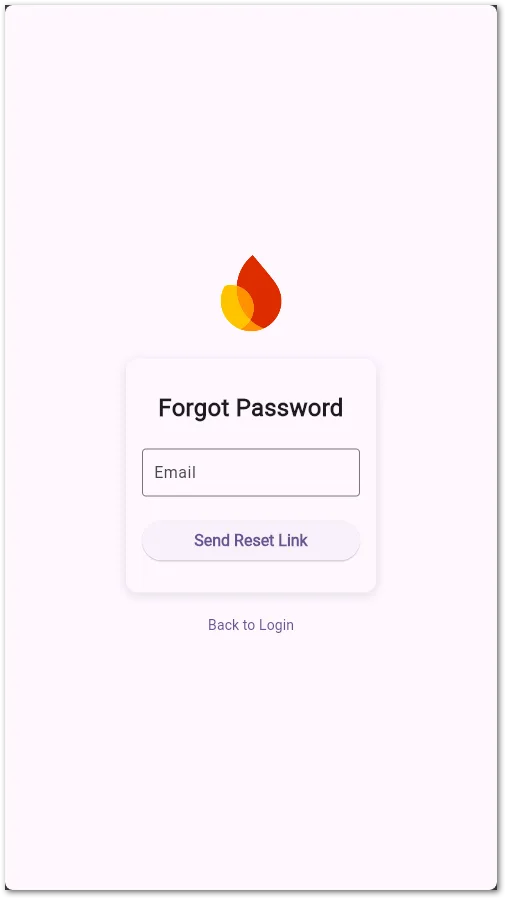
Again, the code is pretty simple:
await FirebaseAuth.instance.sendPasswordResetEmail(
  email: _emailController.text.trim(),
);
Once again, this will trigger an email with a link to click. Then, you should see this form:
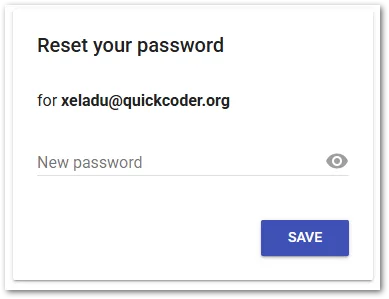
Enter a new password, hit the button, and you are done!
Delete account
It’s always a good feeling when you are in control as a user. An option to delete an account is an easy feature and also required by many data protection regulations around the world.
Here is how to delete a user (a sign out is also performed during the process):
await FirebaseAuth.instance.currentUser?.delete();This is a security-sensitive feature. Check the section about Reauthentication for more details.
A good follow-up is a Firebase Cloud Function that listens to the deletion and cleans up other Firebase resources like Firestore collections or Storage buckets.
Check out my ebook to learn more about Cloud Functions and triggers!
Reauthentication
Security-sensitive functions like changing passwords, changing email addresses, or deleting accounts require recent authentication data. If you call any of those functions and the last sign in is too far in the past (roughly 5 minutes seems to be the threshold), Firebase will return a requires-recent-login error code. In that case, ask the user to reauthenticate and execute the operation afterwards again.
// prompt user to input email and password again
final String email = ...;
final String password = ...;

final cred = EmailAuthProvider.credential(email: email, password: password);
await FirebaseAuth.instance.currentUser?.reauthenticateWithCredential(cred);
There is no option to check if reauthentication is necessary for an operation. You can only trigger the sensitive function and check the result.
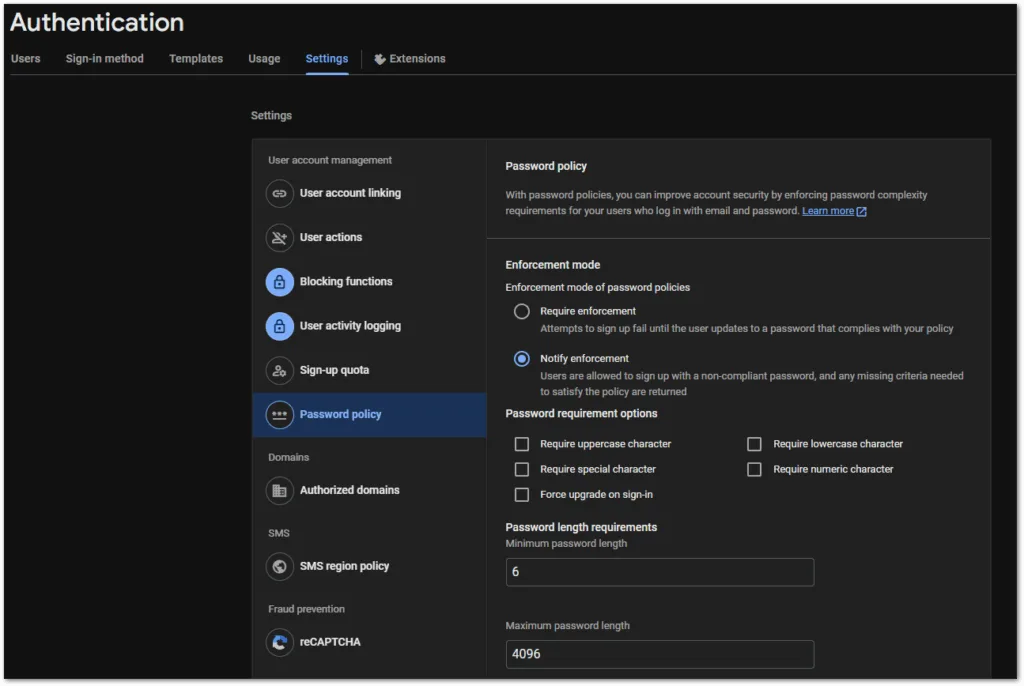
Bonus: Configure password rules
To enforce password guidelines by Firebase, go to Build > Authentication > Settings in your Firebase dashboard. There are several configuration options from minimal password length to required numbers or special characters. You can even force users to upgrade their current password on their next sign in.
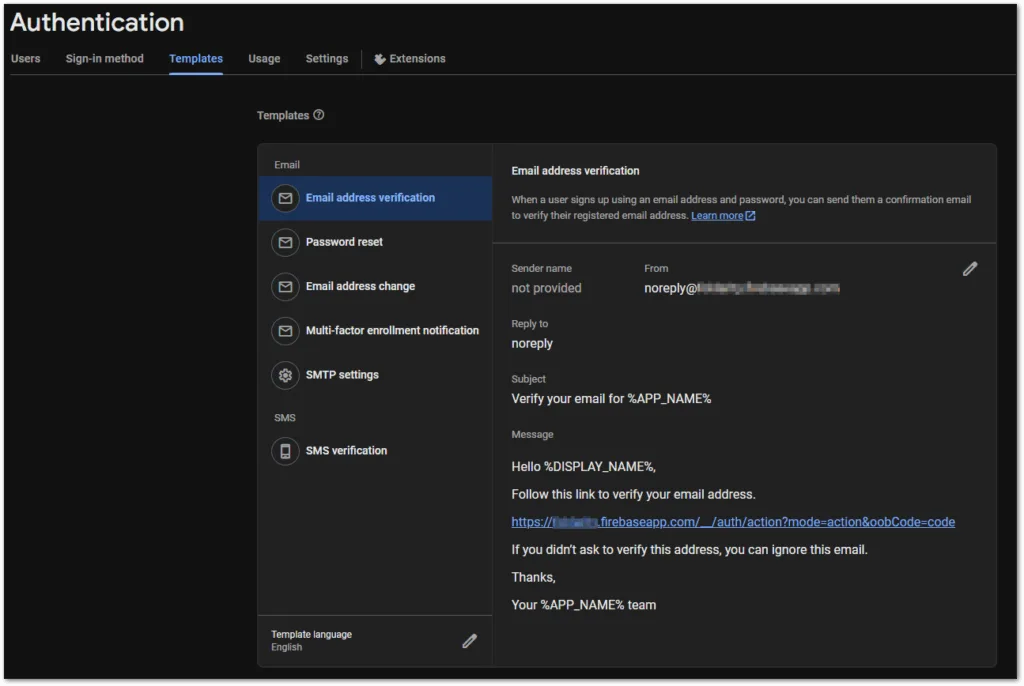
Bonus: Configure email templates
Firebase offers email templates that can partially be configured. Go to Build > Authentication > Templates for the customization. Some options are disabled, but you can change the subject or the language of the templates, for example.
There is also a setting to use a custom SMTP server instead of the built-in email service from Firebase.
Bonus: Source code
Follow this link to get the entire source code from this article. Check out the GitHub repository.
Conclusion
In this article, we explored how to build a modern Flutter app with user authentication powered by Firebase Authentication. You learnt how to implement account management methods with Firebase Authentication in the most simple way. Together with the companion app and the detailed descriptions, you should be able to implement everything on your own.
Related articles