
Introduction
Firebase is the perfect choice to add cloud capabilities to your apps. Here is how to create a Firebase project and link it with your Flutter app. Start your Firebase journey with this guide!
Firebase is a lightweight app development platform of Google offering various services like databases, authentication, messaging, and many more. It offers SDKs for different programming languages and is well-documented. In this article, you’ll learn how to create a Firebase project and link it with your Flutter app.
This article covers the following sub-topics:
- Create a new Firebase account
- Create a new Firebase project
- Create a new Firebase app
- Upgrade your billing plan
- Check your usage data
- Manage users and permissions
- Create a new budget
In case you want to know everything about Firebase and Flutter apps, check out my ebook!
Flutter ❤️ Firebase

Get started with Firebase and learn how to use it in your Flutter apps. My detailed ebook delivers you everything you need to know! Flutter and Firebase are a perfect match!
Create a new Firebase account
Setting up an account is pretty easy. Just go to console.firebase.google.com, click on Get Started, and log in with your existing Google account. Otherwise, you need to create a new one.
And that’s it! Now, you need to create your first project.
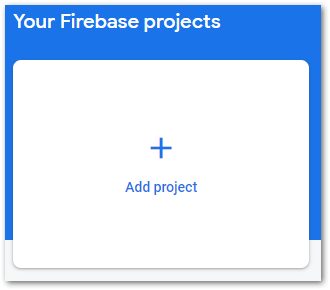
Create a new project
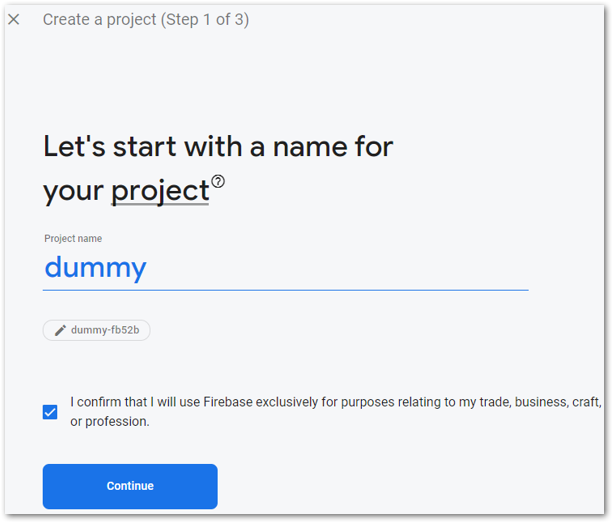
Creating a project is done within a minute. Just follow these steps and have a look at the explaining images.
1. Click on Add project in your Firebase dashboard on console.firebase.google.com
2. Choose a name for your project
3. You will be asked to enable Google Analytics but you can also disable it if you want
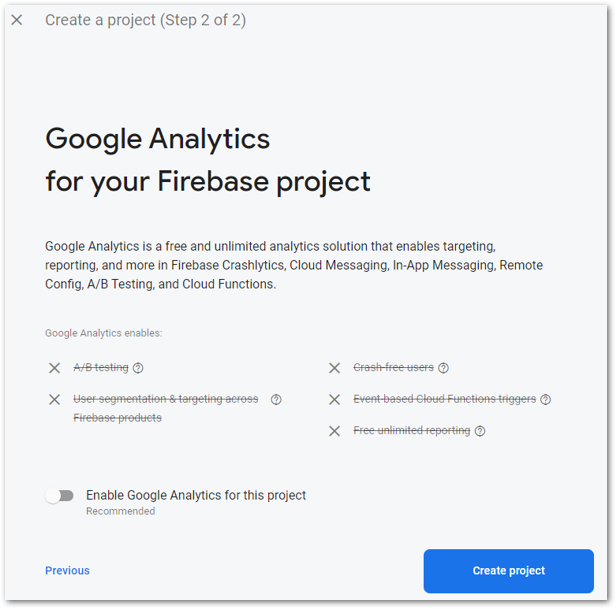
4. A click on Create project finishes the process.
Your new project will appear in the dashboard and is ready for use!
Connect your Flutter app with Firebase
To access Firebase from your Flutter app, you need to do some setup steps.
1. Install Flutter SDK and create a Flutter project

2. Install Firebase CLI tools
3. Log into your Firebase account with the firebase login command
4. Install the FlutterFire CLI with any command-line tool from any location dart pub global activate flutterfire_cli
5. Navigate to your Flutter project root folder and run the command flutterfire configure --project=<project-id> or just flutterfire configure
A file firebase_options.dart will be created in your lib folder. However, it will produce build errors. This file contains all the required information to work with Firebase. If you change your Firebase configuration (by adding a web app for example), you need to run the configuration command again.
6. Add the Firebase core plugin flutter pub add firebase_core The build errors should have been fixed.
7. Initialize Firebase from your main method.
Future main() async {
  await Firebase.initializeApp(options: DefaultFirebaseOptions.currentPlatform);
  runApp(App());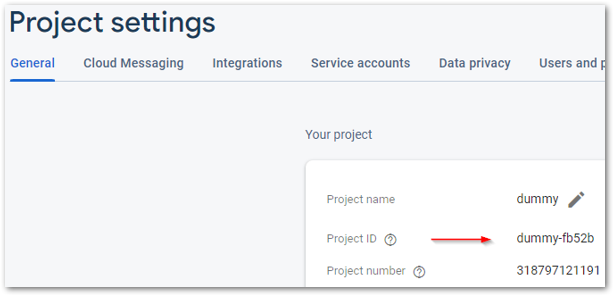
}Can’t find your project id? Look in the project settings ?
Or use the command firebase projects:list in your command-line tool.
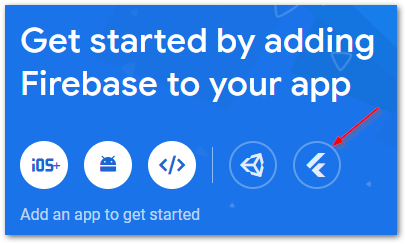
You can also use a wizard in Firebase that provides the same setup instructions. Just click on the Flutter icon when you are on your Firebase project overview dashboard.
Here is another guide on how to connect Firebase with your Flutter app.

That’s the whole magic. You can now start developing your app with available Firebase plugins ⭐
Upgrade your billing plan
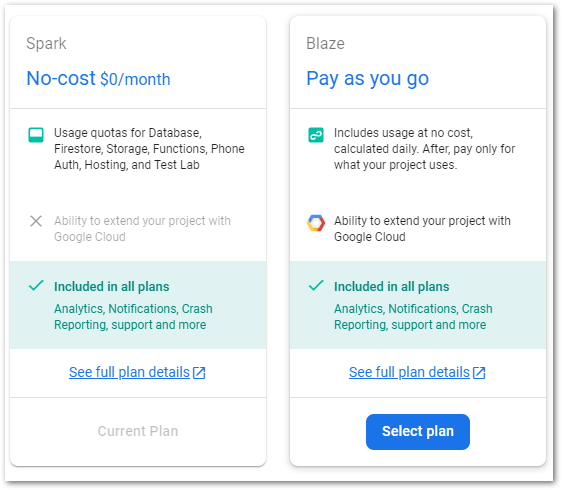
After learning how to create a Firebase project and link it with your Flutter app, we can now look at billing. By default, your account uses the Spark plan which has free usage quotas for some of the Firebase features. To enable the full potential, you need to switch to the Blaze plan. With that plan, you will be charged for usage after the free limit is reached. There are no regular base fees to pay. To compare the details of the plans, see this link.
💡 Tip
If you don’t host any web services, occupy any database storage, or use any functions of Firebase, you won’t be charged anything. There is no monthly fee.
❗
Warning
You will need to set up a billing account that requires a credit card when changing to the Blaze plan.
Follow these steps to switch your plan:
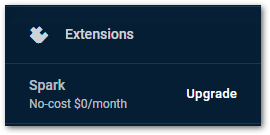
- On your Firebase project dashboard, click on Upgrade in the lower-left corner
- Click on Select Plan in the Blaze column
- Set an optional billing alert if you want and continue
- Finally, click on Purchase to complete the process
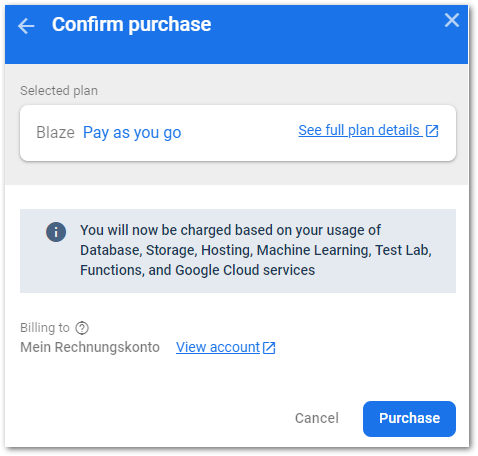
Your plan is upgraded now. You can use additional Firebase features like Machine Learning, Test Lab, or Functions.
Check your usage data
If you are going to build an app with lots of users, you need to get familiar with the usage and billing dashboard. As the Google services scale up when the load is high, your costs could be unexpectedly high. The Firebase usage and billing dashboard calculates costs per day and is a good way to keep an eye on the money.
- On your Firebase project dashboard, click on the gears and select Usage and billing from the list
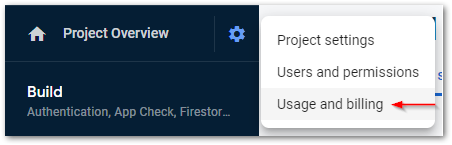
- You will see an overview of your running costs that will be charged at the beginning of the next month
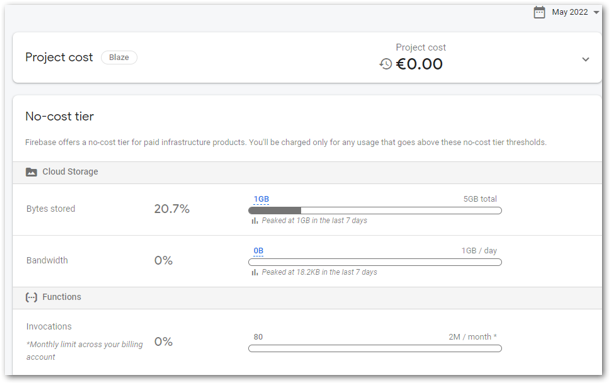
It is that simple to keep track of your current costs with Firebase ?
Manage users and permissions
To manage users and permissions, Firebase offers another dashboard in the project settings to add or remove members and assign roles to them.
- On your Firebase project dashboard, click on the gears and select Users and permissions from the list
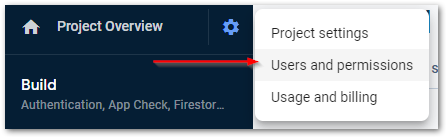
- Use the dashboard to manage members and roles. For advanced settings, there is a link to the Google Cloud Console in the lower-right corner.
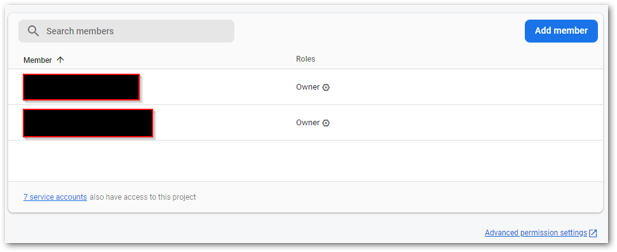
- To invite a new member, click the Add member button, and insert the mail address and the desired role.
Firebase makes user management pretty easy in my opinion.
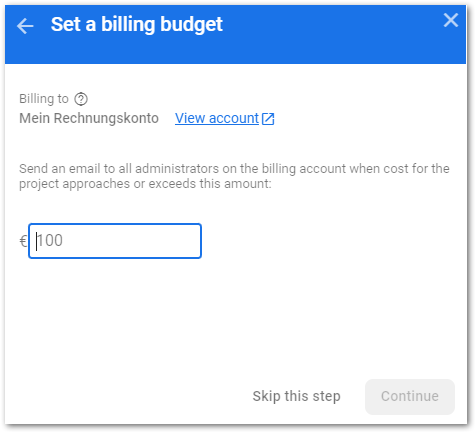
Create a new budget alert
Budget alerts are great when you don’t want to exceed a certain amount of money every month, but you also don’t want to track your costs every day. A budget alert will notify you in case an event happens (for example 90% of your budget is reached). That way you don’t have to worry about costs.
To set up one or more budget alerts, go to the usage and billing dashboard (see section Check your usage data) and switch to the tab Details & settings.
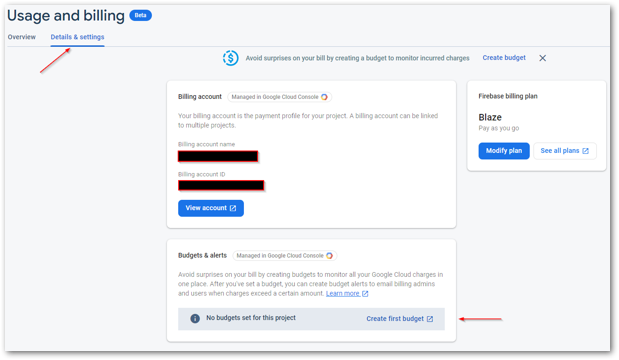
Use the button Create first budget (or View budgets if you already have at least one) to manage your budgets. You’ll be redirected to the Google Cloud Console, but the wizard is easy to understand.
Conclusion
In this article, I showed you how to create a Firebase project and link it with your Flutter app. You can now use all the powerful Firebase services to build your apps!
Related articles