

Introduction
In this article, I’ll show you how to easily use Firebase Storage from your Flutter app to read and write data. Make your app cloud-ready with this guide!
Firebase Storage is an object storage provider in the cloud to store and serve data. Possible scenarios include profile pictures for your users or documents like PDF files that are uploaded during a registration process. In this article, I’ll show you how to set it up, read and write data, and implement basic access control rules. Here is a list of the topics:
- Set up Firebase Storage
- Write data
- Read data
- Delete data
- Monitoring space consumption
- Access control
- Firestore vs Storage
- CORS fix for web
Flutter ❤️ Firebase

Get started with Firebase and learn how to use it in your Flutter apps. My detailed ebook delivers you everything you need to know! Flutter and Firebase are a perfect match!
You will need to set up a Firebase project by yourself to use these code examples here or the one from my GitHub page. If you haven’t done that already, here is an article to guide you through the necessary steps.

Set up Firebase storage
The first step is to install the package firebase_storage. After that, you need to set up a bucket where your data is stored. Think of a bucket as a root folder in a file system. This can be done via the Firebase Console dashboard.
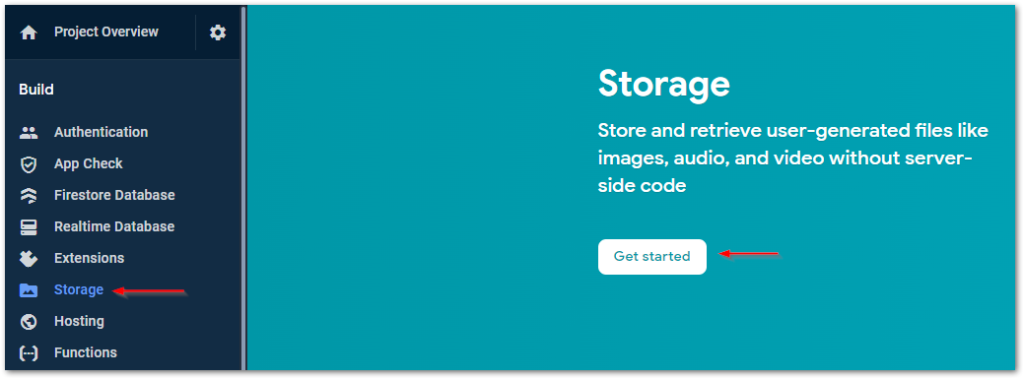
Go to Storage → Get Started
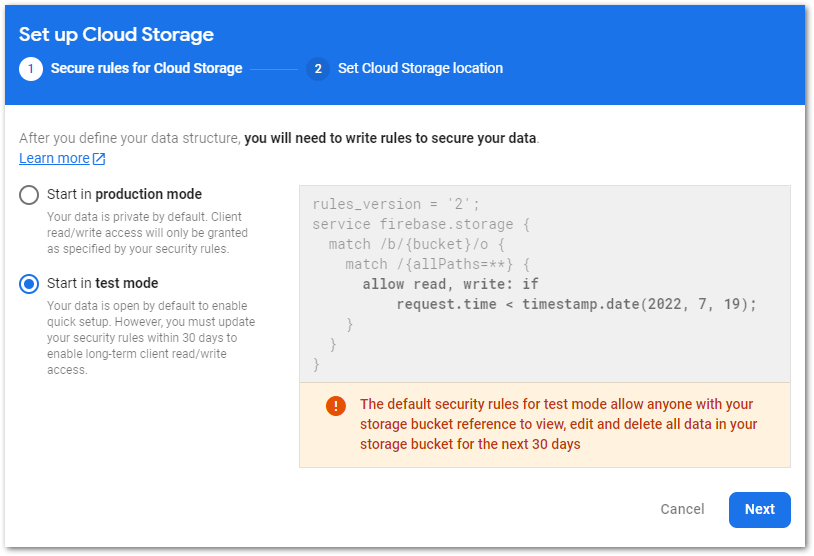
Select Start in test mode and click Next (we will come back to access control later)
Choose your desired location and confirm with Done. To get an overview of locations and what their benefits are, click here. I recommend choosing the location of your target user audience if possible.

A default bucket will be created where you can store your data. It is also possible to add further buckets.
Setup complete, let’s play with some data!
StorageReference
The first step is to get a StorageReference object pointing to a file (item) or directory (prefix) in our bucket. You can navigate through a reference tree with the child() method and the root and parent properties. Google Cloud Storage URIs and HTTPS URLs are also supported when creating references.
Read data
Let’s assume we have a bunch of files stored in our bucket at the root level and we want to download them. The following code grabs 5 items found at the storage reference, downloads the content, and reads the metadata object.
To control how many results are grabbed, you can use the ListOptions object. There is a maxResults and a pageToken property. getData() fetches the content as a byte array, getMetadata() gets enhanced file information, and getDownloadURL() returns a string that points to the file (or folder). If you want to handle folders, use files.prefixes instead of files.items.
Write data
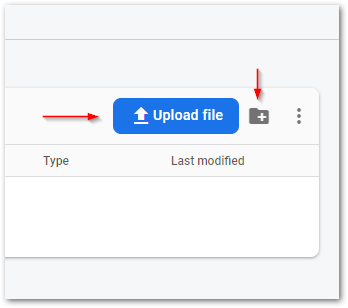
But how do we get data into our storage bucket? The first way is to use the dashboard. There are buttons to upload files and create folders.
However, as we are programmers, we like to do things with code. And here is a quick example of how to upload a file.
We use a Reference and the putFile() method to upload a File object. targetName can also be a path with a file name, it will then be created at the corresponding subfolder location. FilePickers are most often used to get files, but you can also create and write them yourself.
The putFile() method returns an UploadTask object that allows us to monitor and control the upload process.
This example listens to the event stream and updates a progress label while the task is in progress. The UploadTask object also has methods to pause, resume, or cancel the action. For longer-running operations, you have quite the tools to notify the user of what’s going on.
Delete data
Deleting is very simple. Get a reference to an item (file) or prefix (folder) and call the delete() method. Pretty easy, hm?
Monitoring space consumption
To monitor your current space consumption, head over to your Firebase Storage Usage dashboard. The data is updated daily and you get a free tier before any costs arise.
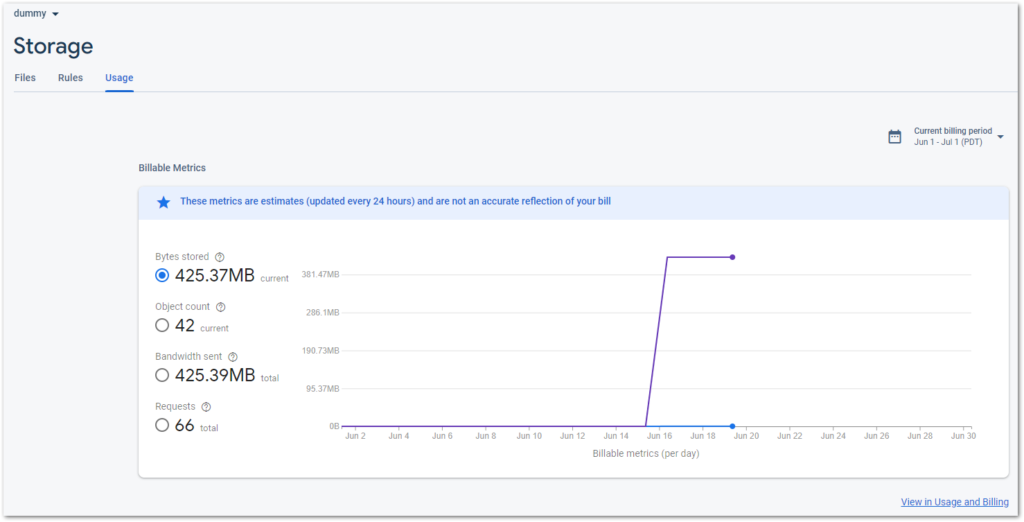
You might be wondering why there is already so much space occupied though you haven’t done anything with the database yet. A probable answer is that you deployed one or more cloud functions. You can’t see these buckets in Firebase, they are only visible if you use the Google Cloud Console. Don’t delete these buckets, if you have active cloud functions!
Click here for more details on why you could be charged some cents though everything seems within the free quota of Firebase.
Access control
I already wrote about it in my article covering Cloud Firestore. Here is a little recap since the pattern is identical.
Access control ensures that only those operations happen on the data that are supposed to happen. There are various options to configure rules, but I’ll give only a brief introduction. For further details, refer to the Firebase documentation or the following two articles.
Your current rule will look similar to this:
rules_version = '2';
service firebase.storage {
  match /b/{bucket}/o {
    match /{allPaths=**} {
      allow read, write: if false;
    }
  }
}
The first line identifies the used service because rules can also apply to Cloud Firestore and Realtime Database. The following match statement(s) identify for which path(s) the rule should be enforced. You can nest multiple match statements or just use one. The allow statement tells us under which condition(s) access is allowed. After the allow keyword, you can add multiple methods like read and write. The following methods are available:
- get — read single documents
- list — read queries
- create — write new documents
- update — write existing documents
- delete — delete data
- read — get + list
- write — create + update
match statements often use wildcards. Text in curly brackets like {bucket} is a single-segment wildcard and can be used in conditions, for example. To make the wildcard recursive, add two star characters {allPaths=**}.
The rule above denies all read and write access to all paths in all buckets.
Here are some common rule conditions that you can use:
allow read, write: if false; // no access

allow read, write: if request.auth != null; // access when authenticated

match ... {
  allow read: if true; // read access for everyone
  allow write: if request.auth != null; // write access when authenticated
}
A good rule to start with should check for authentication. That way, you will prevent any other party than your app from accessing the data. If your application gets bigger, the rules also get more complex.
Firestore vs Storage
When to use what?
Firebase Cloud Firestore is a NoSQL database intended for storing data like strings, numbers, bools, or complex JSON objects. Firebase Storage is intended to store bigger data chunks like images, PDF files, videos, or user-generated content in general.
To store an image in Firestore, you’d probably try to convert it into a Base64 string and then insert it into the database. But Firestore has limits that prevent these approaches. So don’t bother trying and just go with Storage.
CORS fix for web
If you are on the web platform, downloads won’t work because of a CORS error. To fix this, you need to install the Google Cloud CLI and set a CORS rule for your bucket. Create a file cors.json and fill it with the following content:
[
  {
    "origin": ["*"],
    "method": ["GET"],
    "maxAgeSeconds": 3600
  }
]
To deploy, use the following command:
gsutil cors set cors.json gs://<your-cloud-storage-bucket>
After that, the error won’t occur again. For more details, read the documentation.
Conclusion
Firebase Storage is a fast, easy, and simple way to allow your users to store their content. With this article, you should know how to easily use Firebase Storage from your Flutter app to read and write data. Here is a short demo video of the source code.
You can find the complete example source code on my GitHub page.
Related articles
