How To Work With Firebase Cloud Functions In Flutter Apps
Introduction Link to heading
In this article, I will demonstrate how to work with Firebase Cloud Functions in Flutter apps in the most simple way. This is your entry into the world of cloud computing!
Firebase Cloud Functions is a service from Google that enables you to execute code in the cloud. A major benefit is scalability. If your app has many users, you won’t have a bottleneck when using Firebase. I will show you how to work with Firebase Cloud Functions in Flutter apps in the most simple way. The following sub-topics will be covered in this article:
-
Setting up Firebase and your app
-
Initializing cloud functions
-
Writing a cloud function
-
Deploying a cloud function
-
Calling a cloud function
-
Functions as HTTP request endpoints
-
Scheduled functions
-
Regions
-
Logging
Setting up Firebase and your app Link to heading
At first, you need to set up Firebase and connect it with your app. Have a look at the following article for details about that.

How to create a Firebase project and link it with your Flutter app Link to heading
If you need some cloud services for your apps, Firebase might be a good choice. In this article, I’ll show you how to create a Firebase project and how to link it with your Flutter app.
The next step is to install the Firebase Cloud Functions package. Add it to your pubspec.yaml or use the command line. If you need further instructions, read the installation manual or the following article.

How to install packages in your Flutter app Link to heading
This short article shows how to add packages to a Flutter application so that you can use existing code and you don’t have to write everything yourself.
The setup is completed. You can now start writing your functions.
Initializing cloud functions Link to heading
Log in with Firebase by running the command firebase login. Afterward, run the command firebase init functions from your project root directory. The tool will ask some questions that you need to answer. I’ll give you an answer workflow example.
-
Are you ready to proceed? → Yes
-
Please select an option: → Use an existing project
-
What language would you like to use to write Cloud Functions? → JavaScript
-
Do you want to use ESLint to catch probable bugs and enforce style? → No
-
Do you want to install dependencies with npm now? → Yes
After successful completion, you will find a new functions folder in your project structure.
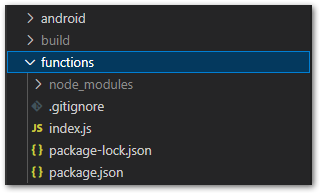
Screenshot of functions folder after initialization by author
The next step is to write the actual code that will be executed in the cloud.
Writing a cloud function Link to heading
Our demonstration code will be a function that expects a string as an argument and converts the input into upper case. It’s very simple but it should give you an idea of what you can do and how you can achieve it.
We open the index.js in the functions folder and write the following code:
We define a callable method called toUpperCase with two parameters. data contains the string we want to transform and the second parameter is a CallableContext that we won’t need in this example. Then we use the built-in toUpperCase method of JavaScript and return the result. Easy as that!
💡
Tip
Your code should be idempotent! This means it produces the same result even when it is invoked multiple times. Make sure to stick to that pattern because it will allow you to retry failed executions very easily.
💡
Tip
You can also use TypeScript or Python as a programming language.
Deploying a cloud function Link to heading
Deployment is pretty simple, just run the command firebase deploy --only functions and wait for the process to finish. It can take up to 5 minutes till your dashboard is updated. The dashboard also provides information about logs and the utilization of your functions.
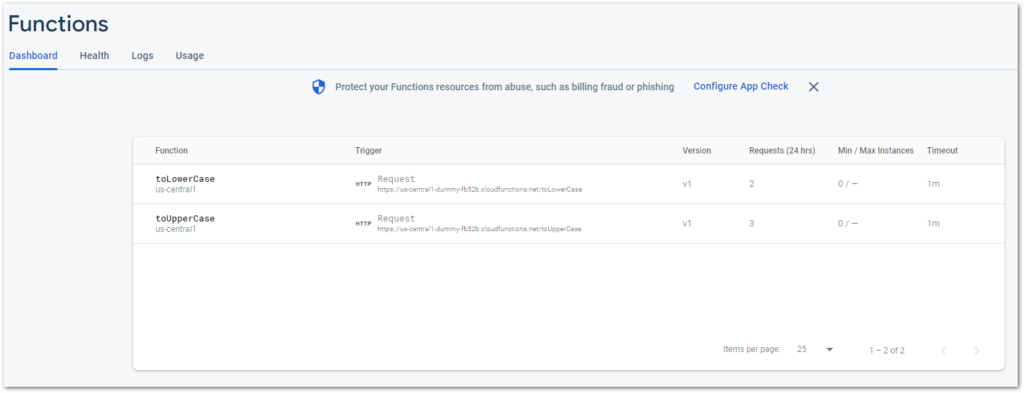
Screenshot of Firebase functions dashboard by author
Calling a cloud function Link to heading
A callable function can be identified by the onCall((request) => {...}); method. The Firebase dashboard doesn’t distinguish between callable functions and HTTP endpoints, both triggers show “Request” as a type. To call a function with the name toUpperCase(), have a look at the following code example:
HTTP request endpoint Link to heading
With the code onRequest((request, result) ⇒ {...}); you can define an HTTP endpoint that other web services can call on demand. That way you can define interfaces for 3rd party software to operate with your data or logic. You don’t even need the Firebase package to call endpoints, but something to create requests like http or Dio. Have a look at the example code:
💡 Tip
You need to replace the link to the function with your deployed version!
I also created an article with demo code on how to create and send HTTP requests in Flutter that might be helpful if you are not familiar with the topic.
How to make HTTP requests with Flutter and parse JSON result data Link to heading
This short article shows how to perform HTTP requests from a Flutter application. We have a look at the most common request types GET, POST, PUT, and DELETE.
❗
Warning
A HTTP endpoint can be accessed by anyone by default. Make sure to implement safety measures like an authorization token. Click here for an official example of how to secure your endpoints.
Scheduling a function Link to heading
It is also possible to schedule the execution of a function. The interval or timeframe can either be described with the App Engine cron.yaml syntax or with the good old Unix crontab syntax. The following code example defines a function that is executed every 10 minutes.
The next example works with Unix crontab syntax and defines a timezone. Click here for a list of all supported timezones.
Regions Link to heading
Firebase uses different regions that affect pricing and latency. You can specify your desired region with the region property and a valid region name as a parameter. It works similar to the time zone and schedule properties in the earlier code examples. Example: region: ”europe-west3”. Click here for a list of all available regions. I recommend using the nearest region to your location. You can also pass multiple regions separated by commas to the function.
Logging Link to heading
To monitor the execution of functions, you can use logging. The output will be visible in your Firebase Functions dashboard.
JavaScript
const { log, info, debug, warn, error, write } = require("firebase-functions/logger");

log("log:", someObj);
info("info:", someObj);
debug("debug:", someObj);
warn("warn:", someObj);
error("error:", someObj);
write("write:", someObj);
Further details about logging can be found in the official documentation.
onCall() or onRequest()? Link to heading
Callable functions and HTTP functions are quite similar. A callable function is an HTTP function with special request parameters. The main differences are that authentication tokens for Firebase and Firebase Cloud Messaging as well as App Check tokens are automatically included in the request if available. In addition, a callable function validates these tokens by default. This means you get authentication features for free if you use the onCall() method of the Cloud Functions package.
As stated before, HTTP functions don’t have any access control features integrated by default. You have to do it on your own. But it is also true that you can execute a callable function with an HTTP request if you provide the correct data. For further details, read the documentation here.
✅ Go with callable functions if your app is the only consumer
✅ Go with HTTP functions if you have 3rd party consumers (for example a public REST API) but make sure to implement access control and other security mechanisms.
Conclusion Link to heading
In this article, I showed you how to work with Firebase Cloud Functions in Flutter apps in the most simple way. Firebase Cloud Functions provide an easy way to use external computation power in your Flutter app. Here is a short demo video of the source code.
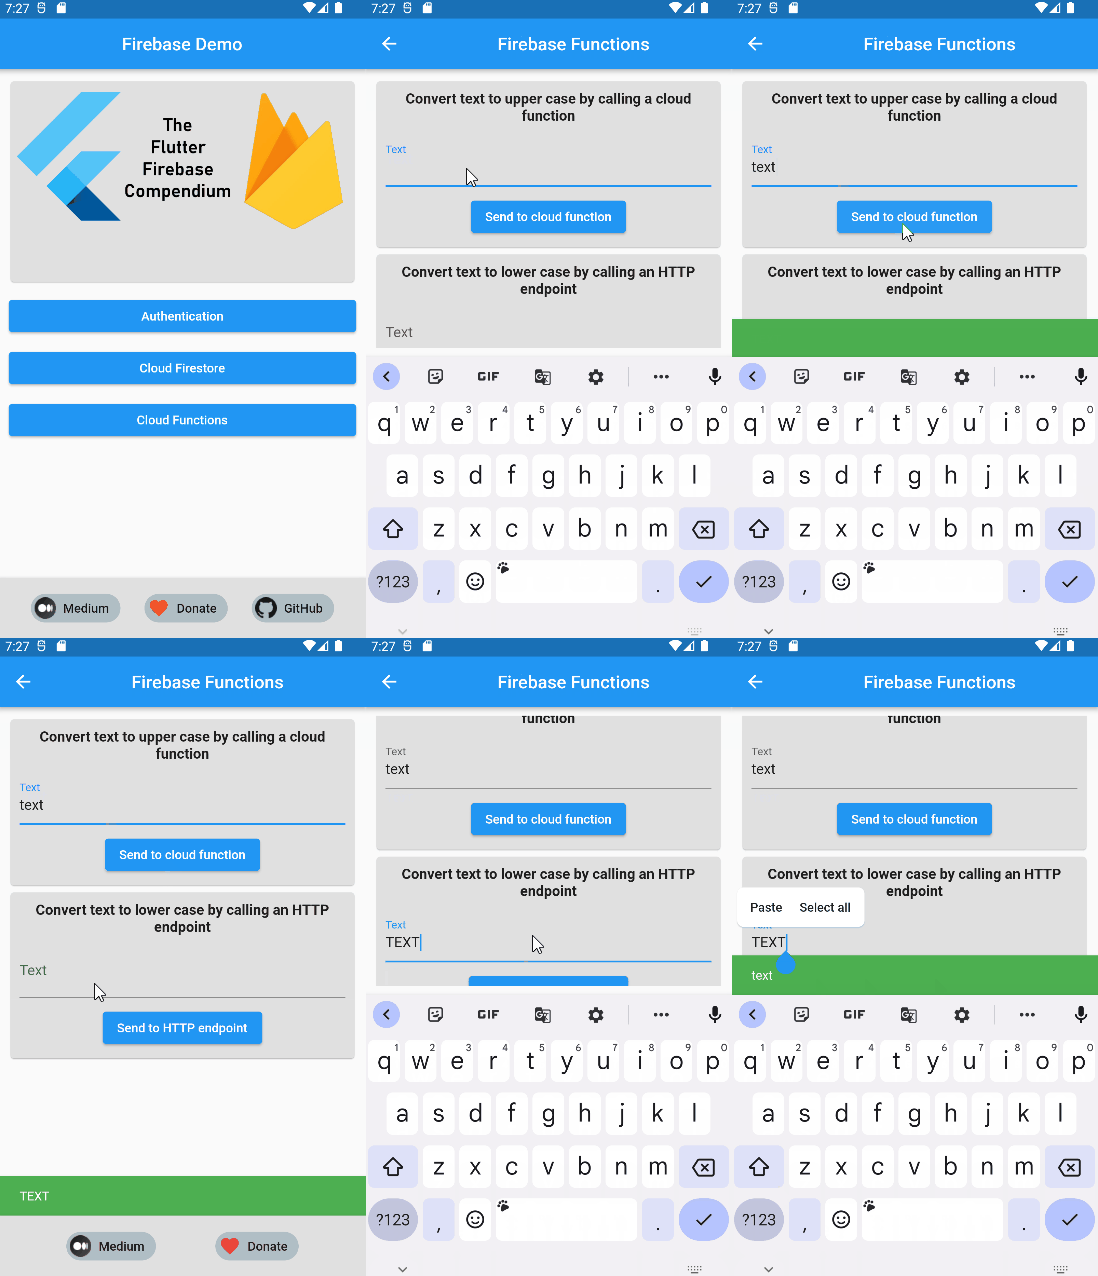
Firebase Cloud Functions demo by author
You can find the complete example source code on my GitHub page.
GitHub - xeladu/flutter_firebase: A Flutter demo app to interact with various Firebase services Link to heading
A Flutter demo app to interact with various Firebase services - GitHub - xeladu/flutter_firebase: A Flutter demo app to interact with various Firebase services
Related articles Link to heading
How To Host Your Flutter Web App With Firebase Hosting Link to heading
Here is how to host your Flutter web app with Firebase Hosting. This article guides you through all the steps needed. This service is free of charge!
How To Create A Firebase Project And Link It With Your Flutter App Link to heading
Firebase is the perfect choice to add cloud capabilities to your apps. Here is how to create a Firebase project and link it with your Flutter app. Start your Firebase journey with this guide!
How To Use Firebase Authentication In Your Flutter App Link to heading
Here is how to use Firebase Authentication in your Flutter app to authenicate your users without any effort. Don’t bother building your own authentication service and use this proven service instead!