Introduction
This short article shows how to create a new Flutter project in 3 different ways, so you can start working on your app. Here is how to do it with Visual Studio Code, Android Studio, and the command line.
I will show you three ways how to create a new Flutter project. You can do it with the IDEs Visual Studio Code or Android Studio or by using the command-line tool from the Flutter SDK. You need to have the Flutter SDK installed, otherwise non of these tips will work. To install the Flutter SDK, see the Flutter homepage.
Visual Studio Code
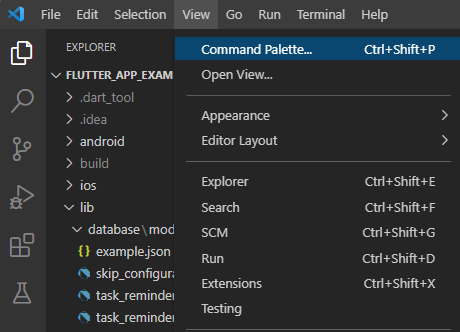
- Go to View ▶ Command Palette…
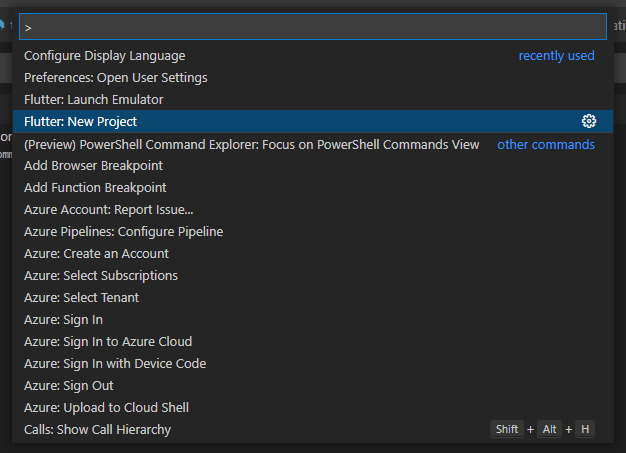
- Enter or select Flutter: New Project
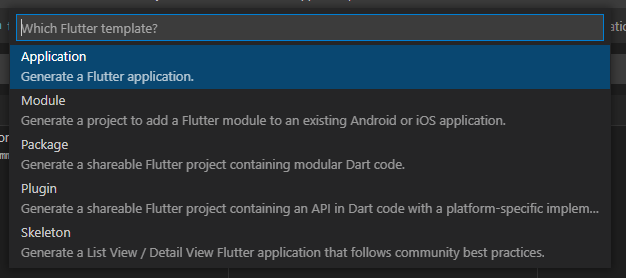
- Select the project template Application.
- Follow the guide until the end
Your project will be created at the desired location and Visual Studio Code will open it immediately.
Want More Flutter Content?

Join my bi-weekly newsletter that delivers small Flutter portions right in your inbox. A title, an abstract, a link, and you decide if you want to dive in!
Android Studio
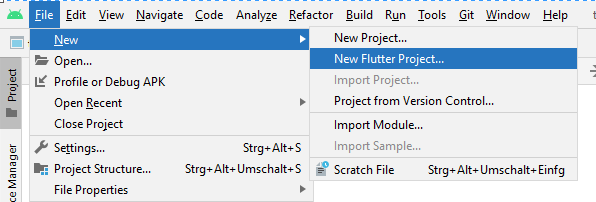
- Go to File ▶ New ▶ New Flutter Project…
- Make sure the Flutter SDK path is found and correct.

- Define additional project settings and click Finish.
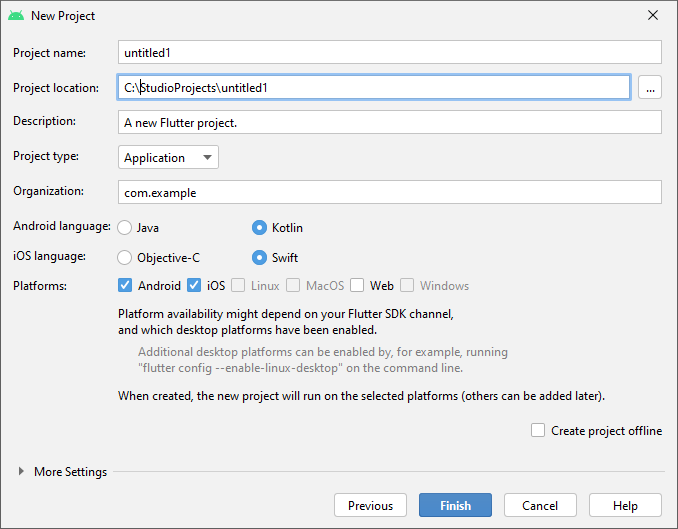
Your project will be created at the desired location and Android Studio will open it immediately.
Command-line
- Open any command-line tool (like CMD on Windows)
- Run the command
flutter create testproject. It will create a folder called testproject at the current location and put all the app code inside this folder.
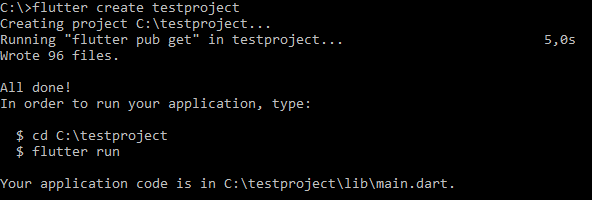
- To customize your new project, see
flutter create --help. There are many options to set for your project. However, the default settings should be fine for most of the cases.
Conclusion
With this guide, you should be able to create new Flutter projects and start developing your apps. For more information about packages go to the official Flutter documentation.
Related articles


