Introduction
Here is how to control apps with Firebase Remote Config without the need to release a new update for your apps. You can also do A/B testing and create feature flags with this service!
Wouldn’t it be great if you had some control over your apps after they are distributed via a store? You could disable a feature that still has flaws. Or your users could be part of a limited group of A/B testers. Or you might want to show a different ad banner in your app without releasing a new version. All these scenarios (and many more) are possible with Firebase Remote Config. I’ll show you how to set it up in Firebase and your app code. There will be a complete code example available at the end. Here is how to control apps with Firebase Remote Config from the backend.
Flutter ❤️ Firebase

Get started with Firebase and learn how to use it in your Flutter apps. My detailed ebook delivers you everything you need to know! Flutter and Firebase are a perfect match!
What is Firebase Remote Config?
Firebase Remote Config lets you define parameter values in the Firebase Console. The supported data types are String, Boolean, Number, and JSON. Your app fetches these values and handles them by enabling or disabling a feature, for example. It gives you the possibility to change the behavior of your app without a new release.
❗
Warning
Do not store any secrets or confidential data in Firebase Remote Config!
App setup
First, install the Firebase Remote Config package into your application with flutter pub add firebase_remote_config. In a later section, we’ll talk about conditions and targeting of specific user groups and app instances. This requires Firebase Analytics to be installed, too (flutter pub add firebase_analytics). That’s it ?
You can then define the connection settings with the backend. A good starting point is the main function after Firebase is initialized. We also need to define default values. If the Firebase backend is not reachable (e. g. device is not connected to the internet), these values will be used instead. Always make sure your app runs in such error cases, too.
To get remote values, use the provided functions getBool(), getDouble(), getInt(), or getString(). Use these values to trigger a special behavior in your app. We will later define a string with the key platformString in Firebase. To get the value, the following code can be used (use a StatefulWidget and its initState function).
Your app code is complete. In the next section, we’ll define the values that are to be downloaded to your app in the Firebase Console.
Create parameters with conditions in Firebase
Log into your Firebase account at https://console.firebase.google.com.
💡 Tip
Do you already have a Firebase project? If not, follow my setup article below with all steps in detail!
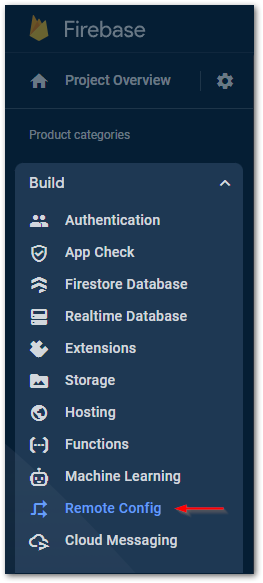
Go to Remote Config in the Build menu.
🔔 Hint
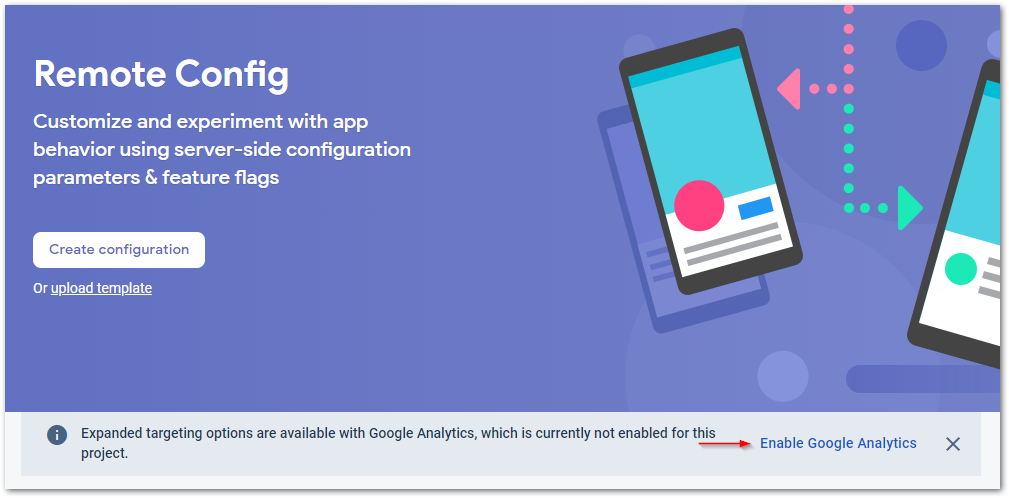
Make sure to enable Google Analytics for your Firebase project if you haven’t done it already during the initial setup. The Firebase Console will notify you in case it is not activated yet (see image below).
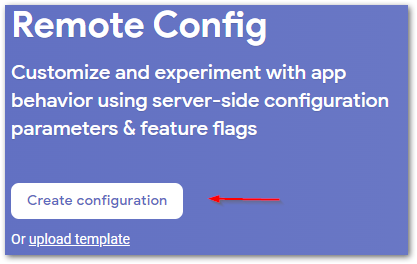
Click in Create Configuration next.
Now, you can create parameters and conditions. Conditions are a mechanism to identify groups of app users with common properties. You can provide different values to different groups based on conditions. iOS users might get a grey app background while Android users will have a blue background, for example. Follow these steps to create a parameter with conditions.
Go to the Conditions tab and click on Add condition. Select a name and define a condition. In this example, I created a condition that applies to all Android users.
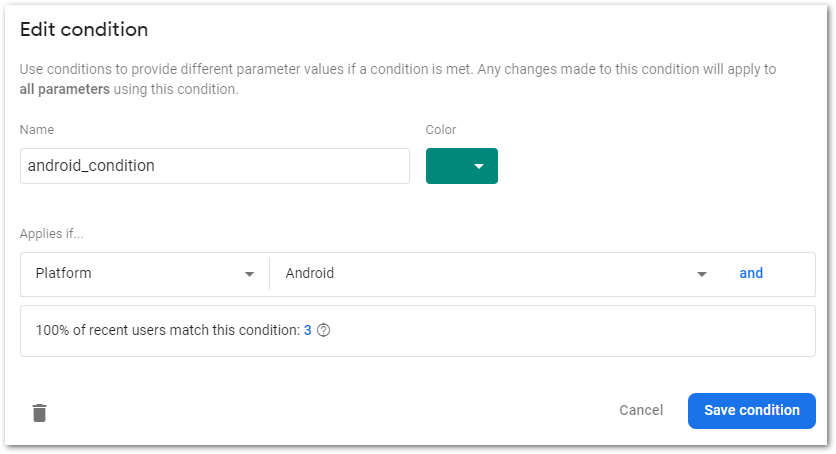
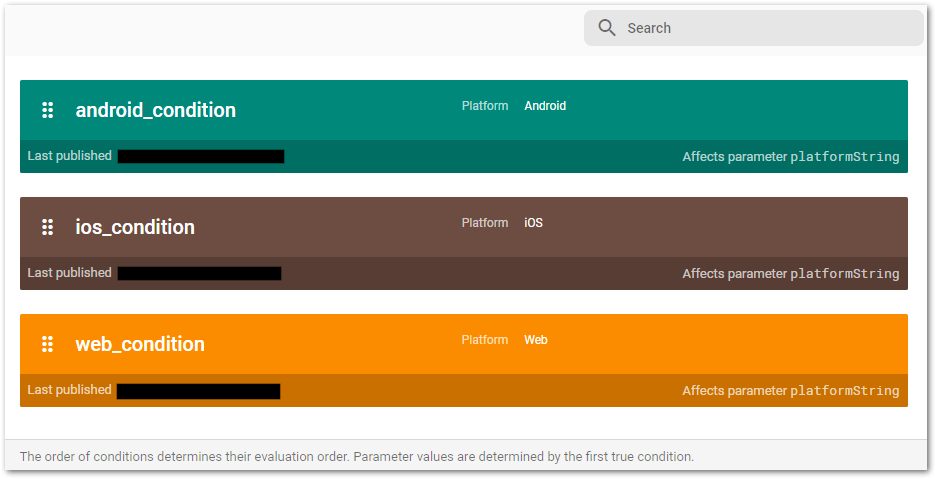
In total, I created 3 conditions for Android, iOS, and web. It should look like in the image below.
Let’s move on to the Parameters tab to create a parameter with our conditions. Click on Add parameter to create a new one. The key is platformString and it will be used by our app code to fetch the value. Add 3 conditional values and assign the previously created conditions to them. You can define output values or rely on in-app defaults if they are set. Have a look at the following image about how to create a parameter.
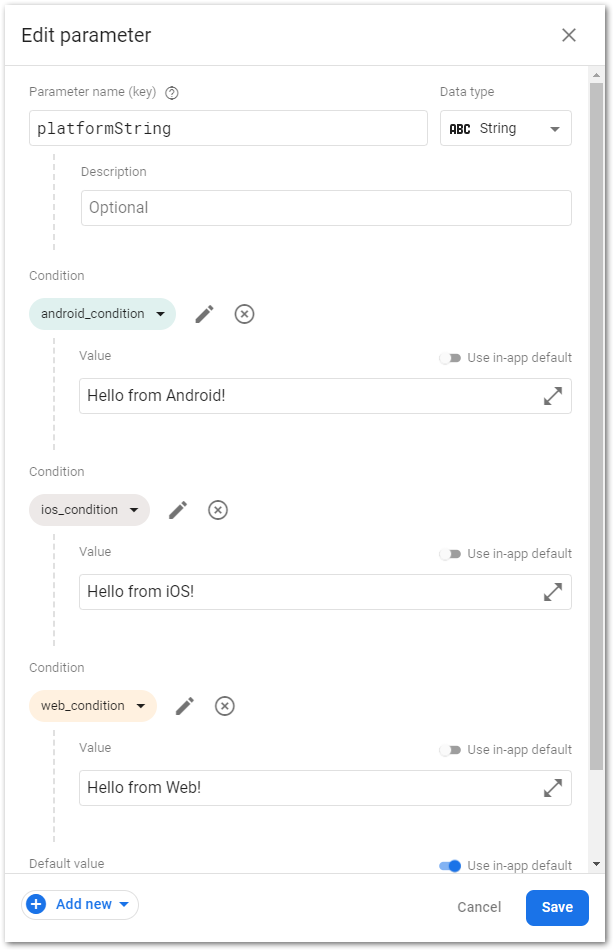
After a click on Save, you should see something like this in your overview.

An app using this parameter will output “Hello from Android!” on Android phones, “Hello from iOS!” on iPhones, and “Hello from Web!” on the web platform. On any other platform, the in-app default value will be used (we set it to “Hello!” in the previous section).
When confirming the changes, they will be available immediately. But users will have to wait until their fetch interval is reset until they receive new values (see the section about fetch intervals).

Let’s verify the correct functionality by running our app. You should see results like in the image below.
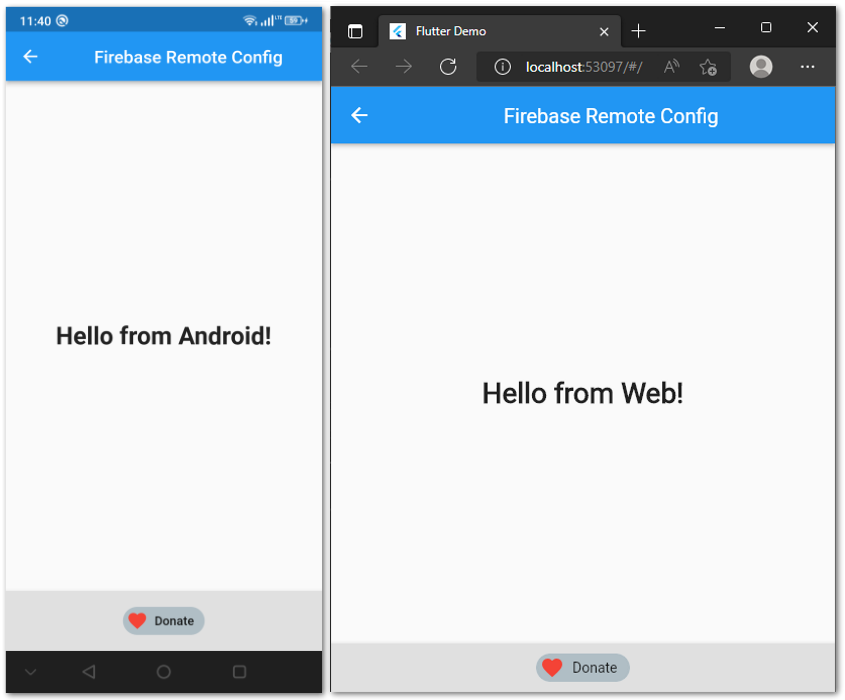
Congratulations, your Firebase Remote Config setup is completed and working! ?
Fetch intervals
The minimumFetchInterval property of the RemoteConfigSettings object defines the period in which follow-up calls to Firebase Remote Config will be ignored. There is a server-side limit, so setting the value too low might result in reaching that limit very quickly with many users. The default value is 12 hours but it makes sense to use lower values like 1 minute during development. Just make sure to only use it in development mode.
Loading strategies
The Firebase docs recommend 3 different loading strategies.
- Fetch and use
Download the values and update the relevant app parts immediately. This is only suitable if there are no big UI changes involved that could confuse users while they are using the app. - Fetch and use with loading screen
Display a loading screen and download the values in the background. This is useful if the values might drastically change the UI or show/hide essential features. Make sure to discard the loading screen after a certain time period even if the download hasn’t finished yet. Users usually don’t accept long app startup times. - Fetch and use with next app start
Activate previously fetched values on app start. Run an asynchronous call to Firebase Remote Config while the user is working with your app but don’t activate the fetched results. When the user starts the app for the next time, the fetched values will be activated.
Advanced options
There is a Remote Config REST API that you can use to add, delete, or modify values and templates in Firebase Remote Config without using the Firebase UI. If you are developing an additional tool to manage your A/B tests, you could use the REST API with your tool to change parameters for user groups for example. The Firebase docs provide a good overview to get started with.
Conclusion
In this article, you learned how to control apps with Firebase Remote Config without the need to release a new update for your apps. Firebase Remote Config provides an easy way to control your app even without a new release. You can load data at runtime and trigger a special behavior in your app.
You can find the complete example source code on my GitHub page.
Related articles
