
Here is everything you need to know about working with the Firebase Console. User management, app creation, cost monitoring, and more!
The Firebase Console is the central hub for all Firebase services. Additionally, there are also some project management tasks that can be done with it.
The ultimate guide for working with the Firebase Console explains everything you need to know about the following use cases:
- Adding apps
Connect iOS, Android, Web, Unity, or Flutter apps to your Firebase project. - Removing apps
Remove connected apps again. - Managing users
Invite new people, change their roles, or remove them from the project. - Switching billing plans
Prevent costs with the free plan or enable all features and pay for what you use. - Monitoring expenses
Keep track of what service generates what costs. - Creating budget alerts
Get notified when your budget is exceeded. - Deleting a Firebase project
In case you like Azure or AWS more ?
Want More Flutter Content?

Join my bi-weekly newsletter that delivers small Flutter portions right in your inbox. A title, an abstract, a link, and you decide if you want to dive in!
Add apps to a Firebase project
Adding apps to a Firebase project can either be done with the Firebase Console or with the Firebase CLI tools. Here are both ways, so you can choose your preferred one.
Firebase Console
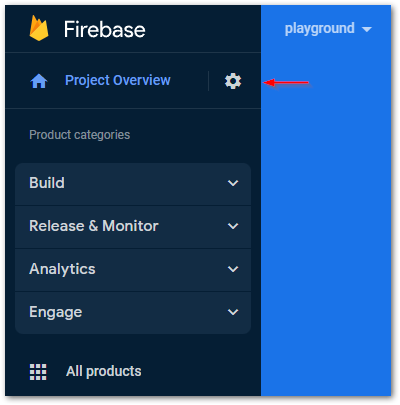
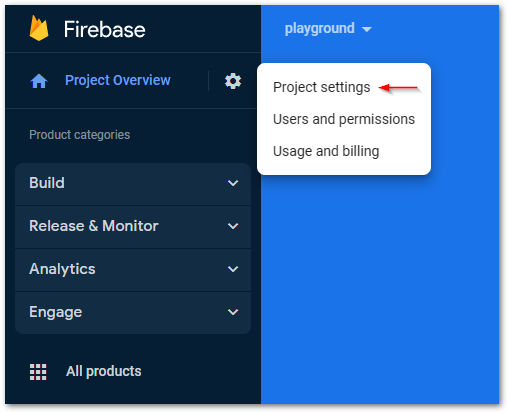
In the Firebase Console, click on the gears icon next to the Project overview menu entry in the Firebase menu on the left.

Then, select Project settings from the popup menu.

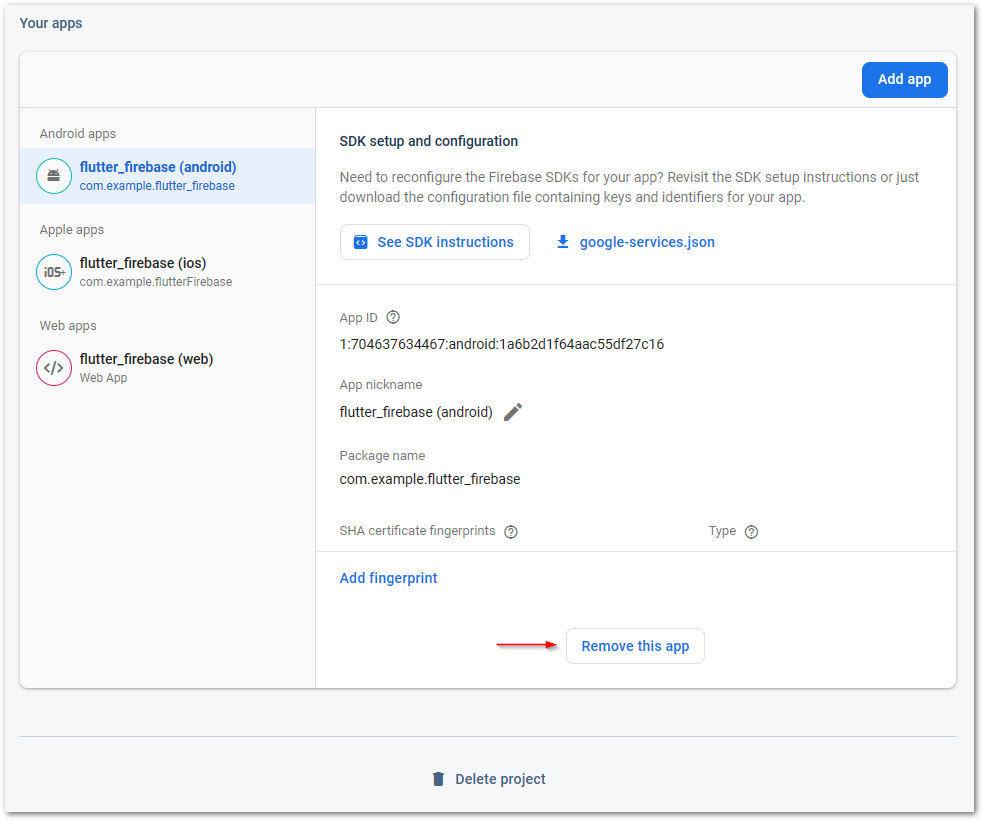
At the bottom you can find your existing apps grouped by platform.

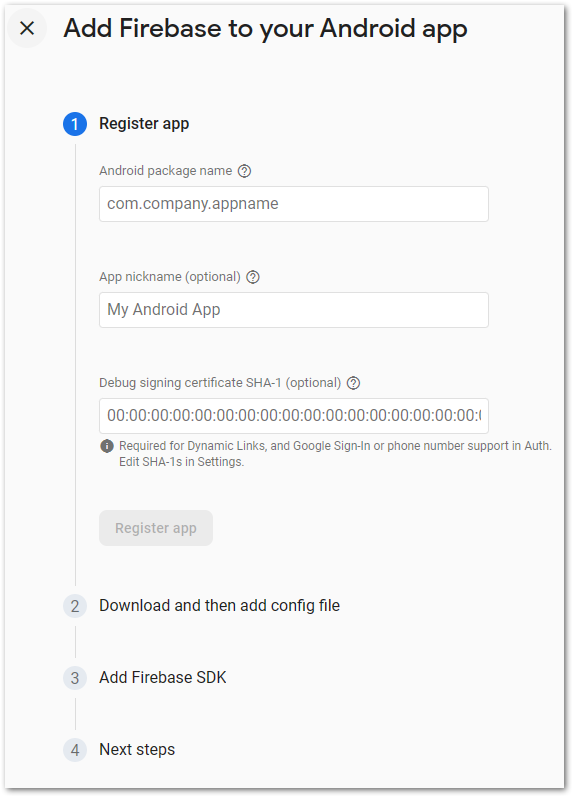
To add a new app, click on the button Add app, choose your desired platform, and follow the setup instructions. After that, a new app appears in your list.
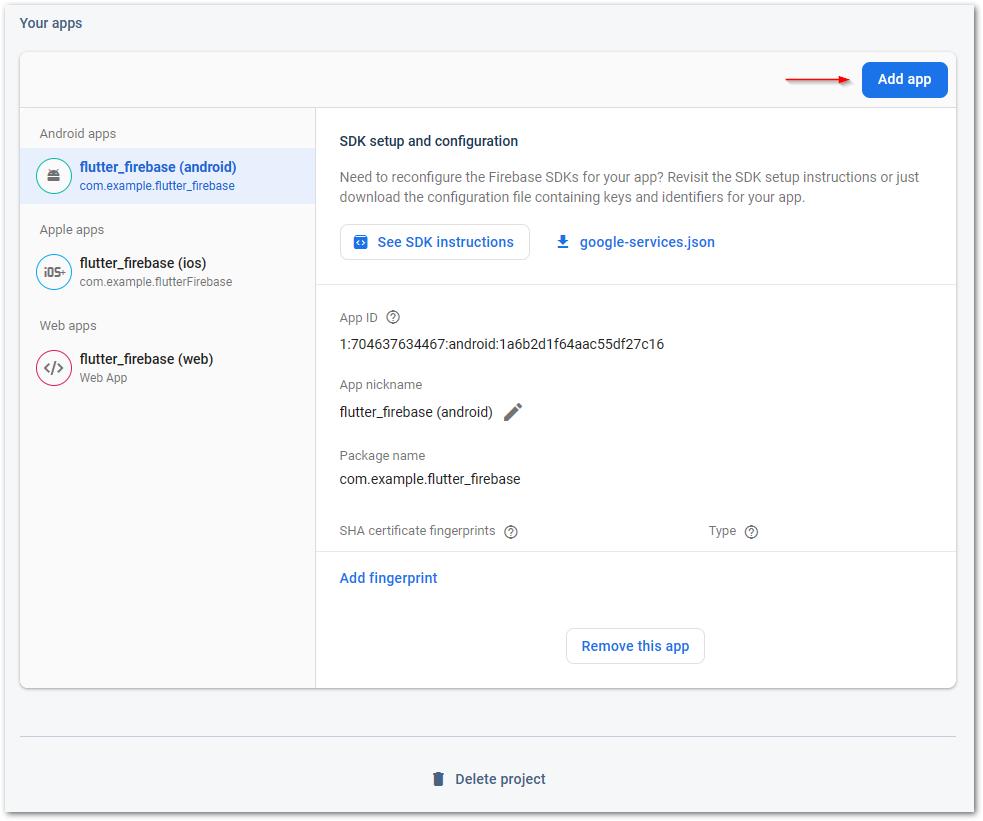
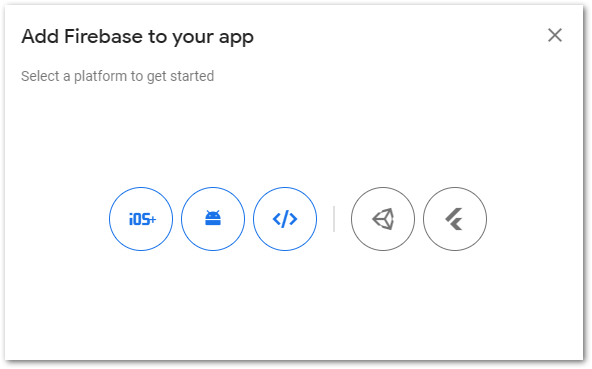
The available platforms are iOS, Android, Web, Unity, and Flutter.
?
Tip
When you use Flutter, the corresponding iOS, Android, and Web apps will be created automatically. You don’t need to perform the manual steps in the setup guide.
Firebase CLI tools
The Firebase CLI tools offer a way to add new apps to an existing Firebase project. To do so, first log in and select the project to which you want to add apps.
firebase login
firebase projects:list
firebase use <project id>
The firebase login command opens a browser window for authentication. After that, you can get a list of all your projects with the firebase projects:list command. Copy a project id and pass it to the firebase use command to set the active project.

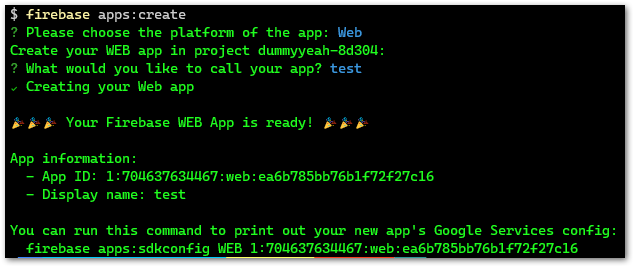
To create a new project, use the command firebase apps:create and follow the instructions of the assistant.
?
Tip
The Firebase CLI only supports iOS, Android, and Web as target platforms!
Remove apps from a Firebase project
In the Firebase Console, click on the gears icon next to the Project overview menu entry in the Firebase menu on the left.

Then, select Project settings from the popup menu.

At the bottom you can find your existing apps grouped by platform.
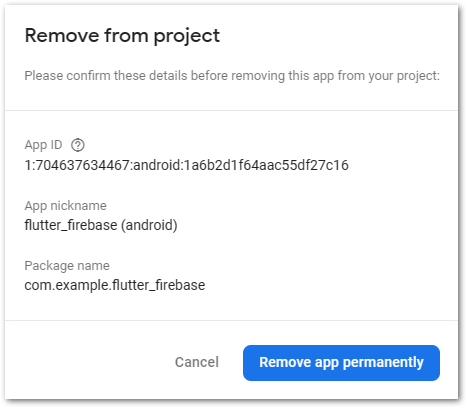
To delete an existing app, select the app from the list and click on the Remove this app button located at the bottom of the page. A confirmation window will appear and once confirmed, the app will be deleted.
⛔
Error
You cannot remove Firebase apps with the Firebase CLI tools. The only way is to use the Firebase Console as described above.
Manage users in a Firebase project
In the Firebase Console, click on the gears icon next to the Project overview menu entry in the Firebase menu on the left.
Then, select Users and permissions from the popup menu.

In this menu you can search for users, add new ones, or edit/remove existing ones.
Use the search field at the top to do a full text search for users. You can enter names, part of the email address, or even search for users with certain rolls.

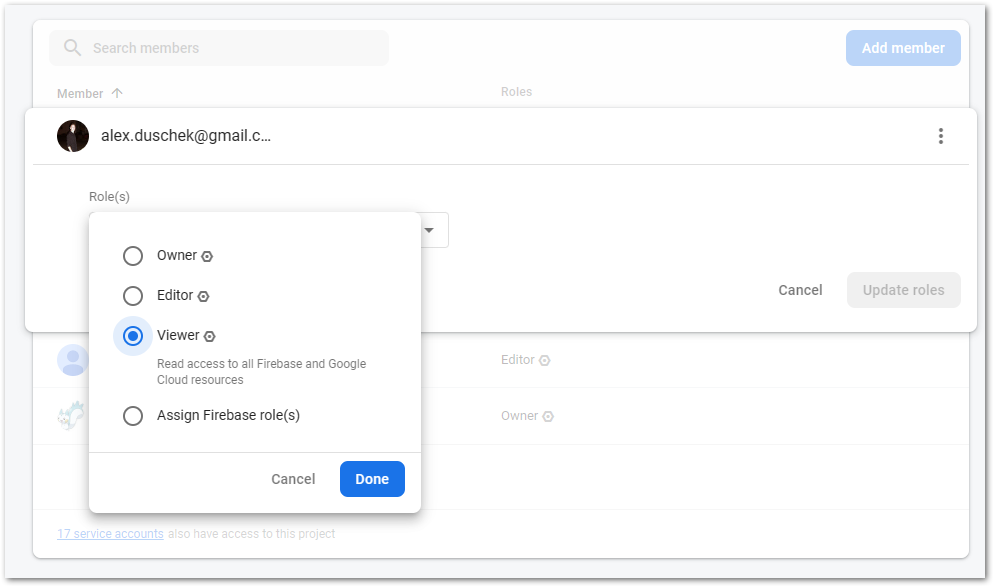
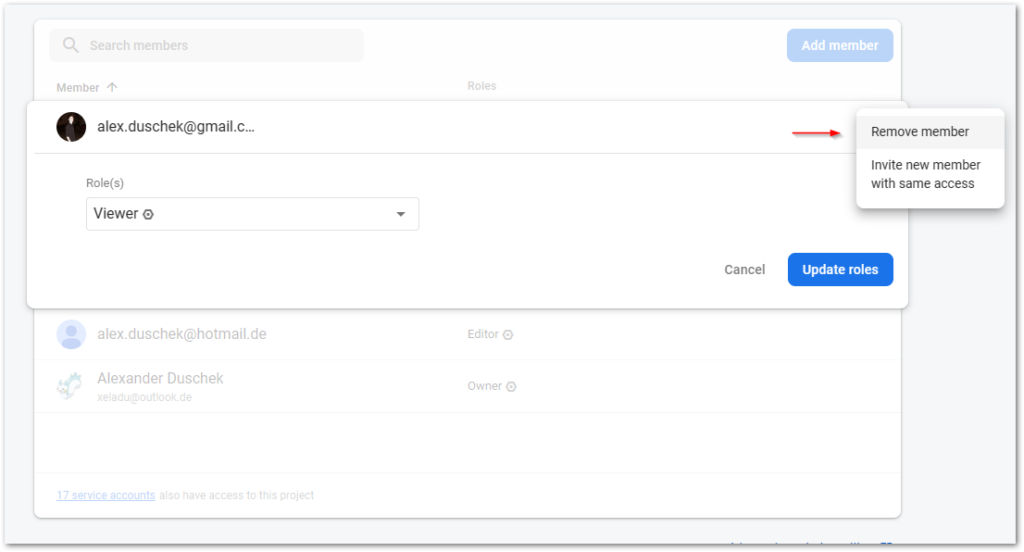
To edit an existing user, click on their name. The row will expand, and you can then edit the user’s role using a dropdown menu.
To remove an existing user, hover over their name and click on the three dots that appear on the right. Then, select the option Remove member. After you confirm the action, the user will be removed and an email will be sent to them.
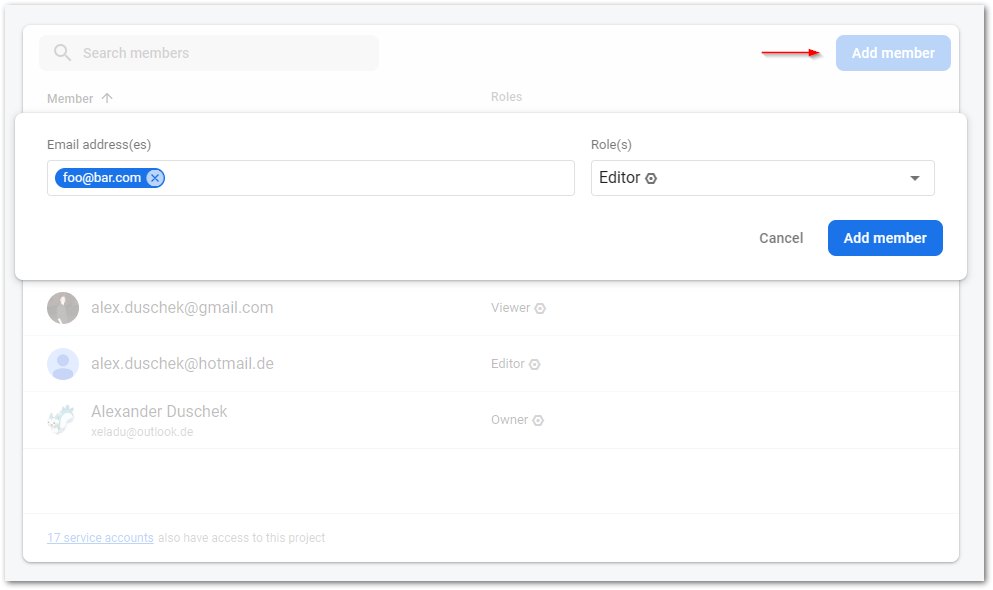
To add a new member, click on the button Add member in the top-right corner. Enter an email address and select a role. You can either choose one of the predefined self-explanatory roles like Owner, Editor, or Viewer or you can assign Firebase roles individually.
The user will receive an email and can access this Firebase project according to the defined role.
You can also add new users using the Google Cloud Console. While it may appear more complicated than the Firebase UI, it offers more options and allows you to grant rights in greater detail. Just click on the link Advanced permission settings at the bottom to get to the Google Cloud Console.

Flutter ❤️ Firebase

Get started with Firebase and learn how to use it in your Flutter apps. My detailed ebook delivers you everything you need to know! Flutter and Firebase are a perfect match!
Change the current billing plan of a Firebase project
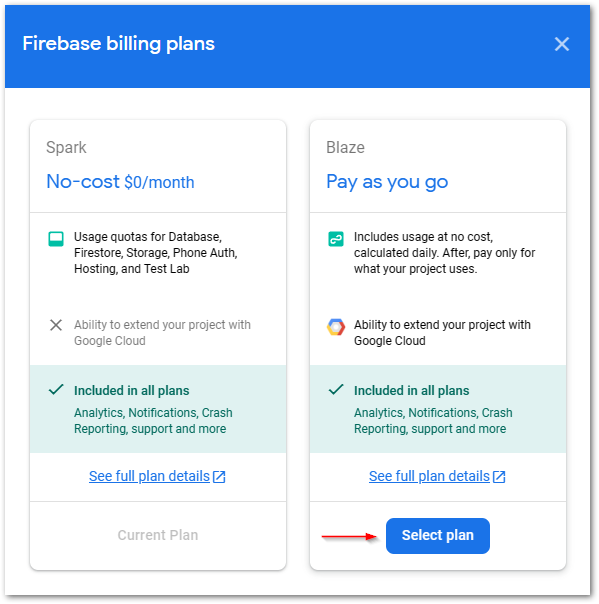
Firebase supports two types of billing plans: Spark and Blaze. Each billing plan covers one Firebase project, so you can have different projects on different plans. By default, you are on the Spark plan.
When using the Spark plan, you won’t have to pay anything for Firebase ever. It’s a free version with a limited resource quota that is suitable for testing and development. However, if you cross a service’s limit, it won’t work until the next billing period. Additionally, some services like Cloud Functions or Extensions cannot be used.
With the Blaze plan, you are charged based on usage. The more you use, the more you pay. All Firebase services are available, but you can still take advantage of the free quota. If you don’t use any resources, you won’t be charged anything.
It is possible to switch billing plans at any time.
Upgrade from Spark to Blaze
By upgrading to the Blaze plan, you can instantly access all Firebase services while still benefiting from the free quota of these services.
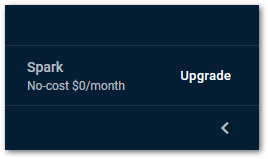
Start by going to the Firebase Console and clicking on Upgrade in the bottom left corner.
Then click on the Select plan button of the Blaze plan.
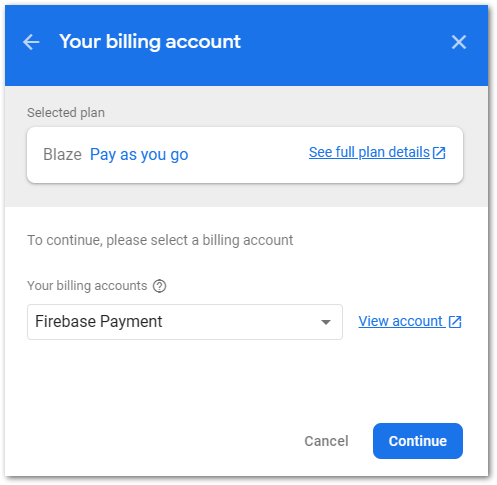
Next, you need to select a billing account. If you do not already have one, you can create a billing account here. After creating a billing account, select it from the dropdown menu and click on Continue.
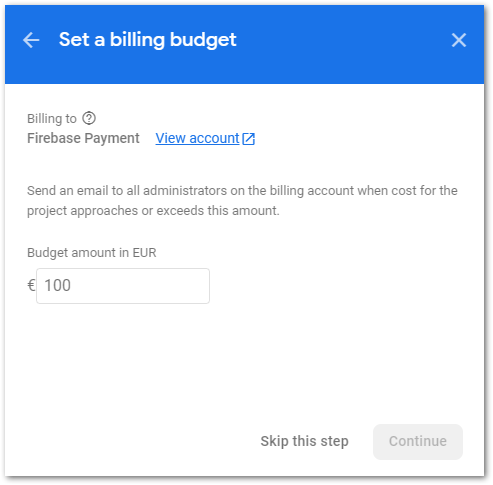
You can set a budget here and receive email notifications when your costs approach the threshold. However, these notifications are only meant as a reminder, and you will need to take action accordingly. This step is optional and can be completed at a later time.
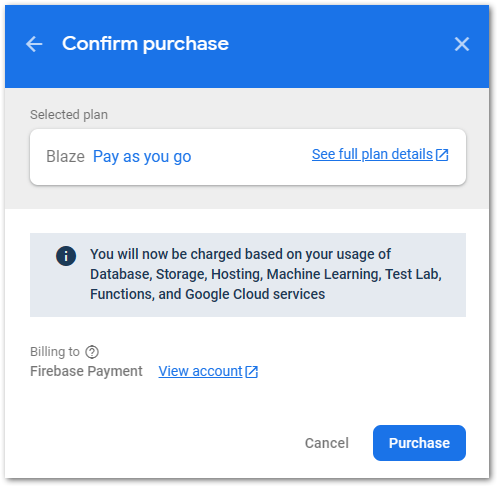
Confirm the upgrade by clicking on Purchase.
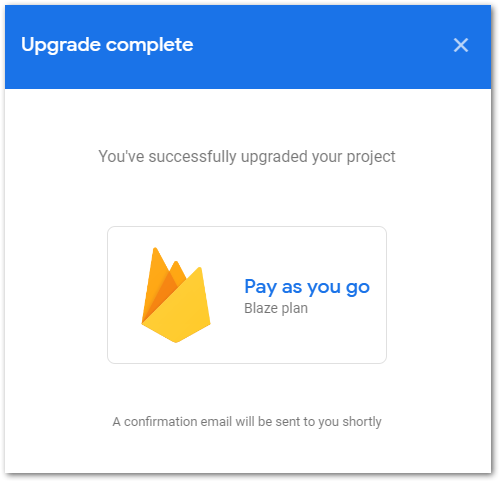
Your upgrade process is completed and you will get an email as notification.
Downgrade from Blaze to Spark
A downgrade to the Spark plan will prevent access to service like Cloud Functions. Data loss is also possible when your stored files exceed the free quota. So make sure to only downgrade when you have saved your important data. On the other side, your costs won’t increase anymore.
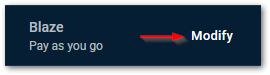
Start by going to the Firebase Console and clicking on Modify in the bottom left corner.
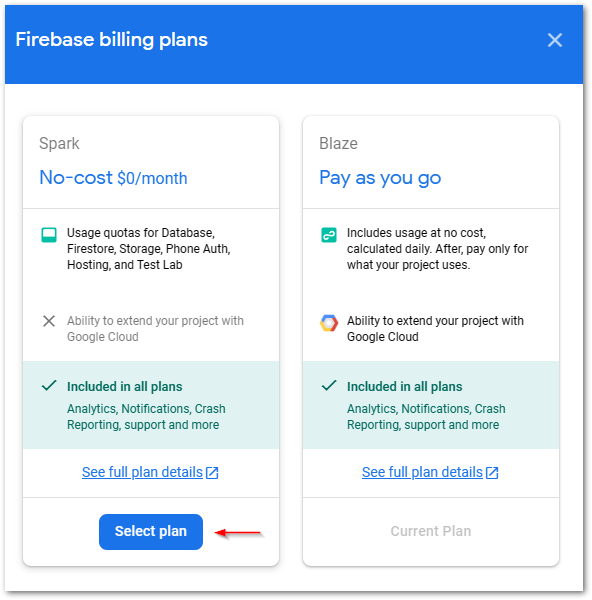
Then click on the Select plan button of the Spark plan.
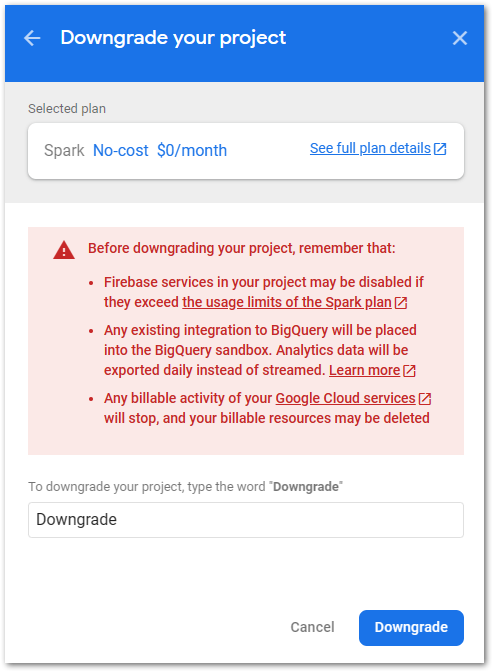
Read the details of the downgrade. Make sure that you saved all relevant data because billable resources might be deleted after the downgrade. Confirm the process by writing Downgrade in the text box and click the button.
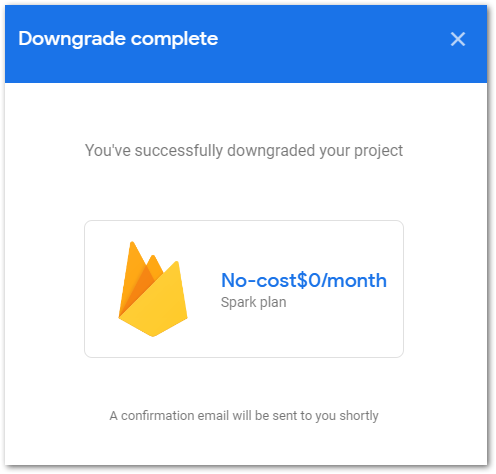
The downgrade process is completed. You will receive a notification email.
Monitor the current costs of a Firebase project
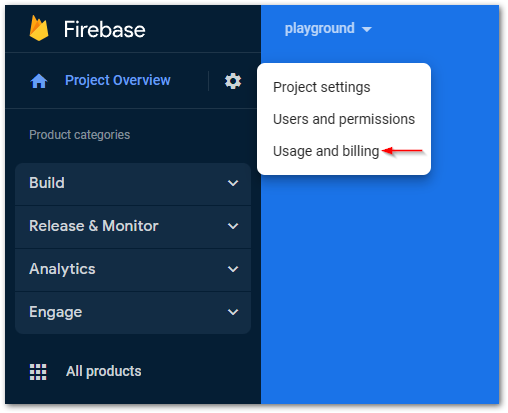
In the Firebase Console, click on the gears icon next to the Project overview menu entry in the Firebase menu on the left.

Then, select Usage and billing from the popup menu.
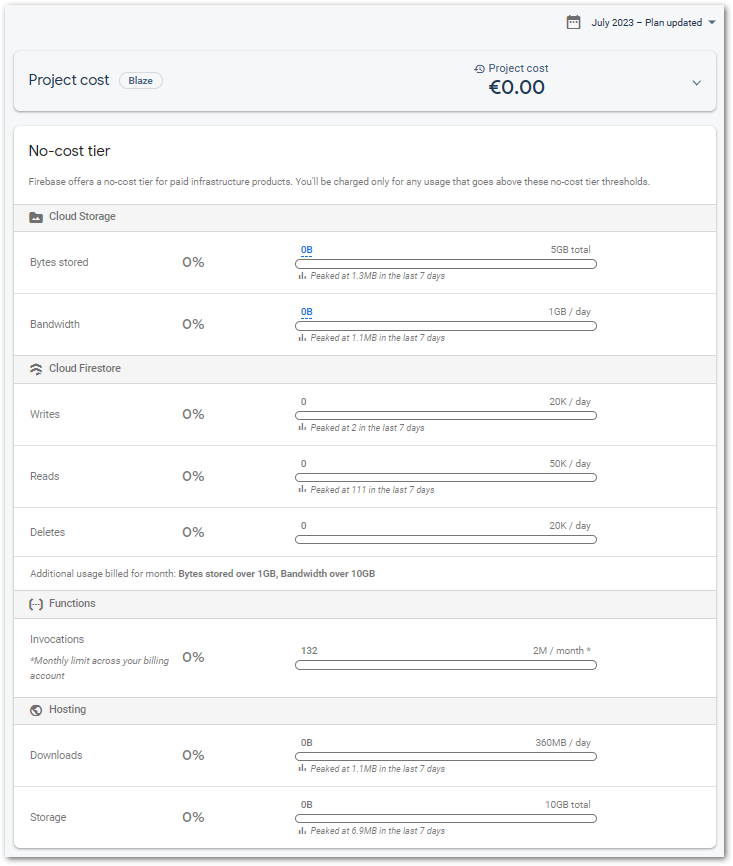
The first row displays the current expenses for this month. As a Spark plan user, everything is free and won’t cost you anything. However, if you exceed the free limits, the services will stop working.
For each service, you can see an exact overview of the resources used. This allows you to easily identify areas where you may reach the limits in the current period. Note that data updates occur every 24 hours. This is not a live dashboard!
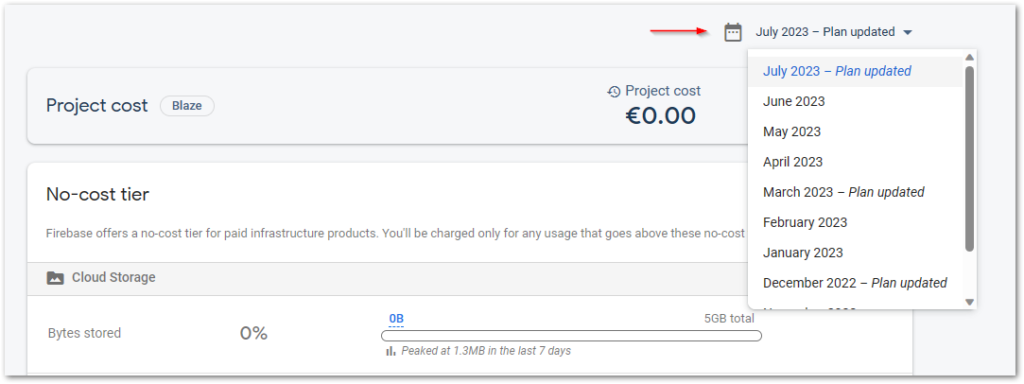
To view historical data, select a different month from the dropdown menu in the upper right corner. Please note that while you can see the costs, you will not be able to view the used resources.
If you want to receive notifications when costs exceed a certain threshold, consider setting up a budget alert. In this way, you can take countermeasures to reduce costs.
Create budget alerts for Firebase projects
In the Firebase Console, click on the gears icon next to the Project overview menu entry in the Firebase menu on the left.

Then, select Usage and billing from the popup menu.

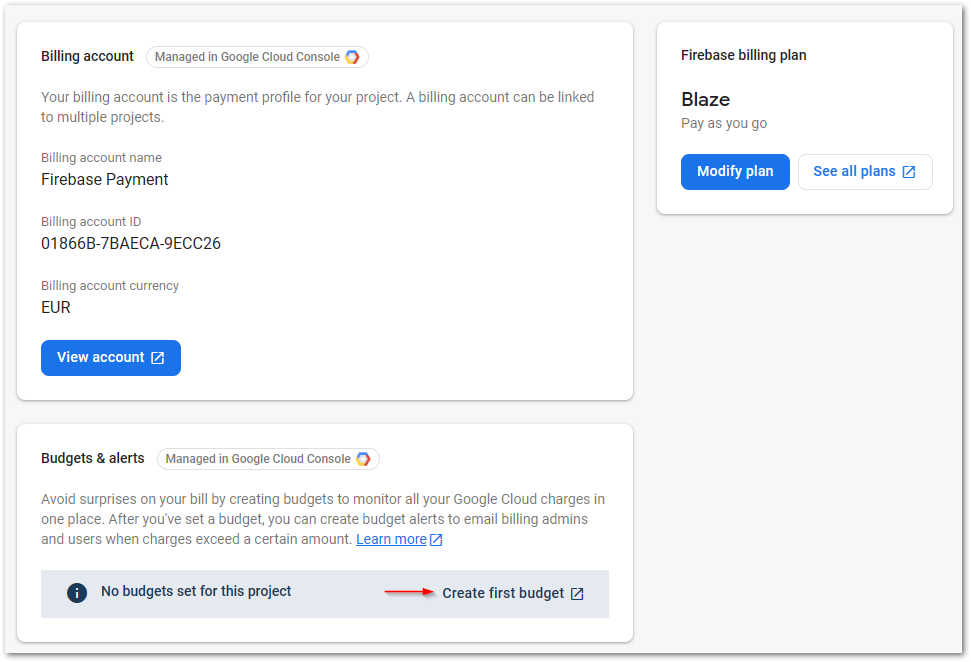
Next, switch to the Details and settings tab.
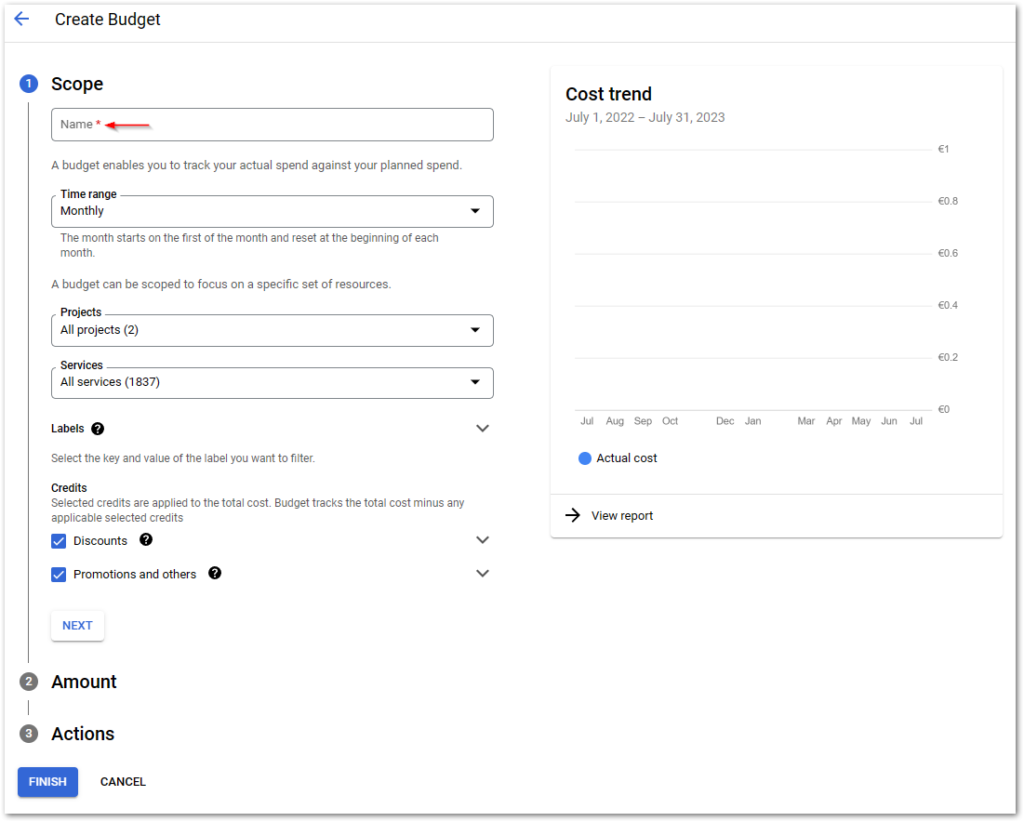
At the bottom you can create a budget alert by clicking on Create first budget. You will be redirected to the Google Cloud Console where all alerts are managed.
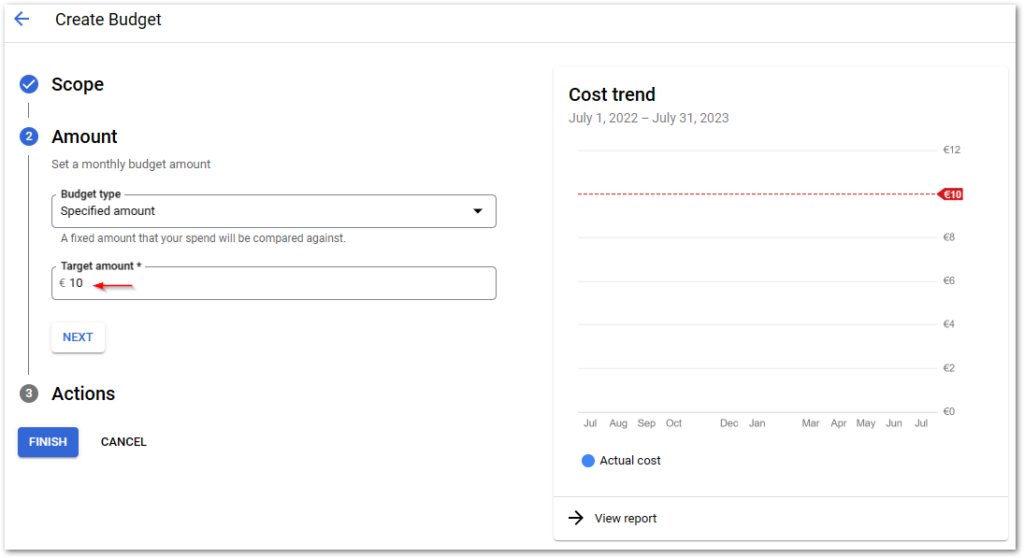
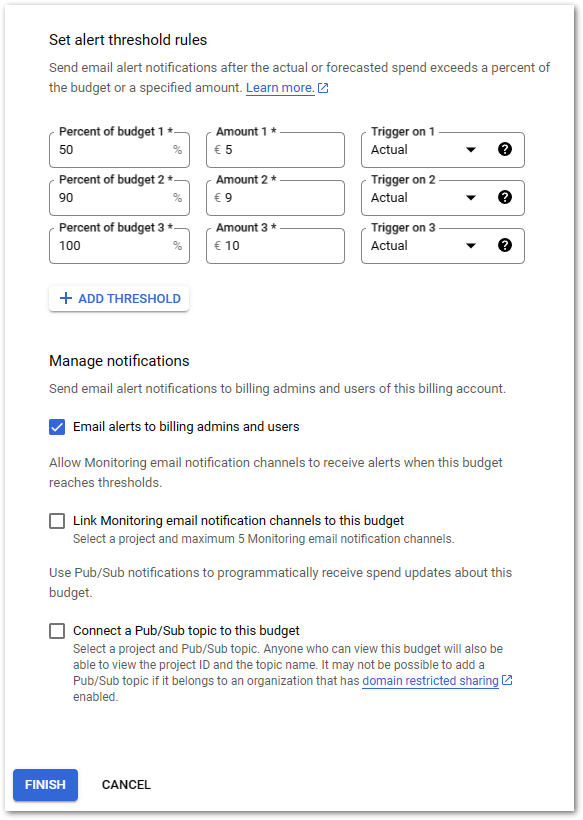
Fill out the relevant fields of the scope, define a target amount, and manage additional thresholds as you finish. The only required fields are the name and the amount. All other fields are optional. After a click on the Finish button, your budget alert is active. You can see it in your Firebase Console.
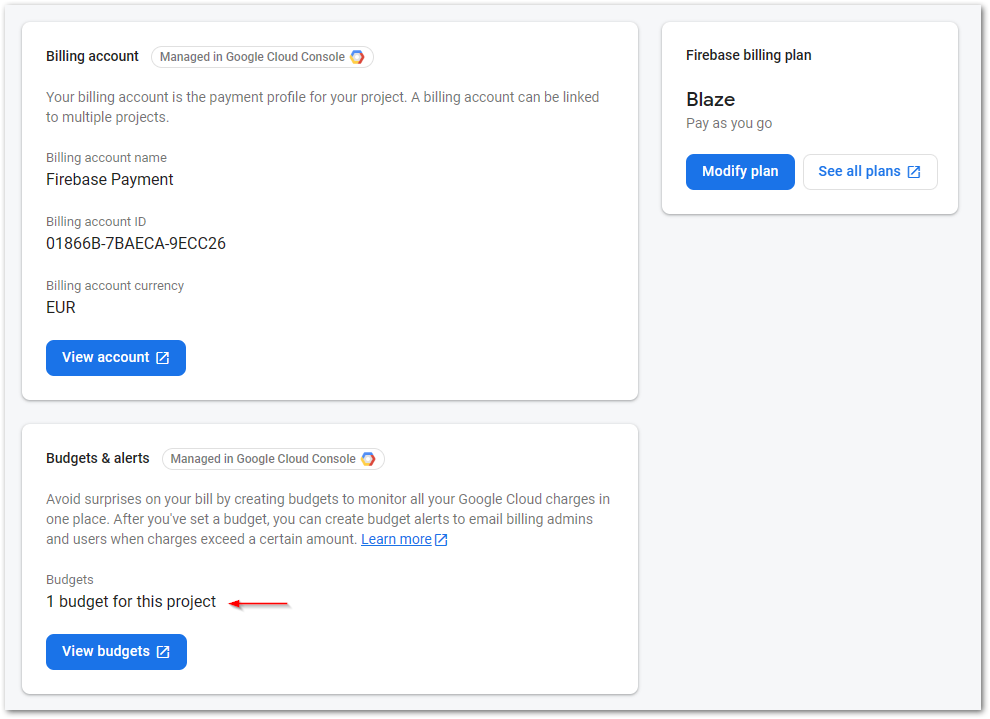
You can also create a budget alert when switching from the Spark to the Blaze plan.
Delete a Firebase project
In the Firebase Console, click on the gears icon next to the Project overview menu entry in the Firebase menu on the left.

Then, select Project settings from the popup menu.
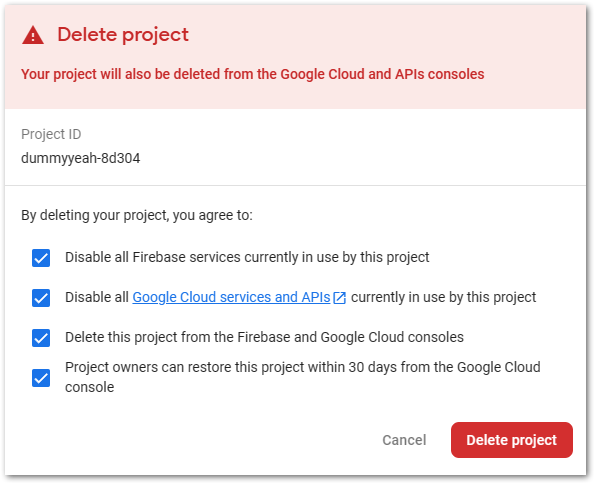
At the bottom of the page, there is a Delete project button. Clicking on it will open a confirmation window, where you need to select multiple checkboxes before finally deleting the project.

⛔
Error
You cannot delete a Firebase project with the Firebase CLI tools. The only way is to use the Firebase Console as described above.
Conclusion
With the ultimate guide for working with the Firebase Console you should be able to cover all management tasks for Firebase projects.
Related articles