Introduction
Using Firebase Cloud Messaging and Firebase Cloud Functions we can achieve this. Learn how to send push notifications with Firebase. This vital feature needs to be part of every app in today’s world!
Today we are going to focus on how to send push notifications from a Flutter app. Therefore Firebase will be used as it provides packages that can be used within a Flutter app. In this scenario, a push notification will be triggered and sent to your own device. Firebase offers some of its services only for paying users but they charge you for your usage. If you don’t use the services, you won’t be charged anything. So here is how to send push notifications from Flutter apps with Firebase to any device.
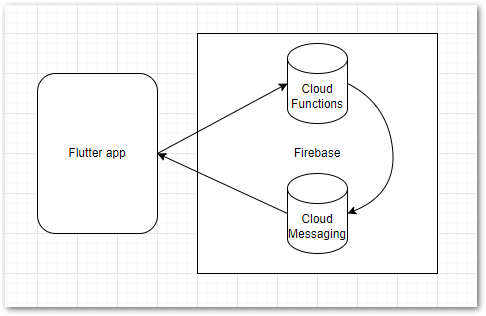
Our final workflow will look like this:
- From our app, a message with custom text is sent to Firebase Cloud Functions.
- The function will forward our message to the Firebase Cloud Messaging (FCM) service.
- The service will deliver the message to the target device.
- Our app should receive a push notification within some seconds.
⛔
Error
Unfortunately, at the moment there is no possibility for us, to send messages from app to device without using Firebase Cloud Functions as the FCM Flutter package does not provide a method for it. So we have to use the workflow above.
The next steps of this article are as follows:
- Create and set up Firebase account and project
- Prepare Flutter app
- Write code to send and receive push notifications
Flutter ❤️ Firebase

Get started with Firebase and learn how to use it in your Flutter apps. My detailed ebook delivers you everything you need to know! Flutter and Firebase are a perfect match!
Firebase Setup
Before the fun part starts we need to set up the backend so that our app can send and receive push notifications. We will create a Firebase project and a Firebase app for each supported platform (iOS, Android, Web). If your Firebase environment is already configured, you can skip this part.
Create a new Firebase project
If you don’t already have one here is a short guide. Otherwise, you can skip this part.
- Go to console.firebase.google.com and log in with your Google account.
- Click Add project
- Choose a name
- Google Analytics can be skipped
- Create the project
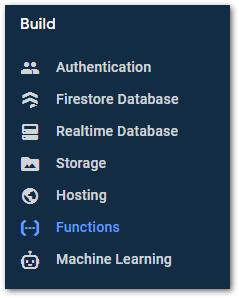
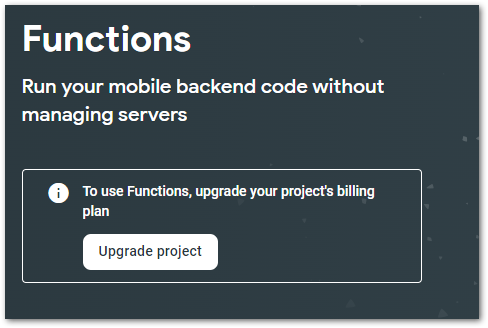
Change plan for Firebase Cloud Functions
To use Cloud Functions you need to upgrade your project from the Spark plan (free usage) to the Blaze plan (pay per usage). This requires payment information to be entered (for example a credit card or you can also use Google Pay).
🔔 Hint
This example won’t cause any recurring costs, but if you extend your Firebase usage above the free limits, you will be charged for it. Keep that in mind! Pricing details can be found here.
To change the plan, go to the Cloud Functions area, hit the Upgrade project button, and follow the instructions (see images below)
After the upgrade, you should see an empty dashboard. Your deployed functions will be available here, where you can check logs, health status, and usage statistics.
❗
Warning
Please be aware that a deployed cloud function occupies resources which can lead to costs. If you deploy more functions, the costs might increase. You can use a budget alert to get notified when unexpected costs arise.
App Setup
To send push notifications with Firebase, we need to prepare our Flutter app. The first step is to link our app with the Firebase backend. After that, we will focus on writing code to send and receive push notifications.
Link with Firebase backend
This is a pretty easy task nowadays as there is a command-line tool that will support us with the configuration. First, we need to add the Firebase Core dependency to our project. Run the command
flutter pub add firebase_corefrom your app’s root folder. The next command installs a cli to connect our app with Firebase. Run
dart pub global activate flutterfire_cliand wait until the installation process has finished.
Finally, run the command
flutterfire configureIt will guide you through the setup process, create Firebase apps and link them with your Flutter app. Afterward, there will be a Dart file containing all relevant Firebase account information. Do not check this file into version control ❗.
Installing the Firebase packages
In your Flutter project open the pubspec.yaml file, add the Firebase Messaging package, and the Cloud Functions package (see image below).
flutter pub add firebase_messaging
flutter pub add cloud_functions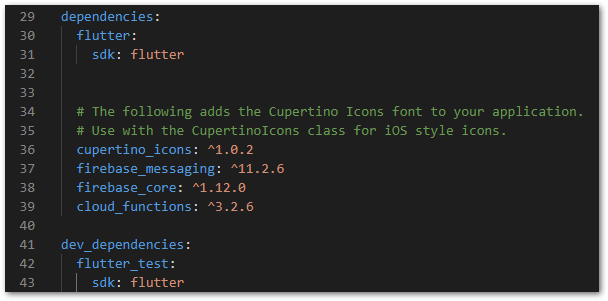
🔔 Hint
The packages are updated frequently, so the versions in this example might be outdated.
Enable app capabilities for iOS
If you are targeting iOS as a platform, you need to do some more configuration work to enable push notifications. One particular requirement is that you have an active Apple developer account. It won’t work without it. The following article guides you through the complete setup process:
- How to configure your XCode project
- How to register keys, provisioning profiles, and identifiers in the Apple Developer portal
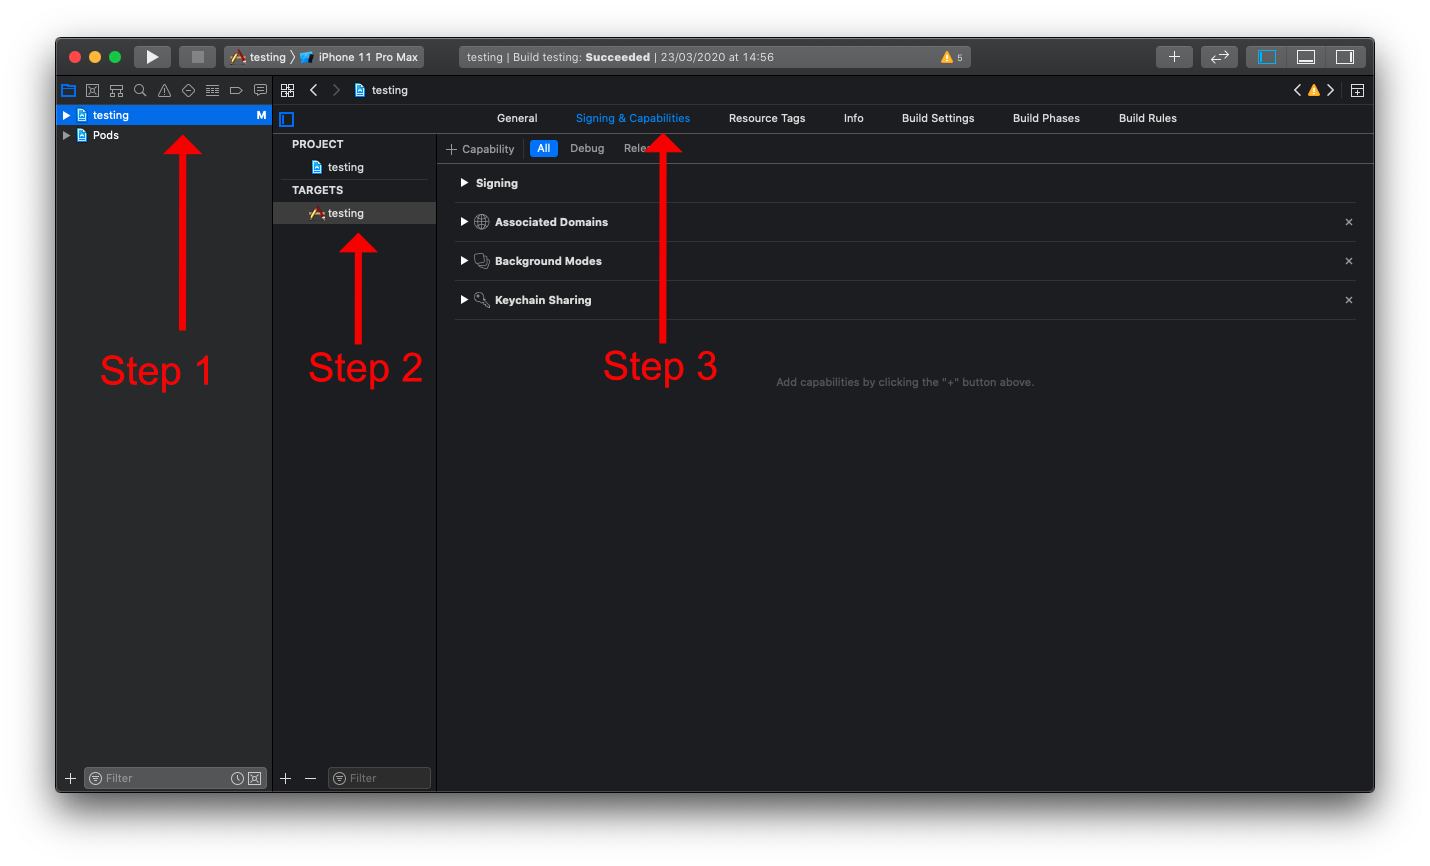
Android apps don’t require additional setup steps.
Set up cloud functions
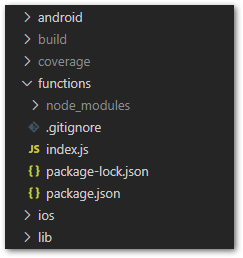
A handy helper for everything related to Firebase are the Firebase CLI tools (installation guidelines). We will use them to initialize the cloud functions and to update them. After the installation, run the command firebase init functions. It will guide you through the login and setup process. Be sure to select the Firebase project you created earlier. Finally, you will see a functions folder in your project directory. It contains the deployed functions and their dependencies. The setup is completed ?.
Code Setup
Finally, we are getting to the most interesting part. Here we will create the cloud function that delivers our message to Firebase Cloud Messaging. And we will implement handlers for incoming notifications so that our app displays the notifications.
Setting up the cloud function
Here is the code for the Cloud Function, we will use. It takes a data argument supplied by the caller and calls the Cloud Messaging service. The result indicates the success or failure of the operation.
The data object is a Map that should have 3 properties:
targetDevicesis a list of strings containing the tokens of the target devicesmessageTitleis a string containing the title of the messagemessageBodyis a string containing the body of the message
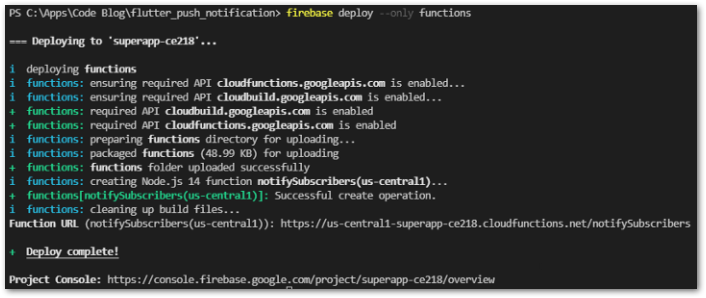
Insert this code into the index.js file in your functions folder. Then run the command firebase deploy --only functions. Your dashboard in Firebase should be updated after the operation is finished. The function is ready to be called ?

Register for incoming notifications
When the app is not running all the notifications are handled by the operating system. You get your typical sound and the app icon in the notification bar just as you are used to. To handle incoming notifications while our app is running we need to register a handler function. If there is no handler the message is just swallowed and you don’t even know that you received one.
After our handler is registered and a notification is received while the app is running, the title and body will be printed to the console.
A background handler has the restriction that it must be a top-level function. It will be invoked when a notification is received and the app is in the background.
Send a push notification
To send a push notification we need to get the device token of the target device (in this case our own device). We then send the message to the Firebase Cloud Functions service which delivers it to the Firebase Cloud Messaging service and it handles everything else. If for example, the target device is offline the message is transmitted as soon as the device is online again. All the little details we don’t need to worry about.

The code tries to find a Firebase function with the name notifySubscribers. When found, it invokes the function with an argument that contains the target devices, the message title, and the text, the user entered in the UI. A print message in the console tells us if the call was successful.
Customize a push notification
You can add additional data to a push notification and have your app handle it in different ways. The RemoteMessage object has a data property where you can add your custom data to the request. Your app can read these values and react accordingly. The image below shows a modified version of our cloud function using the data property.
If you want to add platform-specific code like icons or custom click actions, read this section of the documentation for details.
Send a test notification from Firebase
Firebase allows sending customized push notifications from its UI. That way you can test for example how a notification looks when your app is not running. Follow these steps to send a notification.
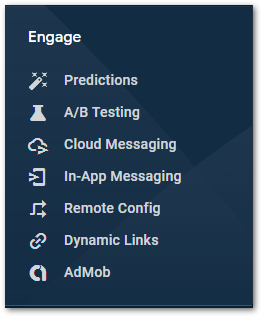
- On the Firebase page go to Cloud Messaging.
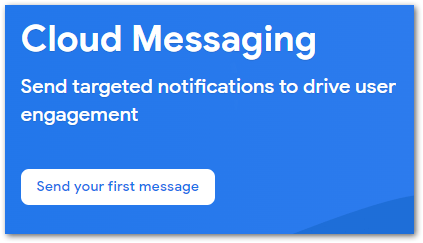
- Click on Send your first message.
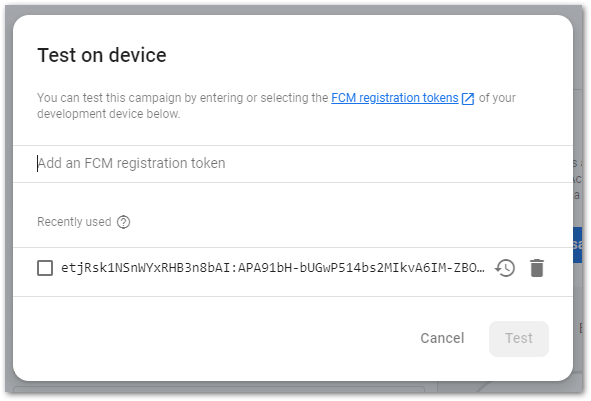
- Enter at least a title and a description and click Send test message.

- Add your device token and click on Test.
Your device should receive a push notification. The handling depends on whether the app is in the foreground, in the background, or not running at all.
- When the app is not running at all, you’ll get a hint in your notification tray of the mobile OS.
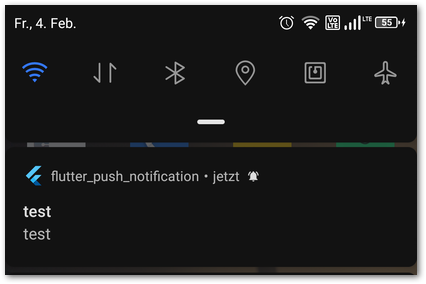
Received push notification from Firebase when app is in background
- When the app is running in the background, you’ll get a hint in your notification tray of the mobile OS and the background handler function will kick it if it is set (see possible output below).

- When the app is running in the foreground, the foreground handler function will handle the message if set (see possible output below).

When your app is running (foreground or background) and a notification is received you can use the package flutter_local_notifications to display a real notification. That way the user is notified properly. Another approach is to display a banner in your app (with a Snackbar widget, for example) but it’s up to you how to continue from here.
Conclusion
In this article, you learned how to send push notifications with Firebase. This is the shortest way possible to enable a Flutter app to receive AND send push notifications to other devices. The configuration of the backend might be a bit overwhelming at first, but it’s really not that hard. With this knowledge, you can interact more easily with your app users in an anonymous way.
Source code
You can find the source code on GitHub. The repo contains the working app without the Firebase configuration. You need to create the account, link your app with it and deploy the cloud function. Then you can reproduce all the results of this article.
Get the most out of Firebase for Flutter developers with my ebook.
Flutter ❤️ Firebase
Get started with Firebase and learn how to use it in your Flutter apps. My detailed ebook delivers you everything you need to know! Flutter and Firebase are a perfect match!
Related articels