

Introduction
In this article, I am going to show you how you can build a quick demo application that queries a web service and displays the results. Mastering the skills of quick prototyping with Flutter and a REST API can help you evaluate app ideas quickly.
Developing simple proof of concepts is a required ability in today’s world as a software developer. Flutter is a perfect tool for these kinds of tasks because it allows you to focus on code while keeping the UI simple. Let’s get started right away!
Code
This is the complete code of the demo app with query logic, user interface, and data conversion. Pretty cool to get so much done with that many lines of code ?.
I am using a FutureBuilder as it can handle different states nicely. We have three states to consider:
- The query is running
- The query has successfully completed
- The query completed with an error
The future parameter is assigned with an asynchronous method _httpGet() to fetch the results. It uses the http package and the publicly available Bored API. In the builder parameter, we can create the actual UI that is displayed depending on the state. To distinguish between the states, we can use the ConnectionState enum and the AsyncSnapshot class.
I already published an article with more details of how to work with REST APIs.

User interface
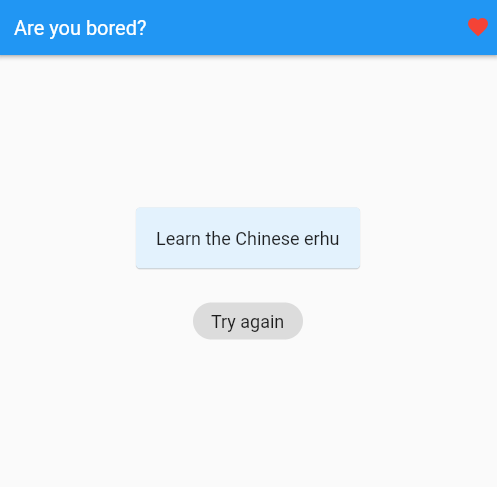
The UI is rather simple as this is not the main focus of a quick demo most of the time. We have a StatefulWidget with a Scaffold containing a Card widget with the result of the API call and an ActionChip with an onPressed handler to call the service once more. The handler just calls the setState function which triggers a rebuild of the page.
When the page is rebuilt, the FutureBuilder runs again and provides a new result to be displayed in the center of the screen.
Conclusion
In this article you learned quick prototyping with Flutter and a REST API can be done. I provided a simple example of a Flutter app that queries a REST API and displays the result. For experienced developers, this task won’t take longer than half an hour. In my opinion, Flutter is ideal for rapid prototyping.
You can find the source code on GitHub.
Related articles

