Introduction
Here is how to use Firebase Authentication in your Flutter app to authenicate your users without any effort. Don’t bother building your own authentication service and use this proven service instead!
What is Firebase Authentication?
Firebase Authentication is a simple way to verify a user without having to worry about storing credentials. It supports a variety of login mechanisms and is easy to set up. You receive a complete registration flow for your users including mail confirmation and validation if desired. Before implementing an authentication process by yourself, consider using this option.
Flutter ❤️ Firebase

Get started with Firebase and learn how to use it in your Flutter apps. My detailed ebook delivers you everything you need to know! Flutter and Firebase are a perfect match!
You will need to set up a Firebase project by yourself to use these code examples here or the one from my GitHub page. If you haven’t done that already, here is an article to guide you through the necessary steps.

Which mechanisms are supported?
- Email/password User logs in with an email and password combination or with an email link
- Phone number User logs in and verifies with his phone number
- Anonymous User logs in anonymously for temporal access
- Social login User logs in with a social provider like Google, Facebook, GitHub, Microsoft, Yahoo, etc. Requires additional plugins to be installed.
How to enable providers?
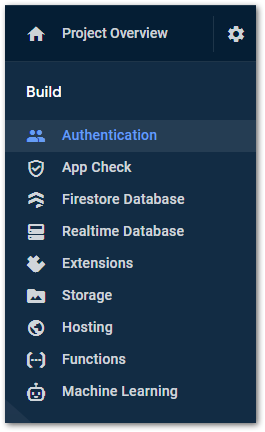
On the left of your Firebase Console dashboard, go to Build → Authentication.
Then select the tab Sign-in method.
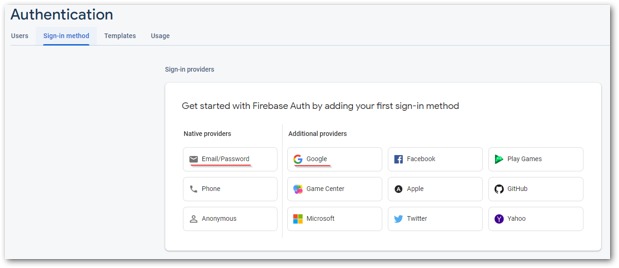
All available providers are listed here and you can activate and configure the ones you like to use. For the following examples, we will use Email/Password and Google, so they are already marked in the screenshot.
Example: Authentication with mail and password
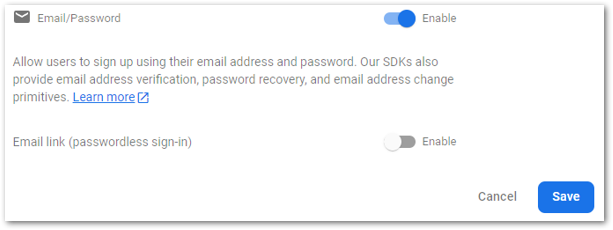
First, we need to activate the Email/Password provider. Click on it, enable the checkbox, and confirm with Save.
Install the firebase_auth package into your Flutter app if you haven’t already done so.
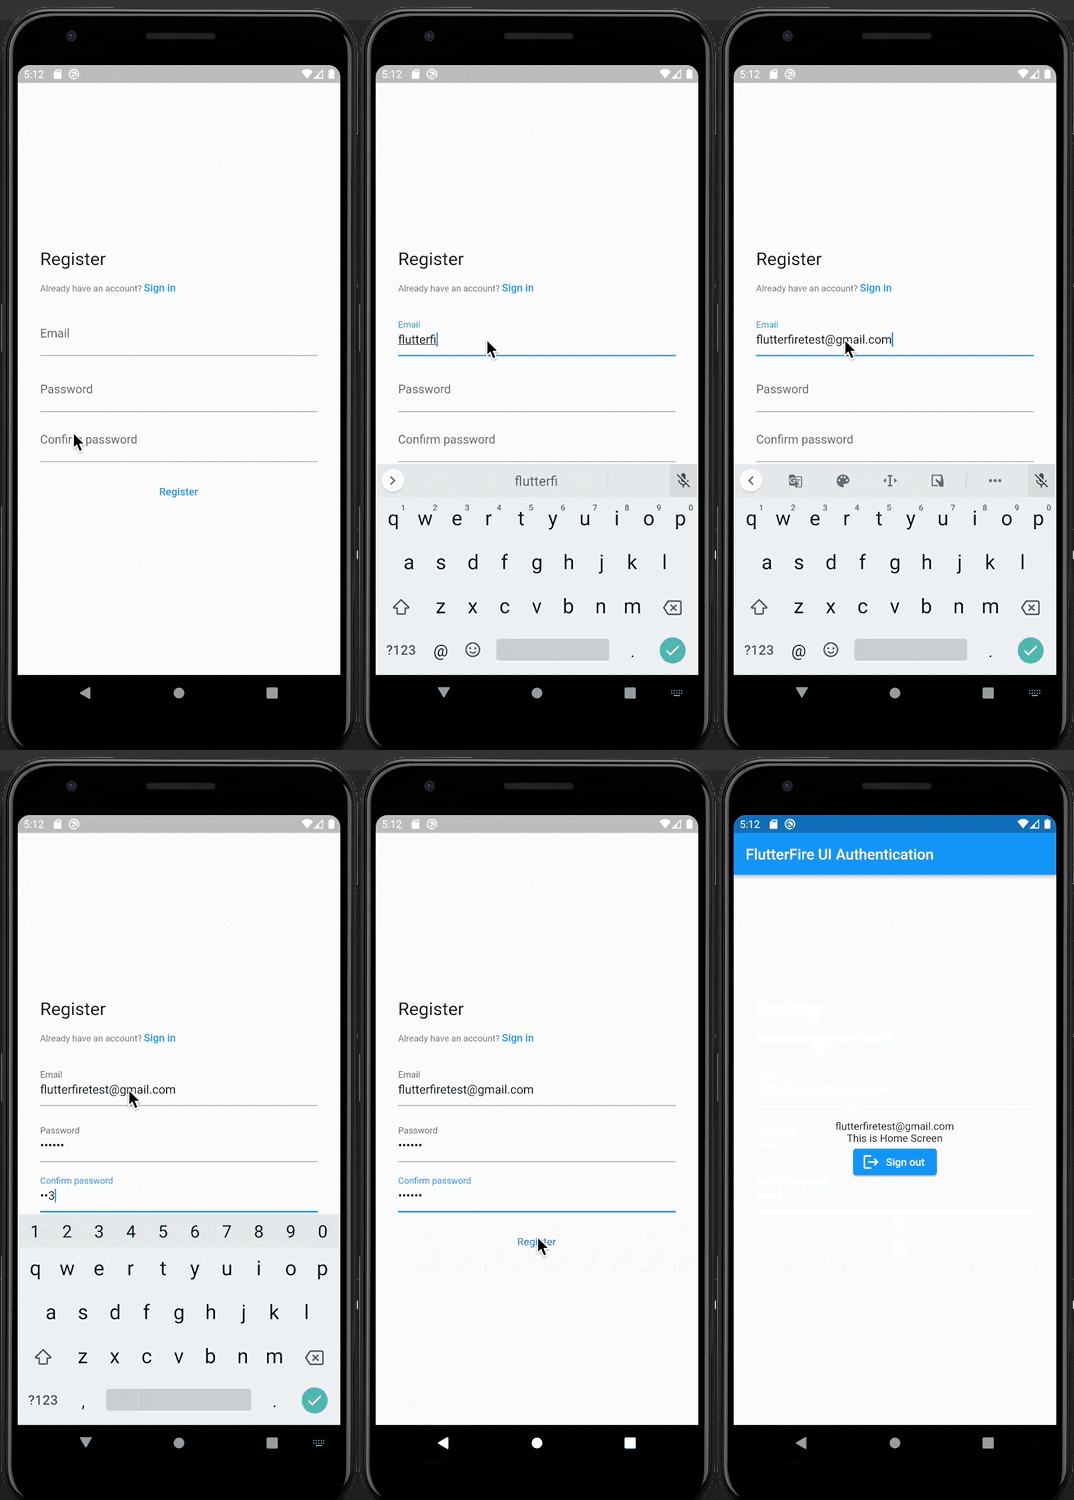
To register a new user, you can use the following code.
The user will also be logged in after the code is executed. The next code snippet will perform a log-out of the current user.
And if you want to log in without registering as a new user, you can use the following code.
To handle authentication state changes, you can listen to a stream that provides updates. See the following code example.
FirebaseAuth.instance.authStateChanges().listen((user) {...});
The User object will be null if you are not logged in. Otherwise, it contains data.
After the registration, you’ll find the user’s details (except for the password, of course) in Firebase. You can manage users from the Users tab of the Authentication dashboard.
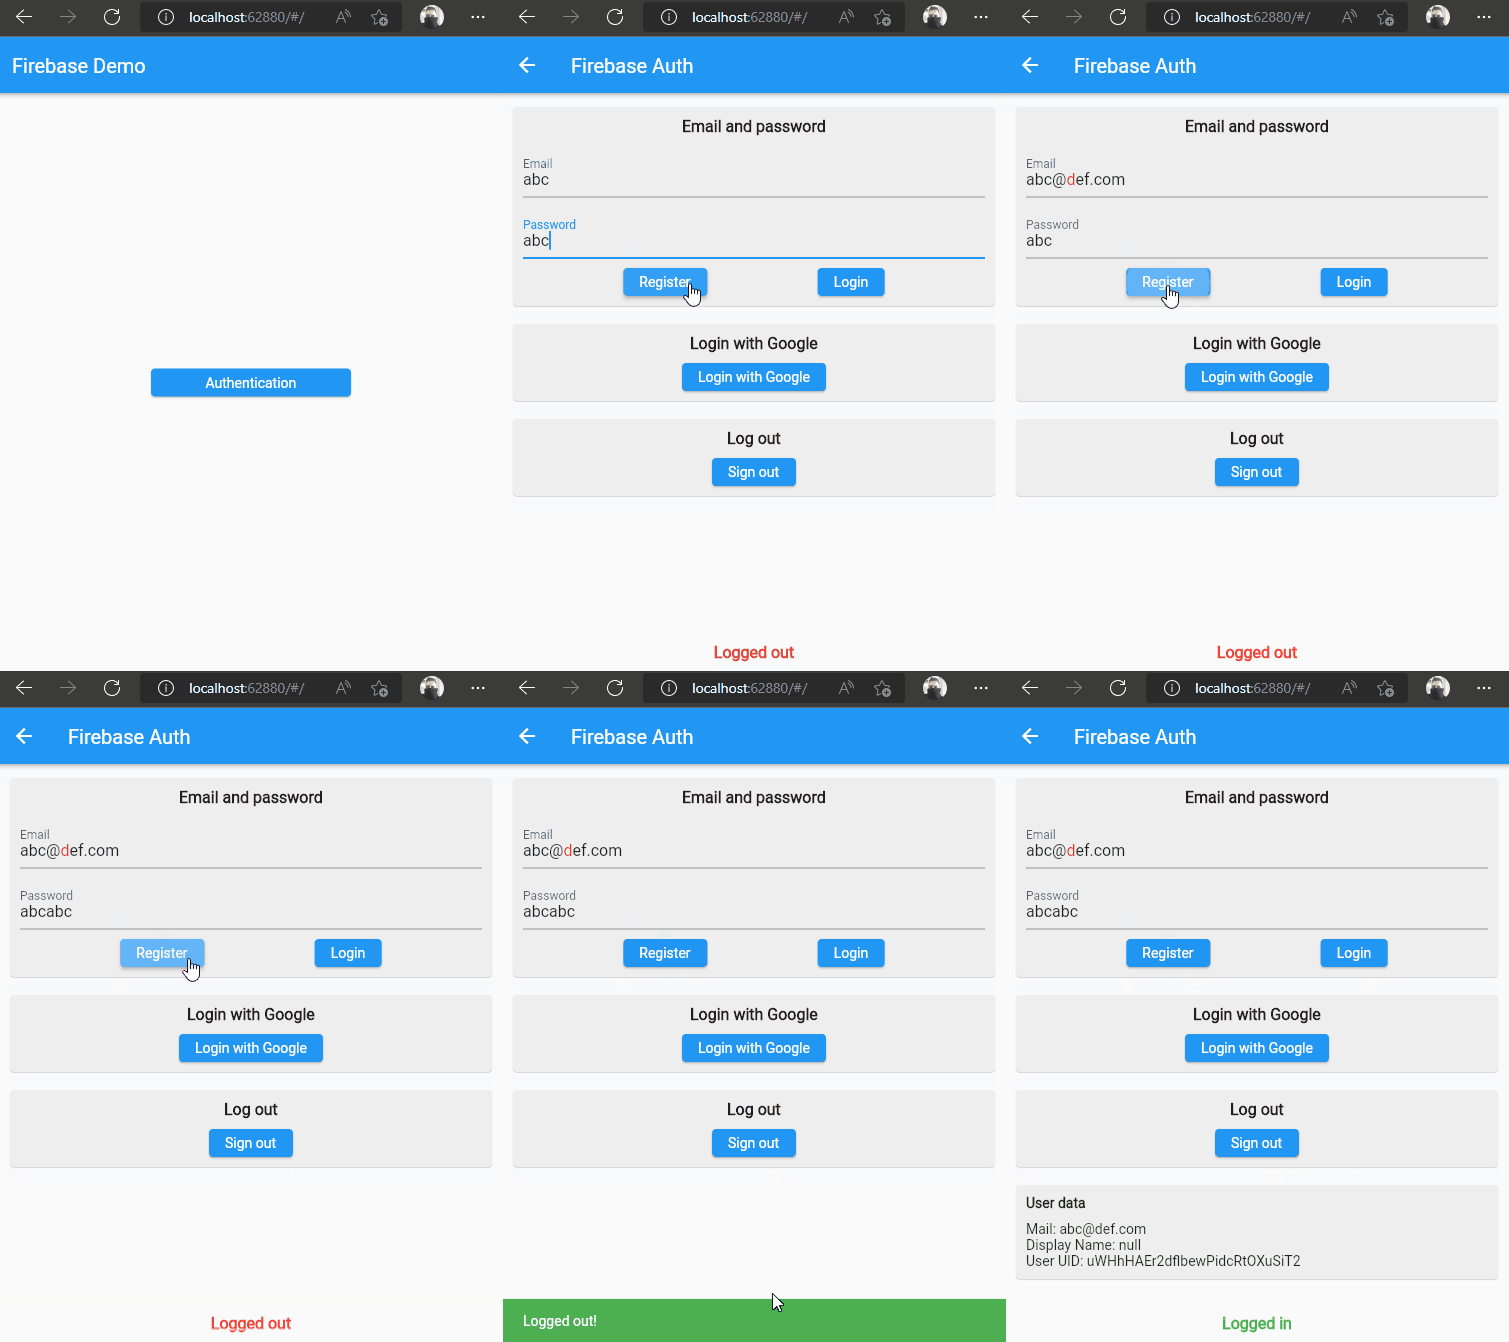
Here is a short demo video of the provided source code.

There are additional features that you can make use of like
- Change or reset passwords
- Customize emails that the user will receive
- Use an emulator for testing
Example: Authentication with Google
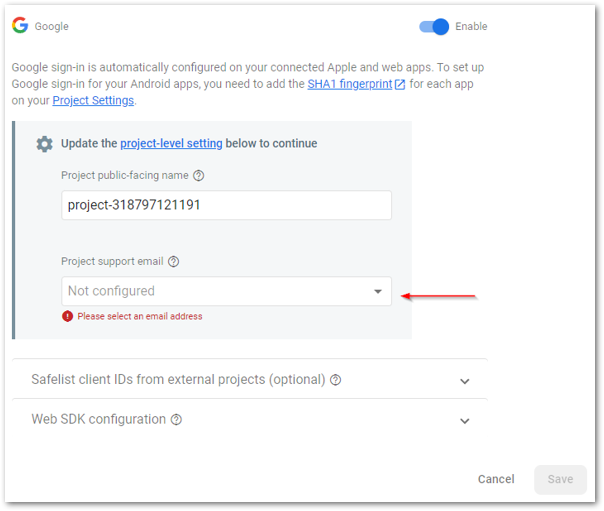
Activate the Google sign-in provider, enter the required mail address, and confirm with a click on Save.
Install the firebase_auth package into your Flutter app if you haven’t already done so.
Use the following code snippet to start the log-in process via Google.
For a log-out, you can use the same code as in the previous example.
❗
Warning
Social authentication with Google, Facebook, Microsoft, … only works on the web platform. On all other platforms, you’ll get a runtime exception. An example of how to get the Google sign-in on Android or iOS can be found in the following article. It requires an additional package and some setup steps.
Conclusion
Firebase Authentication provides an easy way to implement a login and registration process for your app without handling all the details. In this article, you learned how to use Firebase Authentication in your Flutter app. The package is easy to use and provides understandable error messages that can be passed directly to the user. You can find the complete example source code on my GitHub page.
Related articles


