Introduction
Microsoft is a big player in the enterprise environment. So here is how to log in from a Flutter Web App with a Microsoft organization account. Once the setup is complete, it works flawlessly!
You have a Flutter Web App (no Android or iOS) and need to add the possibility that users can log in with their Microsoft organization accounts. It sounds like a rather simple task but it took me quite a while to solve it. To save you the trouble, here is how to log in from a Flutter Web App with a Microsoft account.
💡 Tip
use Firebase Authentication because it’s the only way that works for me. I tried many Flutter packages (most of them use msal.js under the hood) but without success. If you have another approach, tell me in the comments!
Azure Setup
This section describes what you need to do in Microsoft Azure for the authentication to work. The following steps are involved:
- Create an app registration
- Create a client secret
- Create a platform configuration with a redirect URL
- Grant access permissions
App registration
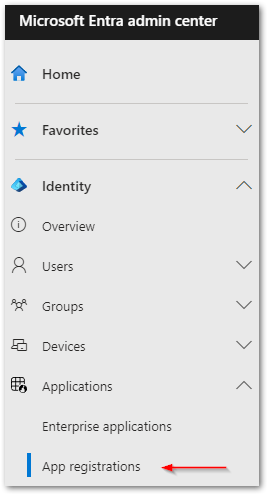
The first step is to create a new app registration. Go to entra.microsoft.com, sign in with your organization account, and jump to the menu entry App registrations.
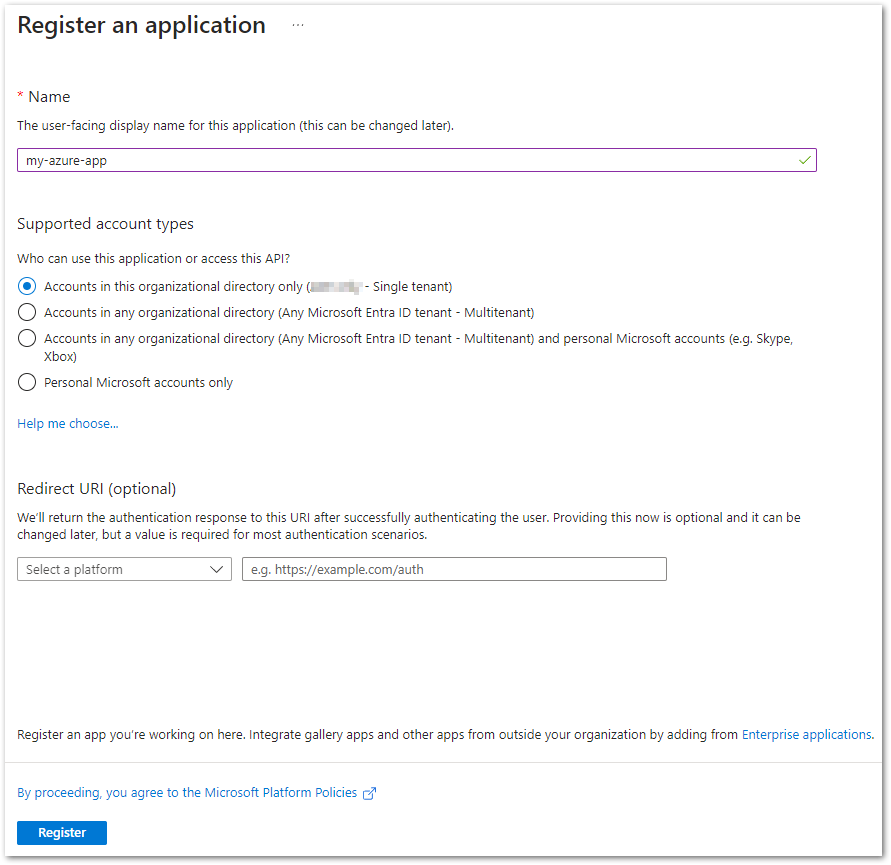
Then, create a new registration but skip the redirect URI for now.
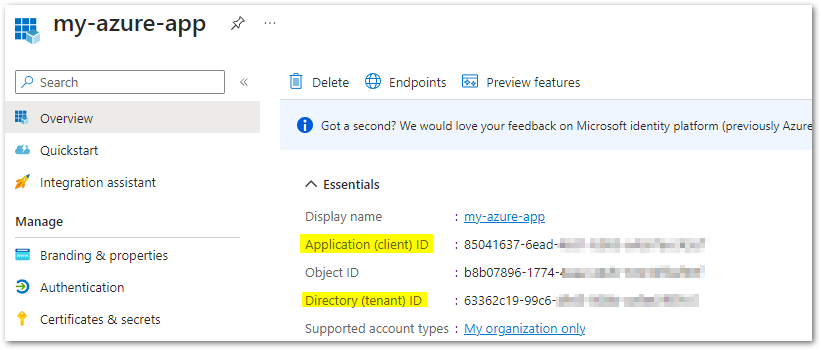
In the overview, you have your Application (client) ID and your Directory (tenant) ID. We need both values in the future.
Client secret
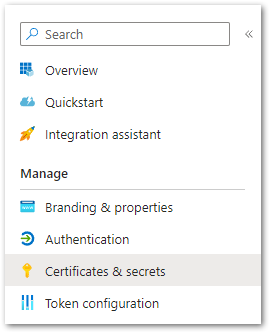
Now, let’s create a client secret. Open the Certificates & secrets menu of your app.
Click on New client secret.
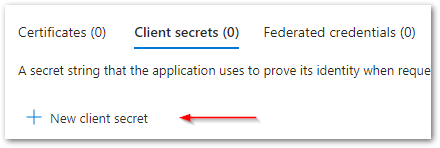
Create your secret and confirm. Make sure to copy the value immediately because once you leave this page, you cannot copy it anymore. Store it in a text file until we need it again.

Platform configuration
💡 Tip
Please continue with the Firebase setup in the next section. You can’t complete this step right now. Once Firebase is set up, you can come back here and finish the Azure configuration!
The final step is to create a platform configuration with a redirect URL that you can do in the Authentication menu.
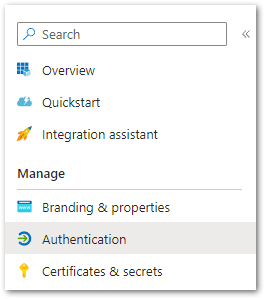
Click on Add a platform.

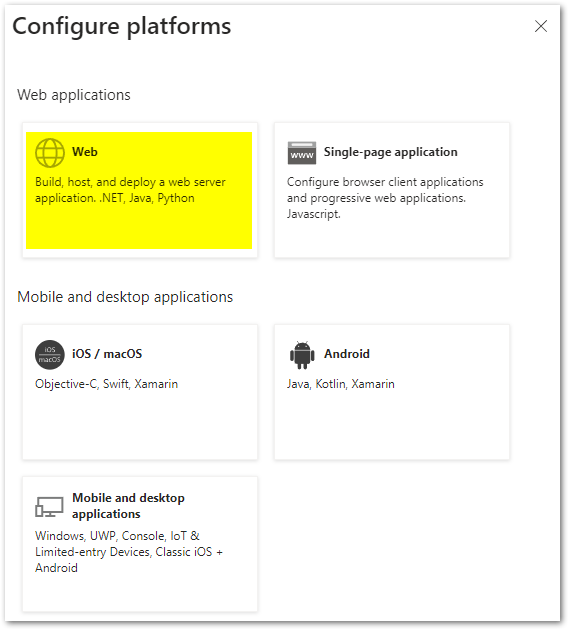
Choose Web (it won’t work with a Single-page application!)
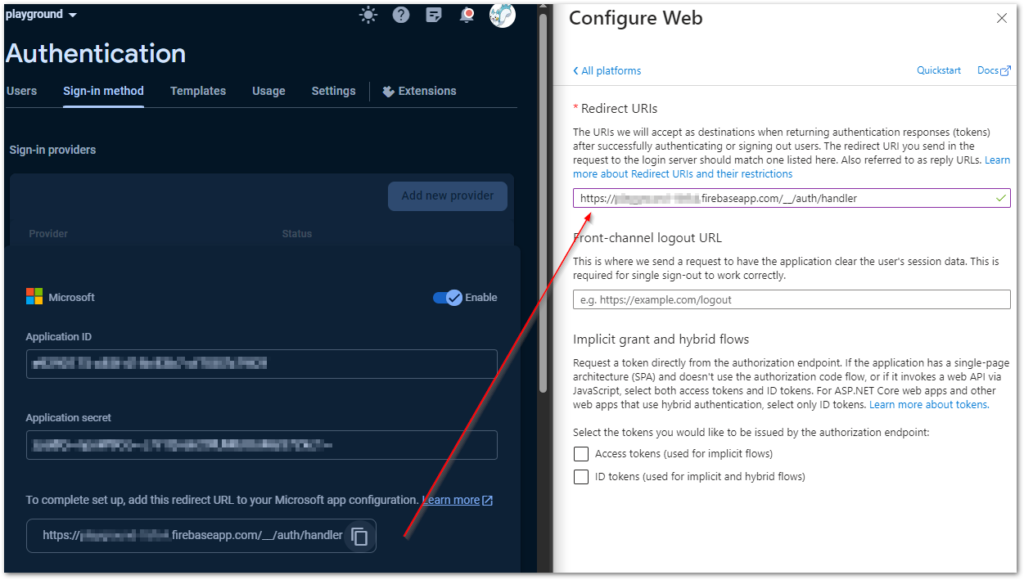
Copy the redirect URL from Firebase to Azure and confirm.
Access permissions (only if needed)
If you get an authentication error indicating missing permissions, then here is how fix deal with it. Go to the API permissions menu.
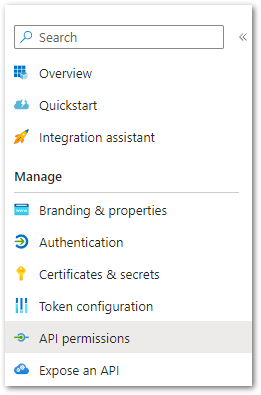
Click on Grant admin consent for [org].
![Click on Grant admin consent for [org] to allow all users in your organization to authenticate](https://www.quickcoder.org/wp-content/uploads/2023/11/app_reg11.png)
Try to authenticate again and it should work now!
Want More Flutter Content?

Join my bi-weekly newsletter that delivers small Flutter portions right in your inbox. A title, an abstract, a link, and you decide if you want to dive in!
Firebase Setup
If you don’t have a Firebase account and project and also don’t know what I am talking about, please read the guide below first. After that, you have a better understanding of the following steps.

In your Firebase Console, select Authentication from the Build menu.
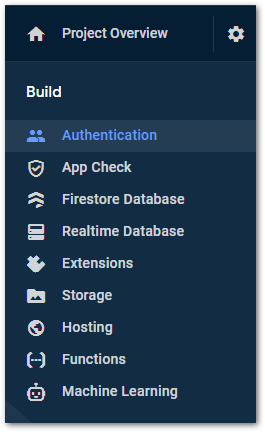
Switch to the tab Sign-in method, click on Add new provider, choose Microsoft, add the client id and client secret from your Azure configuration, copy the redirect URL, and confirm with a click on Save.
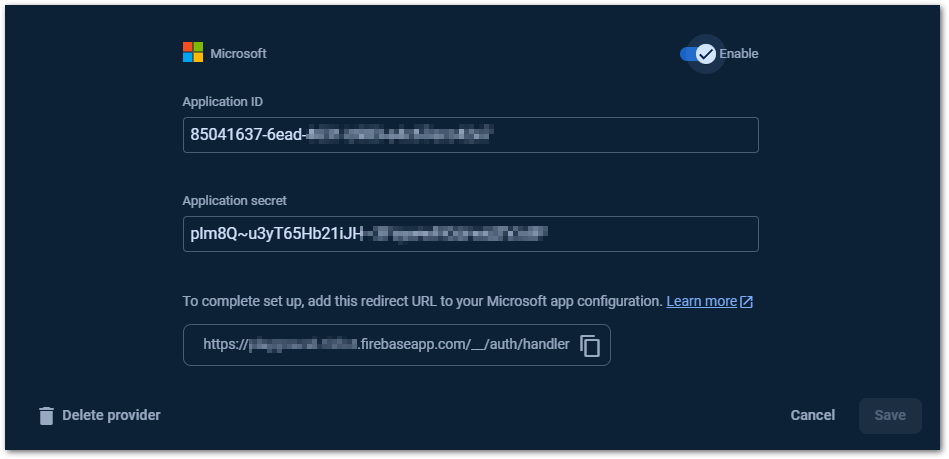
Then, go back to your Azure app registration and continue with the step Platform configuration from the previous section.
The Firebase and Azure configurations are completed. Now, let’s write a small Flutter app and try it out!
Flutter App Setup
Install the following packages to work with Firebase Authentication:
💡 Tip
Not sure how? Here is a guide!
The next step is to connect your Flutter app with your Firebase project. Run the command flutterfire configure, choose your project, select the web platform, and wait for the process to finish. A file firebase_options.dart will be created in your lib folder.
💡 Tip
Need more details with setting up Firebase? Check out this guide!
After that, open your main.dart file in the lib folder and change the main() method to the following:
import 'package:your_package/firebase_options.dart';
import 'package:firebase_core/firebase_core.dart';

...

Future<void> main() async {
  await Firebase.initializeApp(options: DefaultFirebaseOptions.currentPlatform);
  runApp(const MyApp());
}
Now, you can initiate the authentication process with the following code block:
import 'package:firebase_auth/firebase_auth.dart';
import 'package:firebase_core/firebase_core.dart';

...

try {
  final provider = OAuthProvider("microsoft.com");
  provider.setCustomParameters(
      {"tenant": "your-tenant-id"});

  var cred =
      await FirebaseAuth.instance.signInWithPopup(provider);

  print(cred.user!.displayName!);
  print(cred.user!.email!);
} on FirebaseAuthException catch (ex) {
  print("${ex.code} - ${ex.message}");
}
Replace your-tenant-id with the corresponding value from your Azure subscription.
Now, you can run your code and test the authentication.
Pitfalls
Here are some things that can go wrong during the setup. Make sure to avoid them.
Don’t forget the tenant id!
The tenant (directory id) needs to be passed to Firebase Authentication. Otherwise, it will use the ‘common’ endpoint which does not work for organizations. The tenant id can be found in Azure in the “Overview” section of your Azure App.
Missing permissions!
If authentication fails because of missing admin privileges, go to entra.microsoft.com, switch to your organization and your app, go to the “Permissions” section and click on the button “Grant admin consent for [org]”. Authentication should then work fine.
Use Web App, not SPA!
The Azure App must be configured as a Web app, not a SPA (Single Page Application) app. Otherwise, authentication will fail.
Use Entra Admin Center!
Don’t use the Azure Portal to create app registrations, use the Microsoft Entra Admin Center at https://entra.microsoft.com.
Conclusion
In this article, you learned how to log in from a Flutter Web App with a Microsoft account.
Flutter ❤️ Firebase

Get started with Firebase and learn how to use it in your Flutter apps. My detailed ebook delivers you everything you need to know! Flutter and Firebase are a perfect match!
Related articles


