
Greenshot is my favorite screenshot-capture tool. Here are some reasons why I prefer it and you should, too.
When I write coding tutorials, it is often useful to include screenshots of code, the created UI, or sections of the IDE. That’s why I heavily rely on Greenshot. It’s free, open source, and still maintained. It works similarly to other tools.
So why do I like it and why is it better than other tools like the Windows snipping tool?
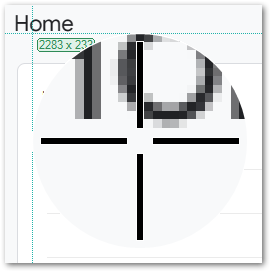
? You get a magnifier while selecting
The magnifier allows you to exactly select the start and end position of your screenshot region to be captured. In addition, you get the exact pixel coordinates on your monitor.
? Capture region, app window, and screen with different hotkeys
Greenshot captures either a region, an open app window, or your entire screen. You can use hotkeys to switch between the different modes easily. And if you need to capture the same region multiple times, there is also a hotkey for that. This can save you a lot of time!

Want More Flutter Content?

Join my bi-weekly newsletter that delivers small Flutter portions right in your inbox. A title, an abstract, a link, and you decide if you want to dive in!
? Simple image editing features
Greenshot allows editing images. You can add various shapes like arrows, add speech bubbles, resize it, add drop shadows, highlight areas, and more. It’s a faster way for easy image editing than opening the screenshot with another tool.

? Greenshot is free and auto-updates
Greenshot is free but donations are welcome. The auto-update feature ensures that you always have the latest version on your machine.
? Useful Tips
- When selecting a region you can use the arrow keys to move the cursor to exactly where you want to have it. This is easier than using the mouse or trackpad to find the correct spot!
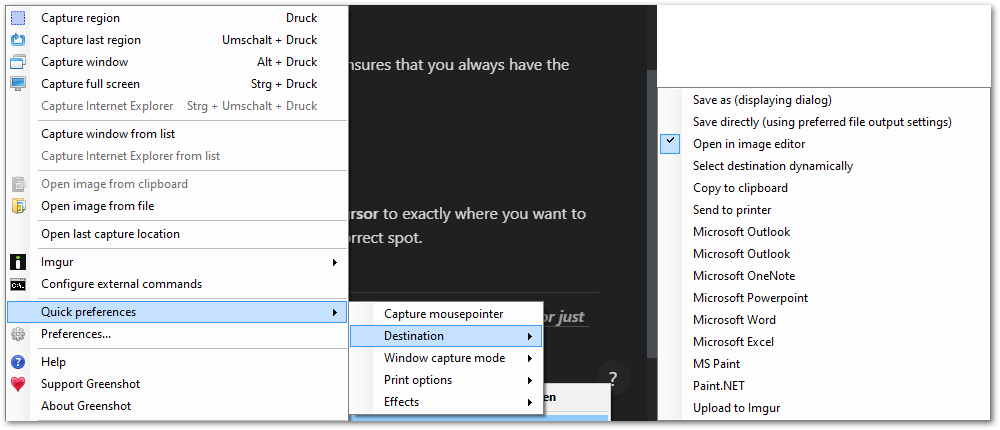
- You can tell Greenshot what to do after a screenshot was taken. Auto-save it to a predefined directory, open the image editor, launch a third-party program like Paint.NET or Microsoft Word, or upload it directly to imgur. There are many possibilities!
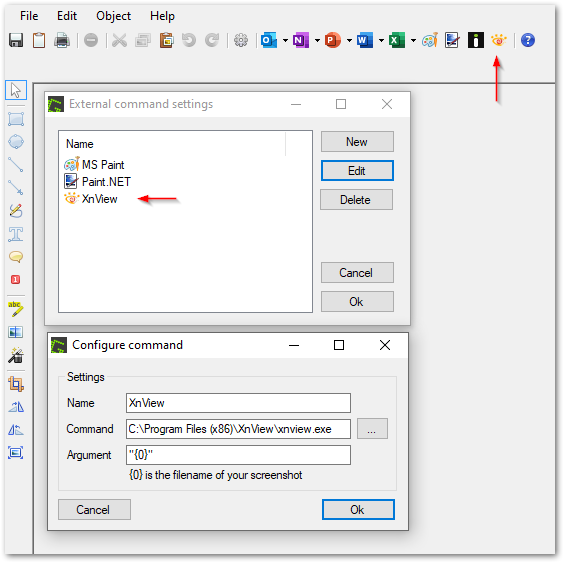
- You can add additional external commands to send the current image to other apps. In the image below I created a link to XnView. A click on the icon in the action bar will open the app and load the image.
Conclusion
Greenshot is my favorite tool when it comes to capturing screenshots. Its editing capabilities are sufficient for my purposes and with the magnifier and the arrow keys, I always get the correct snippet that I want to capture.
Related articles